Recording Attendance
Makronexus supports four ways to record staff attendance. Choose the method that fits your school's workflow; all methods write the same StaffAttendanceRecord to the database.
    Four ways to record attendance
    ================================
    1. Manual entry     (admin, one record at a time)
    2. Self check-in    (staff member, from web app)
    3. Bulk register    (admin, whole school at once)
    4. Kiosk check-in   (staff member, at gate terminal)
1. Manual entry (administrator)
Administrators can create or correct an attendance record for any staff member.
Navigate to Operations -> Staff Attendance -> Attendance Log, then click + Record Attendance (top-right).
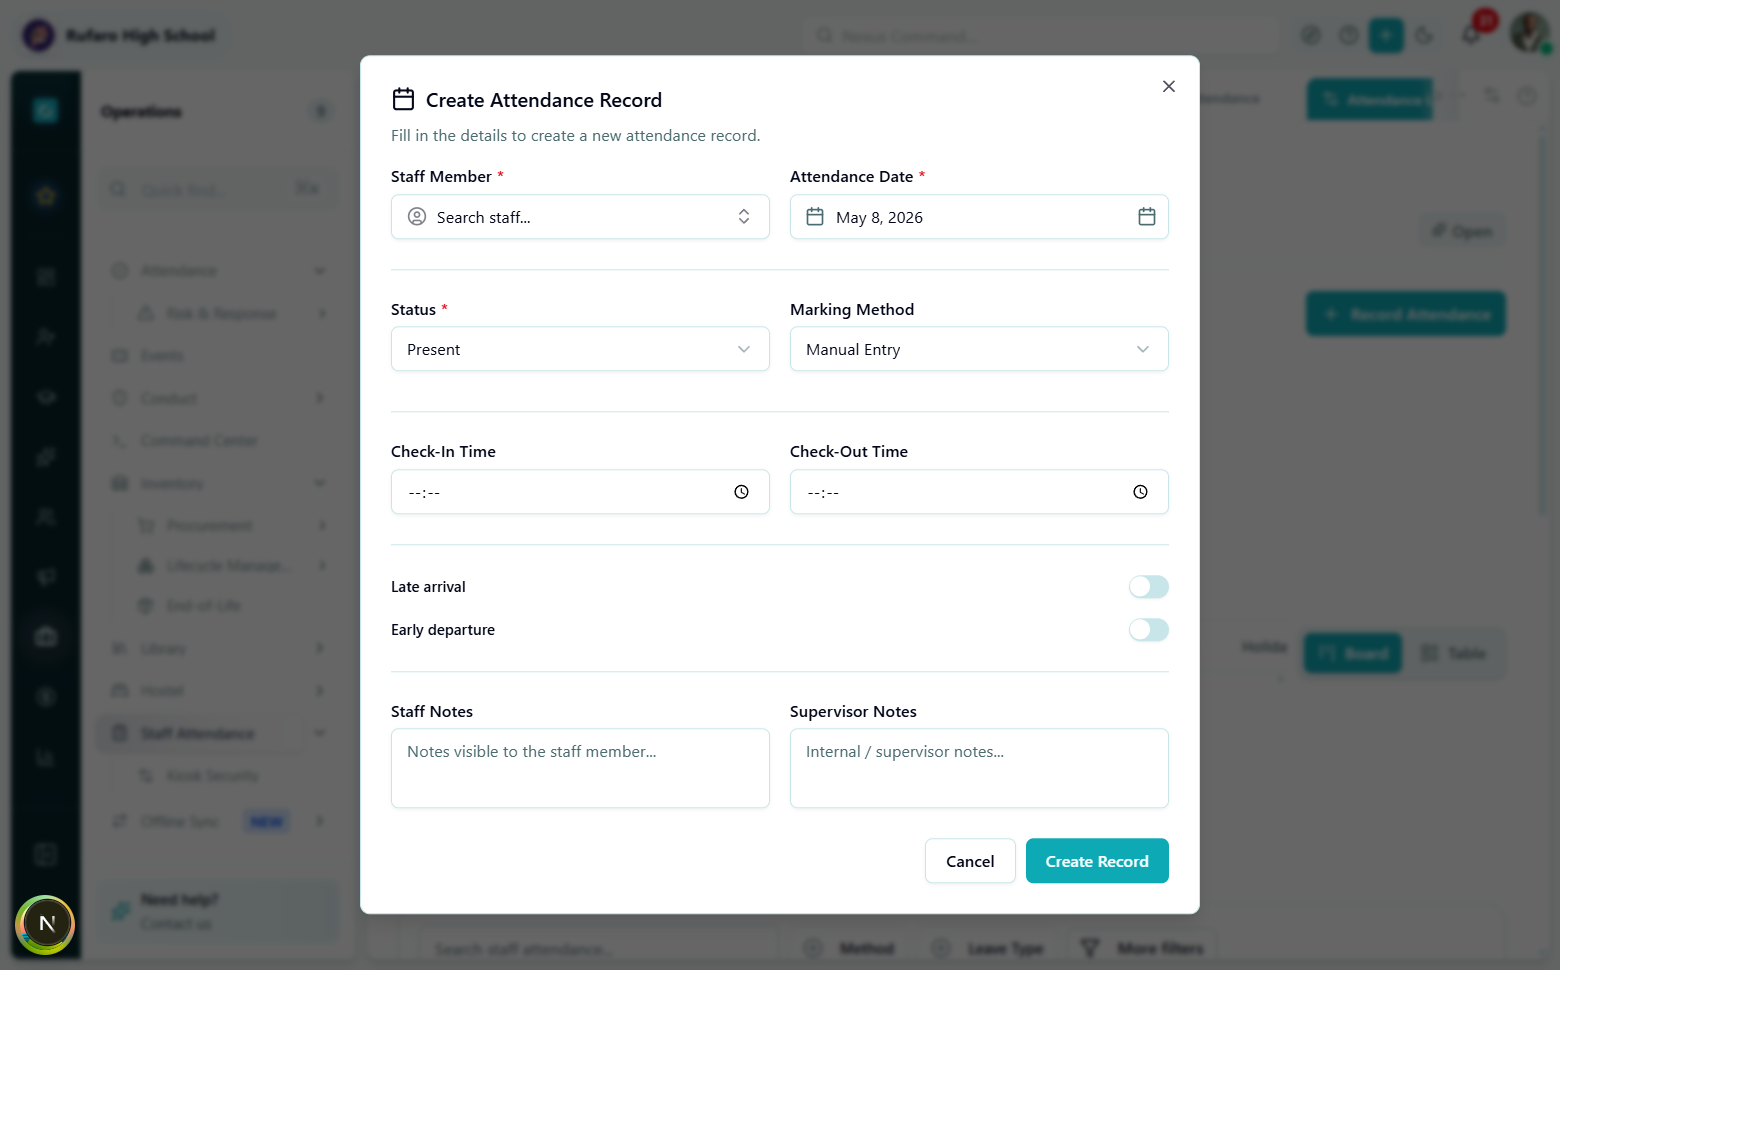
The Create Attendance Record dialog. All required fields are marked with a red asterisk. Notes are visible to the staff member; Supervisor Notes are internal.
Required fields
| Field | Description |
|---|---|
| Staff Member | Type to search by name - autocomplete shows matching staff |
| Attendance Date | Defaults to today; change via the calendar picker |
| Status | Select from: Present · Absent · Late · Half Day · On Leave · Holiday · Weekend |
Optional fields
| Field | Description |
|---|---|
| Marking Method | Defaults to Manual Entry; change if recording a kiosk or RFID event retrospectively |
| Check-In Time | HH:MM in 24-hour format |
| Check-Out Time | HH:MM in 24-hour format |
| Late arrival | Toggle on if the staff member arrived after the configured threshold |
| Early departure | Toggle on if the staff member left before the end of the working day |
| Staff Notes | Visible to the staff member in their portal |
| Supervisor Notes | Internal - not shown to the staff member |
Leave type
When Status is set to On Leave, a Leave Type dropdown appears. Choose from:
annual · sick · maternity · paternity · unpaid · study · compassionate
Click Create Record to save. The record appears immediately in the Attendance Log and the dashboard counters update.
2. Self check-in (staff member)
Staff members can check themselves in directly from the Attendance Log page - no tablet or kiosk required.
Navigate to Operations -> Staff Attendance -> Attendance Log.
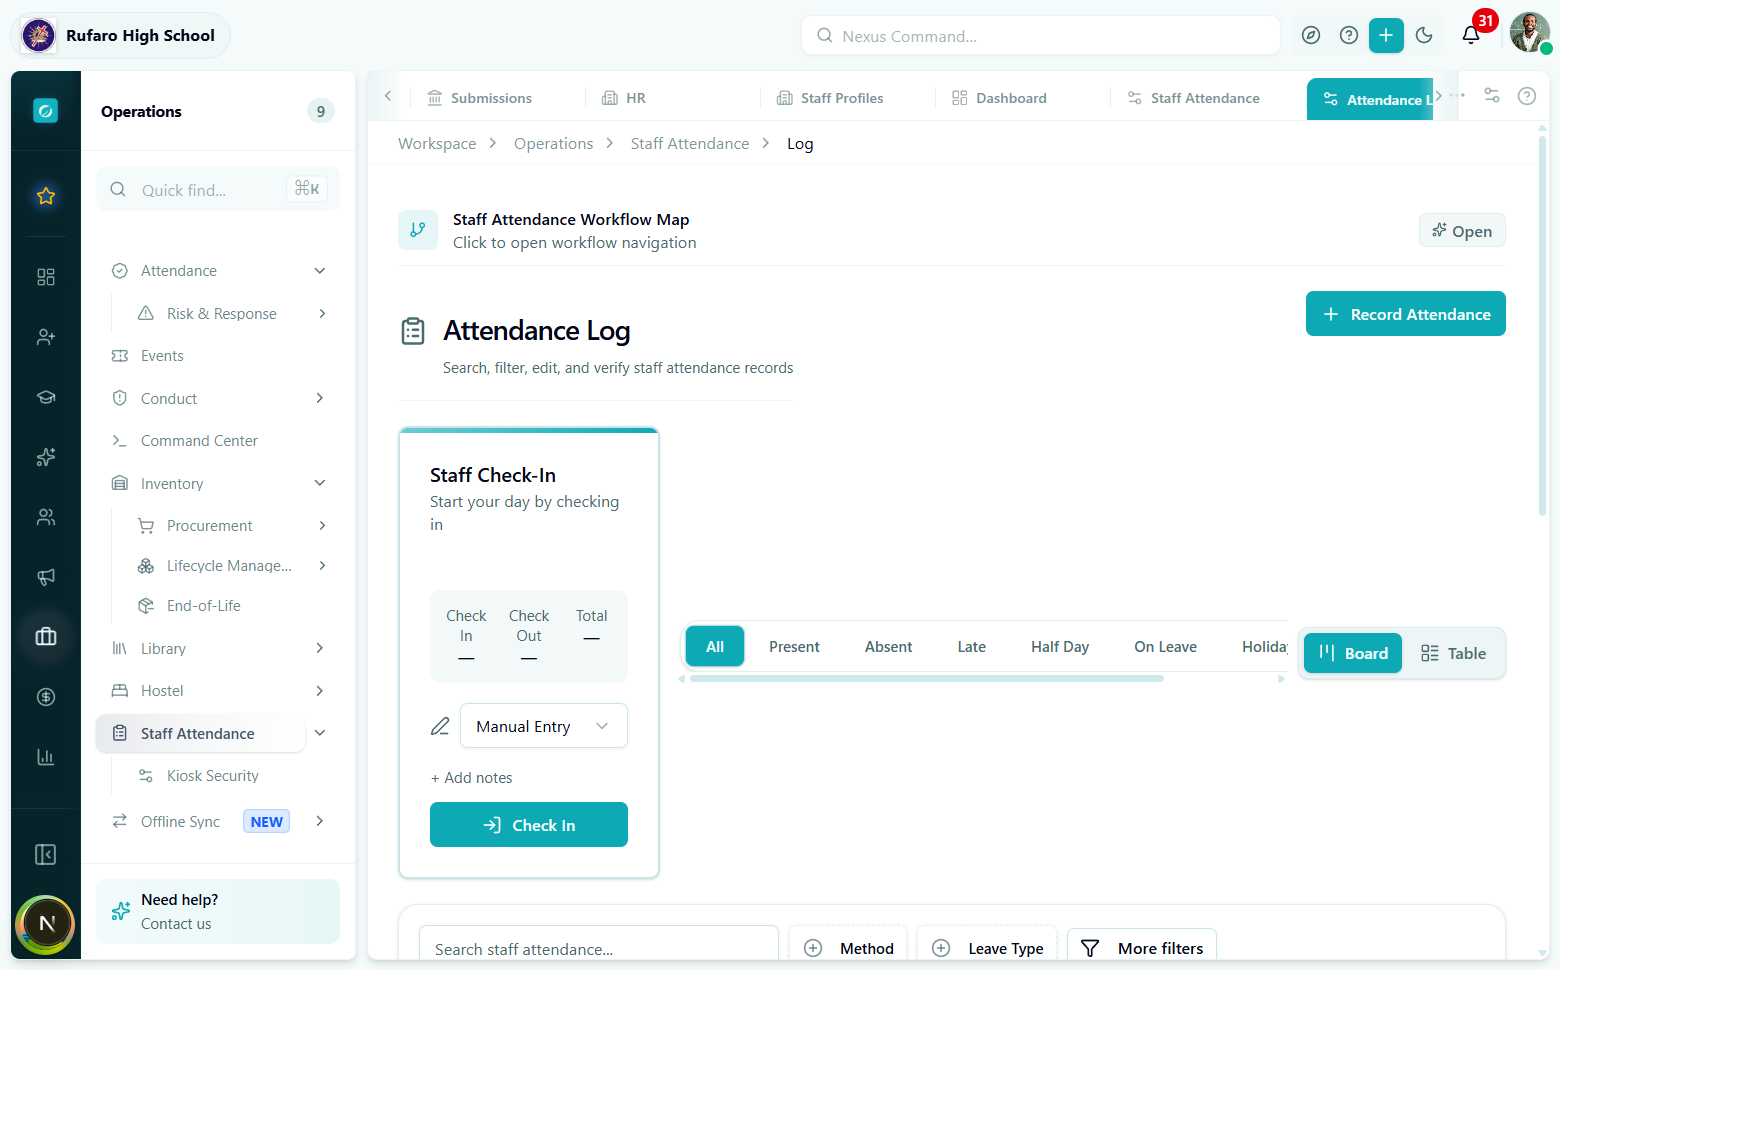
The Attendance Log page. The "Staff Check-In" card on the left is the self-service widget. The board/table on the right shows all records for today.
The Staff Check-In card shows:
| Element | Description |
|---|---|
| Check In / Check Out counters | Your own today's times (dashes if not yet recorded) |
| Marking Method dropdown | Defaults to Manual Entry - change to App for accuracy |
| Add notes | Optional personal note |
| Check In button | Creates (or updates) your check-in time |
The self check-in card is always visible to the logged-in user. It records attendance for the signed-in account regardless of which staff member's record you may be viewing in the table. Administrators checking in on behalf of others should use + Record Attendance instead.
3. Bulk marking (administrator)
When you need to mark attendance for the entire school or a department in one action - for example at the start of a school day or to record a public holiday - use the bulk register.
From the Attendance Log page, click the Board view and look for the Bulk Register button or access it from the overflow menu (three-dot icon). Alternatively, access it via the Workflow Map from the dashboard.
Bulk register workflow
- Select the date for the bulk record.
- Select a default status (e.g.
presentfor a normal school day, orholidayfor a public holiday). - Optionally restrict to a department.
- Review the list - override individual staff statuses as needed.
- Click Save Bulk Record - one record is created per staff member.
Bulk marking overwrites records that already exist for that date. If some staff have already checked in via kiosk, their checkInTime will be preserved but the status will be updated to match the bulk value unless you exclude them from the selection.
4. Kiosk check-in
The kiosk terminal runs as a full-screen display at the school gate. Staff check in by entering their staff code, scanning a QR/barcode, or tapping an RFID card.
See Kiosk Setup & Display for full instructions on setting up a kiosk station and launching the display.
Attendance record flow after creation
Verification
Verification is the supervisor's sign-off that the record is accurate. It does not change the status - it just flags the record as reviewed.
To verify a record:
- Open the Attendance Log.
- Find the record in the table.
- Click the Verify button (checkmark icon) in the Actions column.
- The
verifiedByandverifiedAtfields are set automatically to the current user and timestamp.
You can verify multiple records at once by selecting their checkboxes in the Table view and clicking Verify selected from the bulk actions bar.