Kiosk Setup & Display
The kiosk system lets you deploy shared tablets or touchscreens at the school gate so staff can check themselves in without administrator intervention. Each kiosk station has a unique signed URL (token) that determines which school's data it reads and writes.
Architecture
The raw token (the signed URL) is shown only once - at creation or after a token rotation. Store it securely.
Managing kiosk stations
Navigate to Operations -> Staff Attendance -> Kiosk Stations.
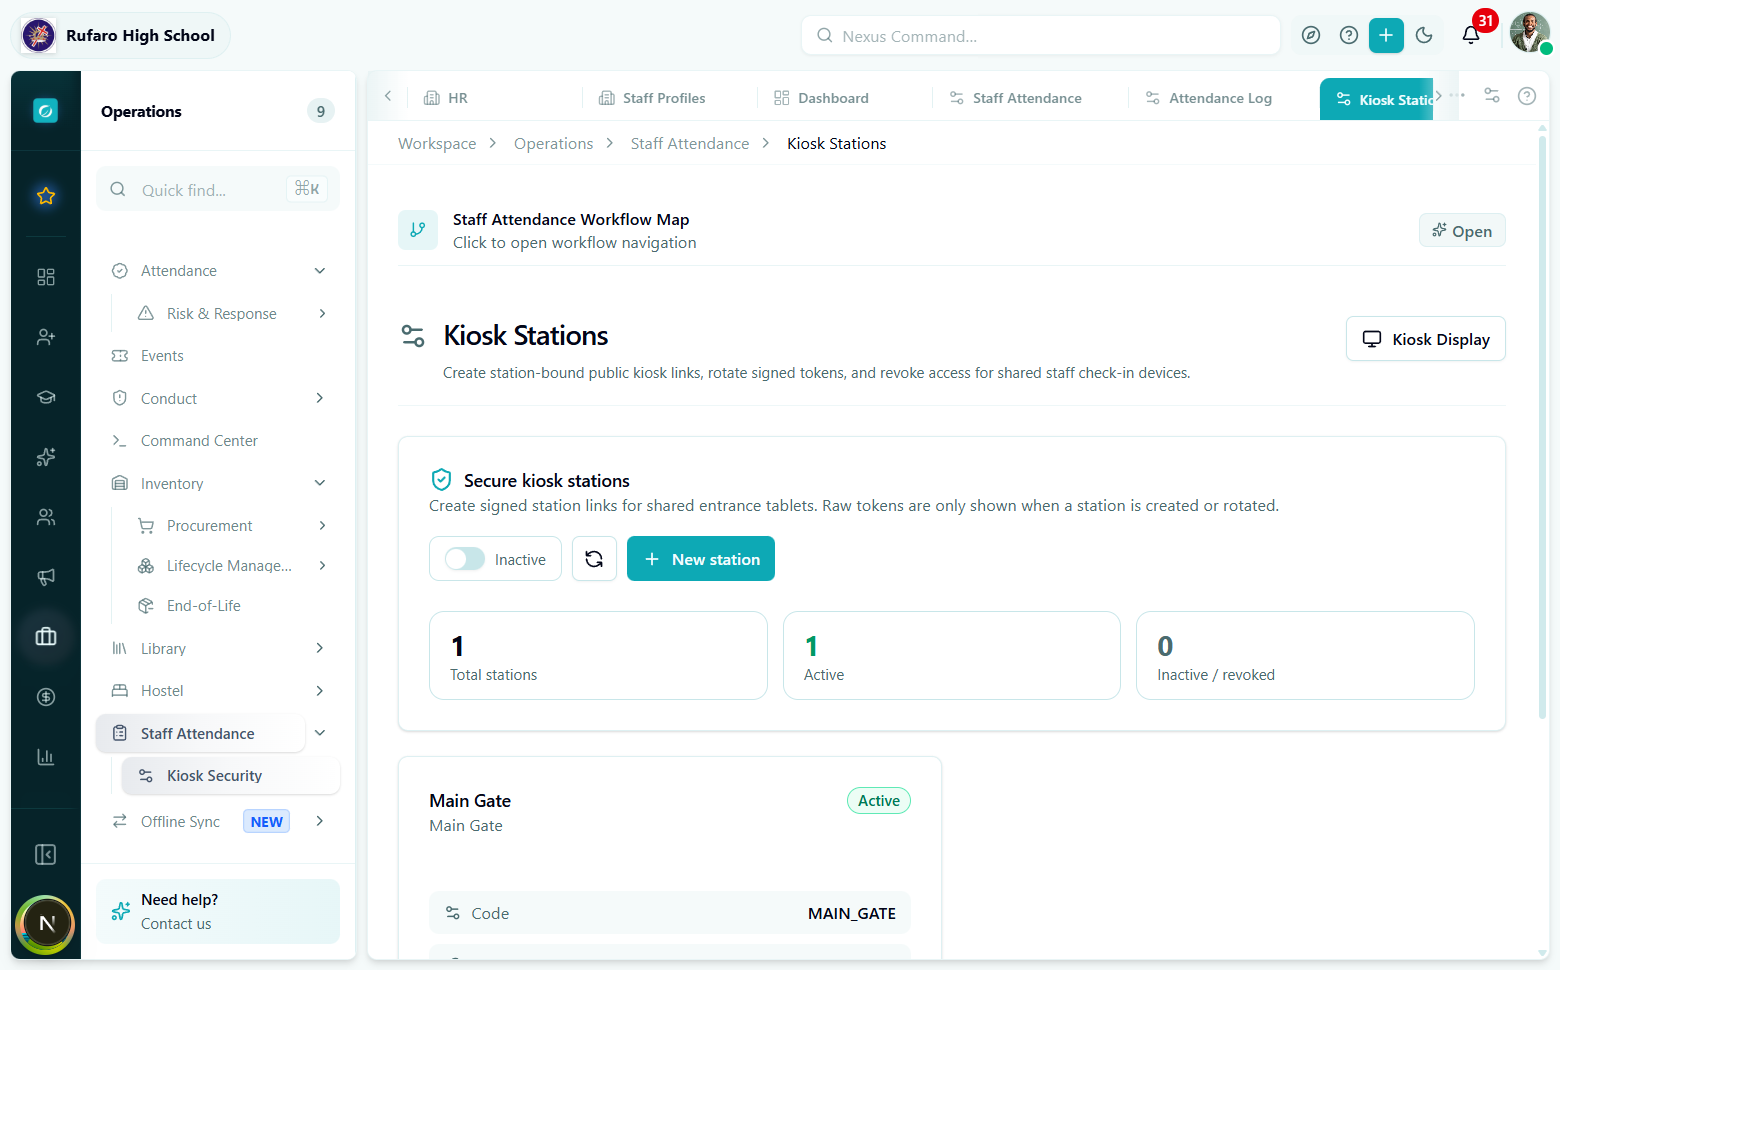
Kiosk Stations manager. The Main Gate station is active. Stat cards show the fleet health at a glance.
Creating a station
- Click + New station.
- Fill in the Name (e.g. "Main Gate") and Location (optional - shown in the kiosk header).
- Select the allowed marking methods for this station (Barcode/QR, RFID, Manual). You can select multiple.
- Click Create Station.
- A dialog displays the one-time station URL. Copy it immediately - it is never shown again in full.
After you close the creation dialog, the full signed URL is no longer accessible. If you lose it, use Rotate token to generate a new one.
Station card fields
Each station card shows:
| Field | Description |
|---|---|
| Name | Display name shown in the kiosk header |
| Code | Short identifier (e.g. MAIN_GATE) - used in API queries |
| Status badge | Active (teal) or Inactive / Revoked (grey) |
| Token | Token version number (v1, v2, …) |
| Expires | Token expiry date - after this date the kiosk will be locked out |
| Last used | Timestamp of the last successful check-in via this station |
| Allowed methods | Icons for each marking method enabled on this station |
Editing a station
Click Edit on the station card to update the name, location, or allowed methods. The token is not regenerated by an edit.
Rotating a token
Click Rotate token when:
- The token has expired or is about to expire
- You believe the URL has been compromised
- You are moving the tablet to a new device
A confirmation dialog warns that the old URL will immediately stop working. Click Rotate to confirm. The new signed URL is displayed - copy it before closing.
Revoking a station
Click Revoke to immediately invalidate the station token without deleting the station record. Staff who attempt to check in via the revoked URL will see an error. The station remains in the list and can be re-activated via Rotate token.
Deleting a station
Click Delete and confirm. This removes the station record entirely. Existing attendance records created through this station are preserved.
Kiosk Display (the check-in terminal)
The Kiosk Display is the full-screen interface staff use to check in. It is designed for touchscreens and can run in any modern browser.
Navigate to Operations -> Staff Attendance -> Kiosk Display or open the signed station URL directly on the tablet.
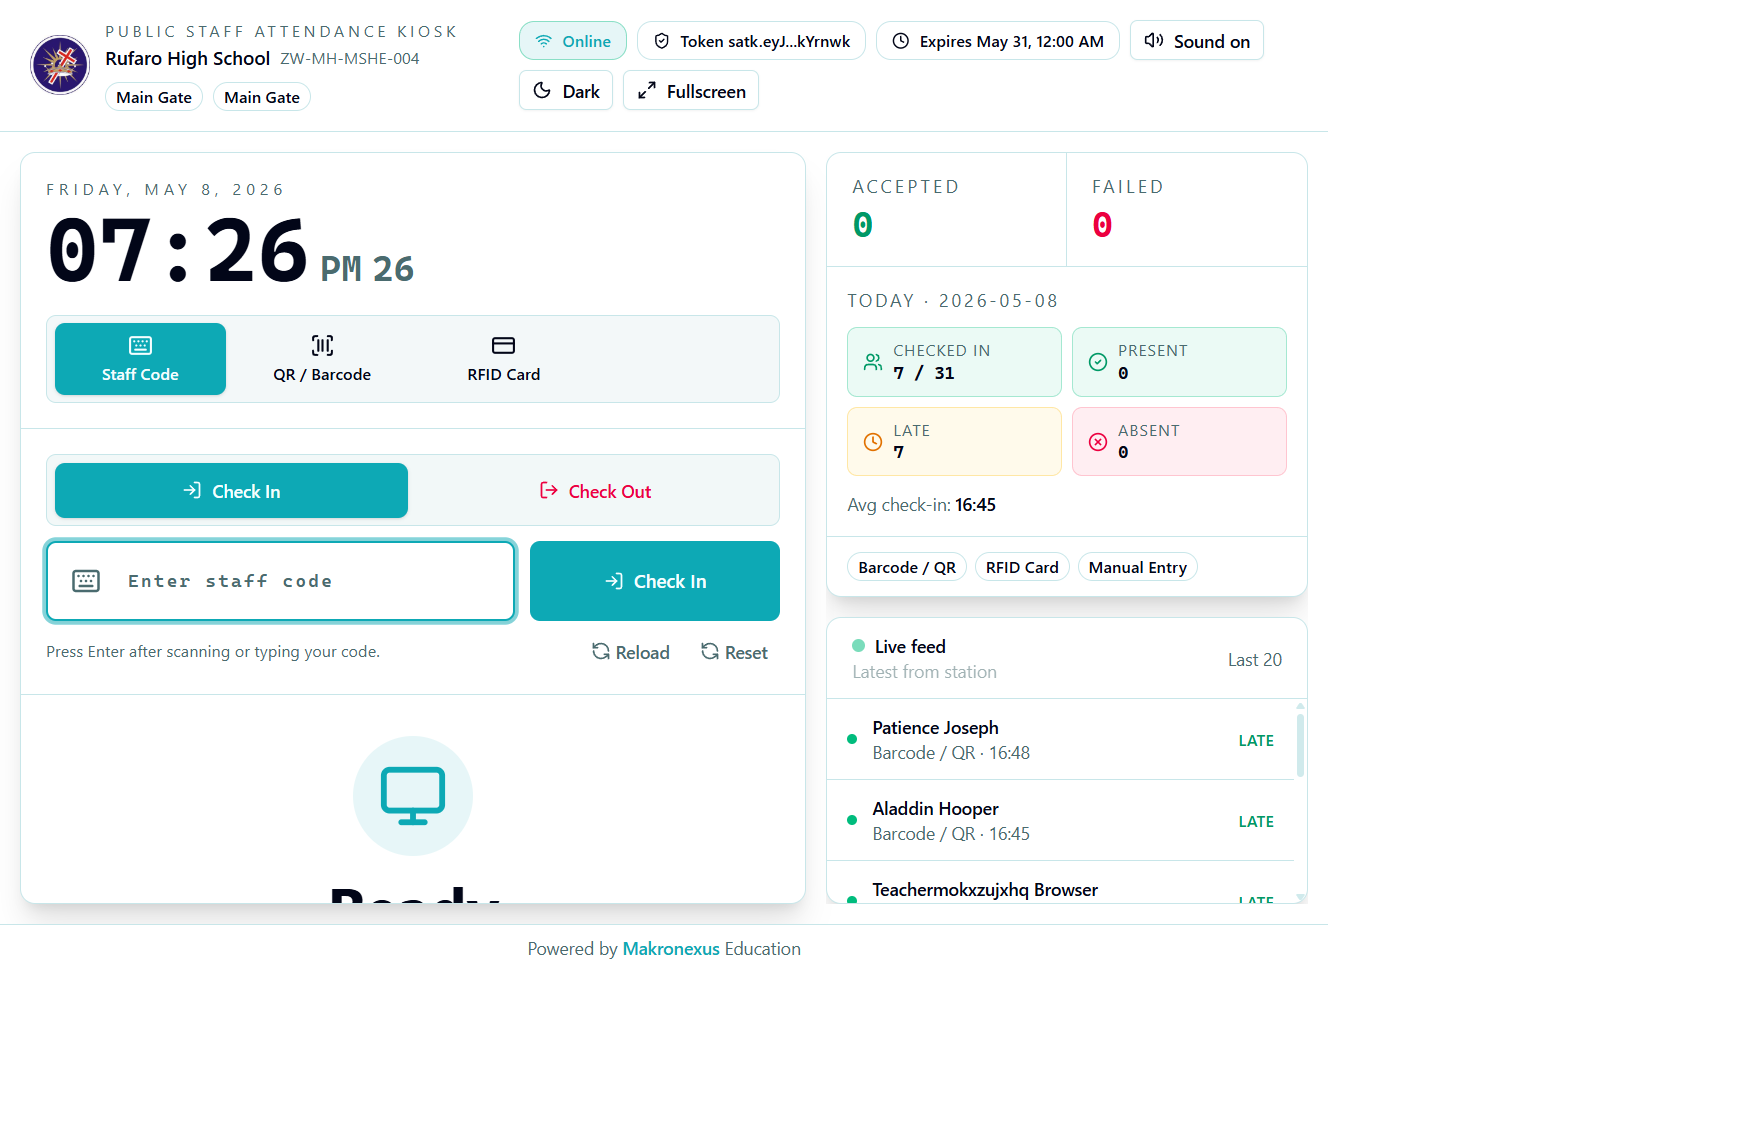
The public kiosk terminal. This screen runs in any browser - no login required. Staff type or scan their code; the live feed on the right updates instantly with each event.
Kiosk header
The header bar shows the school name, location code, station name, and token status. The right side contains control buttons:
| Element | Description |
|---|---|
| Online badge (teal) | Green when connected to the server; amber when operating offline |
| Token | Truncated token identifier - useful for support |
| Expires | Token expiry date - station locks out after this |
| Sound on/off | Toggle audio feedback for successful/failed check-ins |
| Dark / Light | Theme toggle for bright or dim environments |
| Fullscreen | Expand to cover the entire display (recommended for tablets) |
Marking methods
The kiosk supports three input modes, selectable via tabs in the top-right corner:
- Staff Code
- QR / Barcode
- RFID Card
Staff types their staff code into the large input field and presses Check In. The code is validated against the school's staff roster.
This is the simplest method and requires no additional hardware.
Connect a USB or Bluetooth barcode scanner. When the scanner reads a code, the kiosk automatically submits it - no button press needed.
The staff member holds their ID card or printed QR code near the scanner.
Connect an RFID/NFC reader. Staff tap their card and the kiosk processes the check-in instantly.
The station must have rfid listed in its allowedMarkingMethods to enable this tab.
Check In vs Check Out
The kiosk shows two large buttons:
- Check In (teal) - records the
checkInTimefor today's record - Check Out (outlined) - records the
checkOutTime; system computestotalHoursWorked
Staff who tap Check In when they already have a check-in record for today will be prompted to confirm they want to update their time.
Live counters (right panel)
The right-hand panel shows real-time totals for the current day:
| Card | Colour | Meaning |
|---|---|---|
| Accepted | Green | Check-ins processed successfully this session |
| Failed | Red | Rejected or invalid codes this session |
| Checked In | Teal | Staff with a check-in time today (e.g. 7 / 31) |
| Present | Green | Staff marked present |
| Late | Amber | Staff whose check-in was after the threshold |
| Absent | Pink | Staff with no record yet |
| Avg check-in | - | Average check-in time across all today's records |
Below the counters, the Live feed panel shows the last 20 check-in events from this station - staff name, method, time, and status badge (LATE, PRESENT, etc.).
Utility controls
At the bottom of the input area:
| Button | Action |
|---|---|
| Reload | Re-fetches today's stats and live feed without a full page refresh |
| Reset | Clears the code input field and any pending state |
Offline mode
If the kiosk loses internet connectivity, it continues to accept check-ins and queues them locally. When connectivity is restored, the queue is flushed automatically. The Connection indicator turns amber while offline. See Offline Sync in the sidebar for details.
Recommended tablet setup
- Open the signed station URL on the tablet.
- Click Fullscreen in the kiosk header (or press
F11). - Set the browser to kiosk mode (if supported by the device's MDM) to prevent staff from navigating away.
- Enable Sound on for audio confirmation feedback.
- Check the Connection: Online indicator is green before placing the tablet at the gate.