Initial school setup checklist
After signing in for the first time, follow this checklist to configure your school for full operation. The system provides a Setup Progress assistant that tracks your completion status.
Overview
Makronexus Education requires several foundational elements before you can run day-to-day operations like enrolling students, recording attendance, or collecting payments. This guide covers the recommended setup sequence.
Setup progress dashboard
The system includes a guided setup assistant that tracks your progress:
Navigation: Foundation -> Schools -> Setup Progress
Or for a specific school: foundation/schools/{schoolId}/setup
Setup stages
The assistant organizes setup into categories:
| Stage | Steps included | Estimated time |
|---|---|---|
| Basic Info | School profile, Address | 15 minutes |
| Academic Setup | Academic year, Terms, Grade levels, Subjects, Classes | 45 minutes |
| Personnel | Departments, Staff & Teachers | 40 minutes |
| Students | Student enrollment | 45+ minutes |
| Financial | Fee structure | 20 minutes |
| Portal | Portal setup (optional) | 10 minutes |
Step dependencies
Some steps require others to be completed first:
Basic Info
    +-- Address
    +-- Academic Year
            +-- Terms
            +-- Grade Levels
                    +-- Subjects
                    +-- Classes
                            +-- Staff & Teachers
                            +-- Students
Setup checklist
Phase 1: School identity
1.1 Complete school profile
Navigation: School Profile (sidebar) or Foundation → Schools → Select school → Edit School
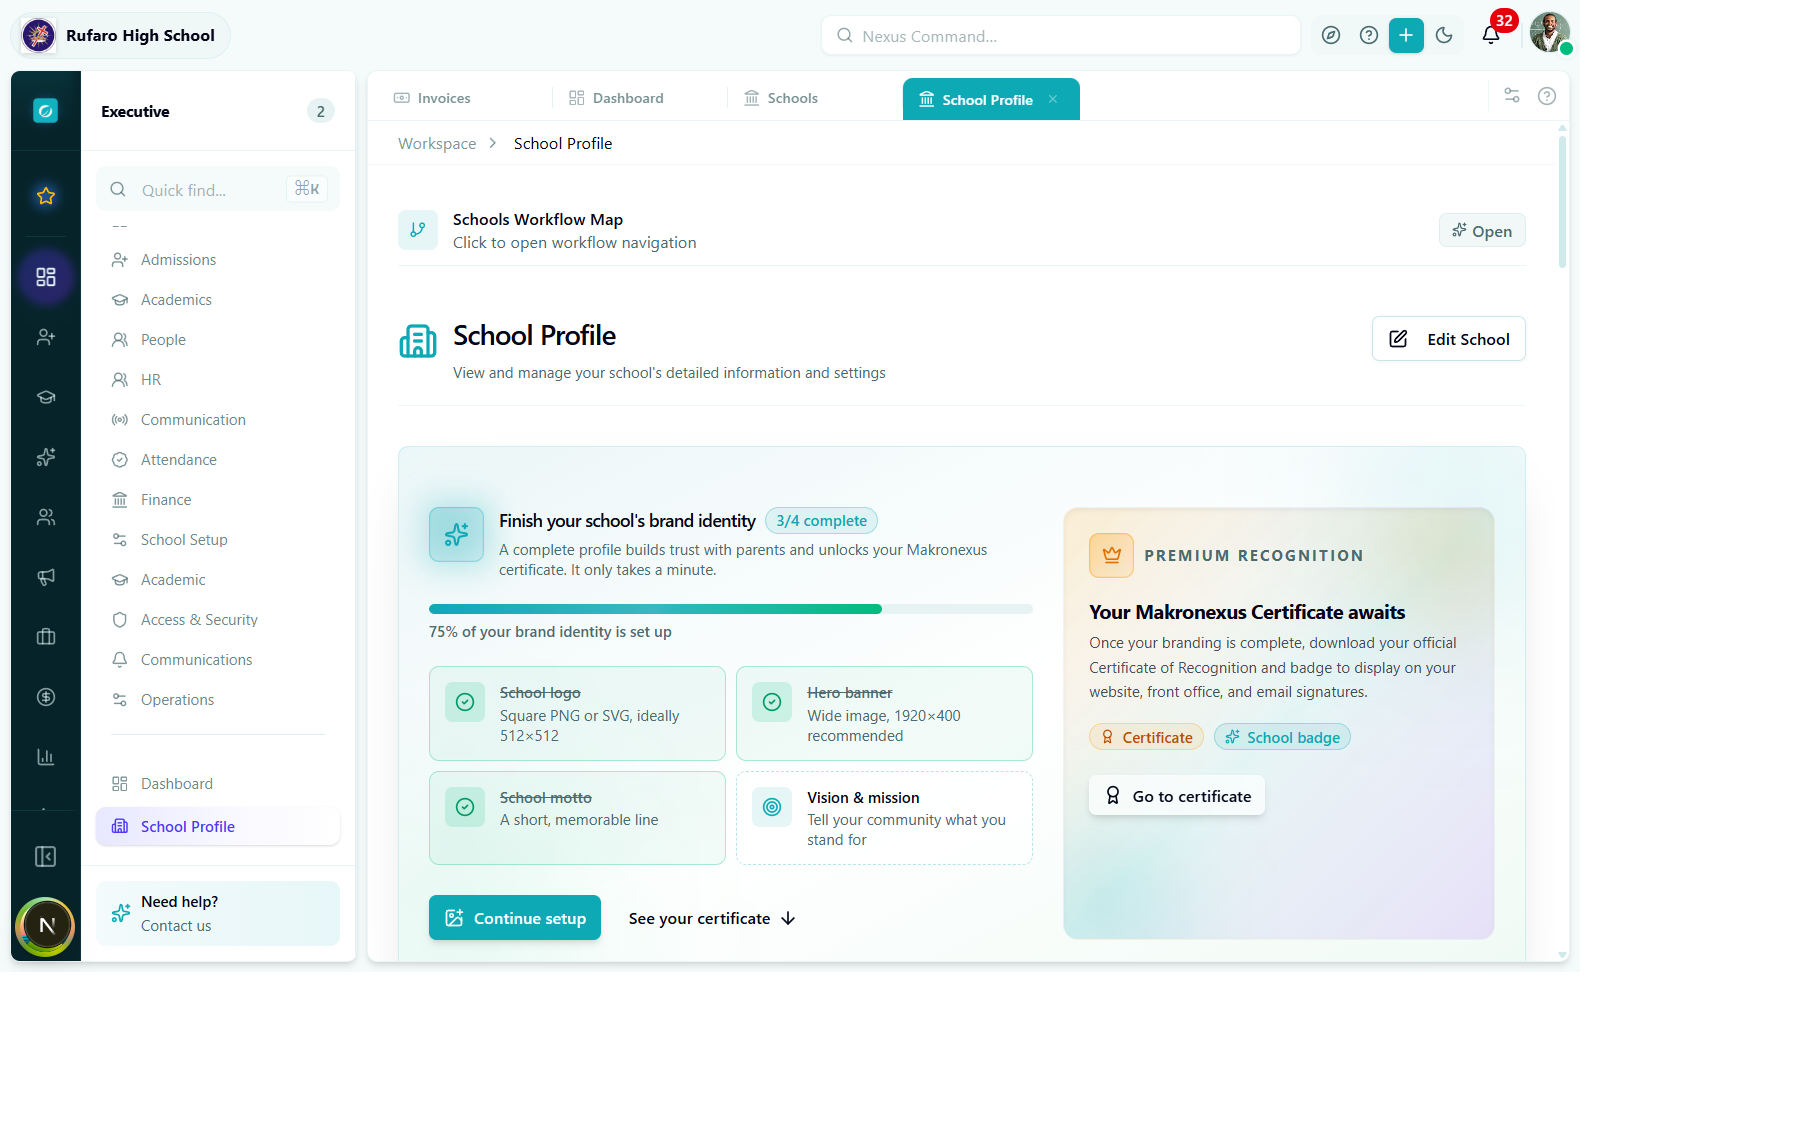
School Profile overview page — shows brand identity completion progress and the Edit School button.
Click Edit School to open the profile form:
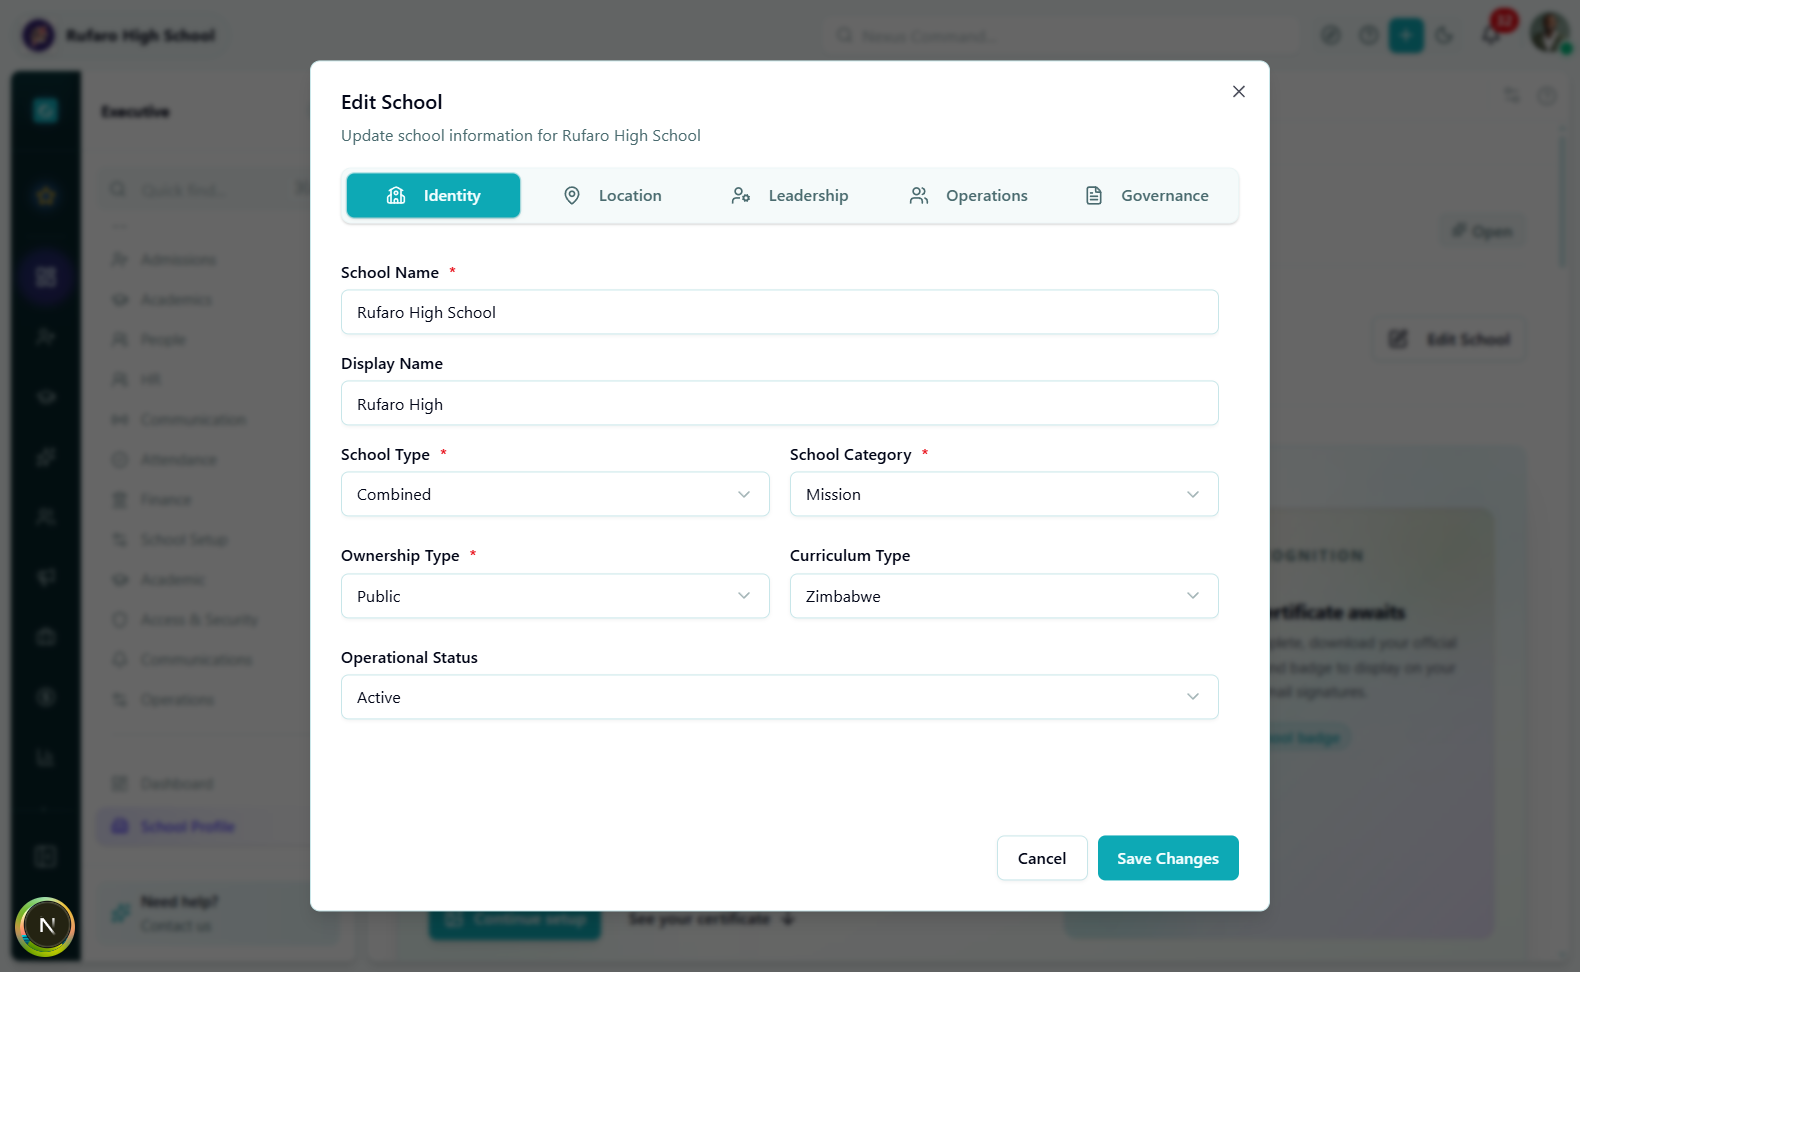
Edit School dialog — Identity tab. Fill in the school name, display name, type, category, ownership, curriculum, and operational status.
| Field | Required | Description |
|---|---|---|
| School name | ✓ | Official registered name |
| Display name | Optional | Short name for UI (e.g., "Rufaro High" instead of "Rufaro High School") |
| School type | ✓ | Primary, Secondary, Combined, etc. |
| School category | ✓ | Government, Mission, Private, etc. |
| Ownership type | ✓ | Public, Private, etc. |
| Curriculum type | Optional | Zimbabwe, Cambridge, IB, etc. |
| Operational status | ✓ | Active, Inactive, etc. |
1.2 Add school address
Navigation: Click Edit School → open the Location tab
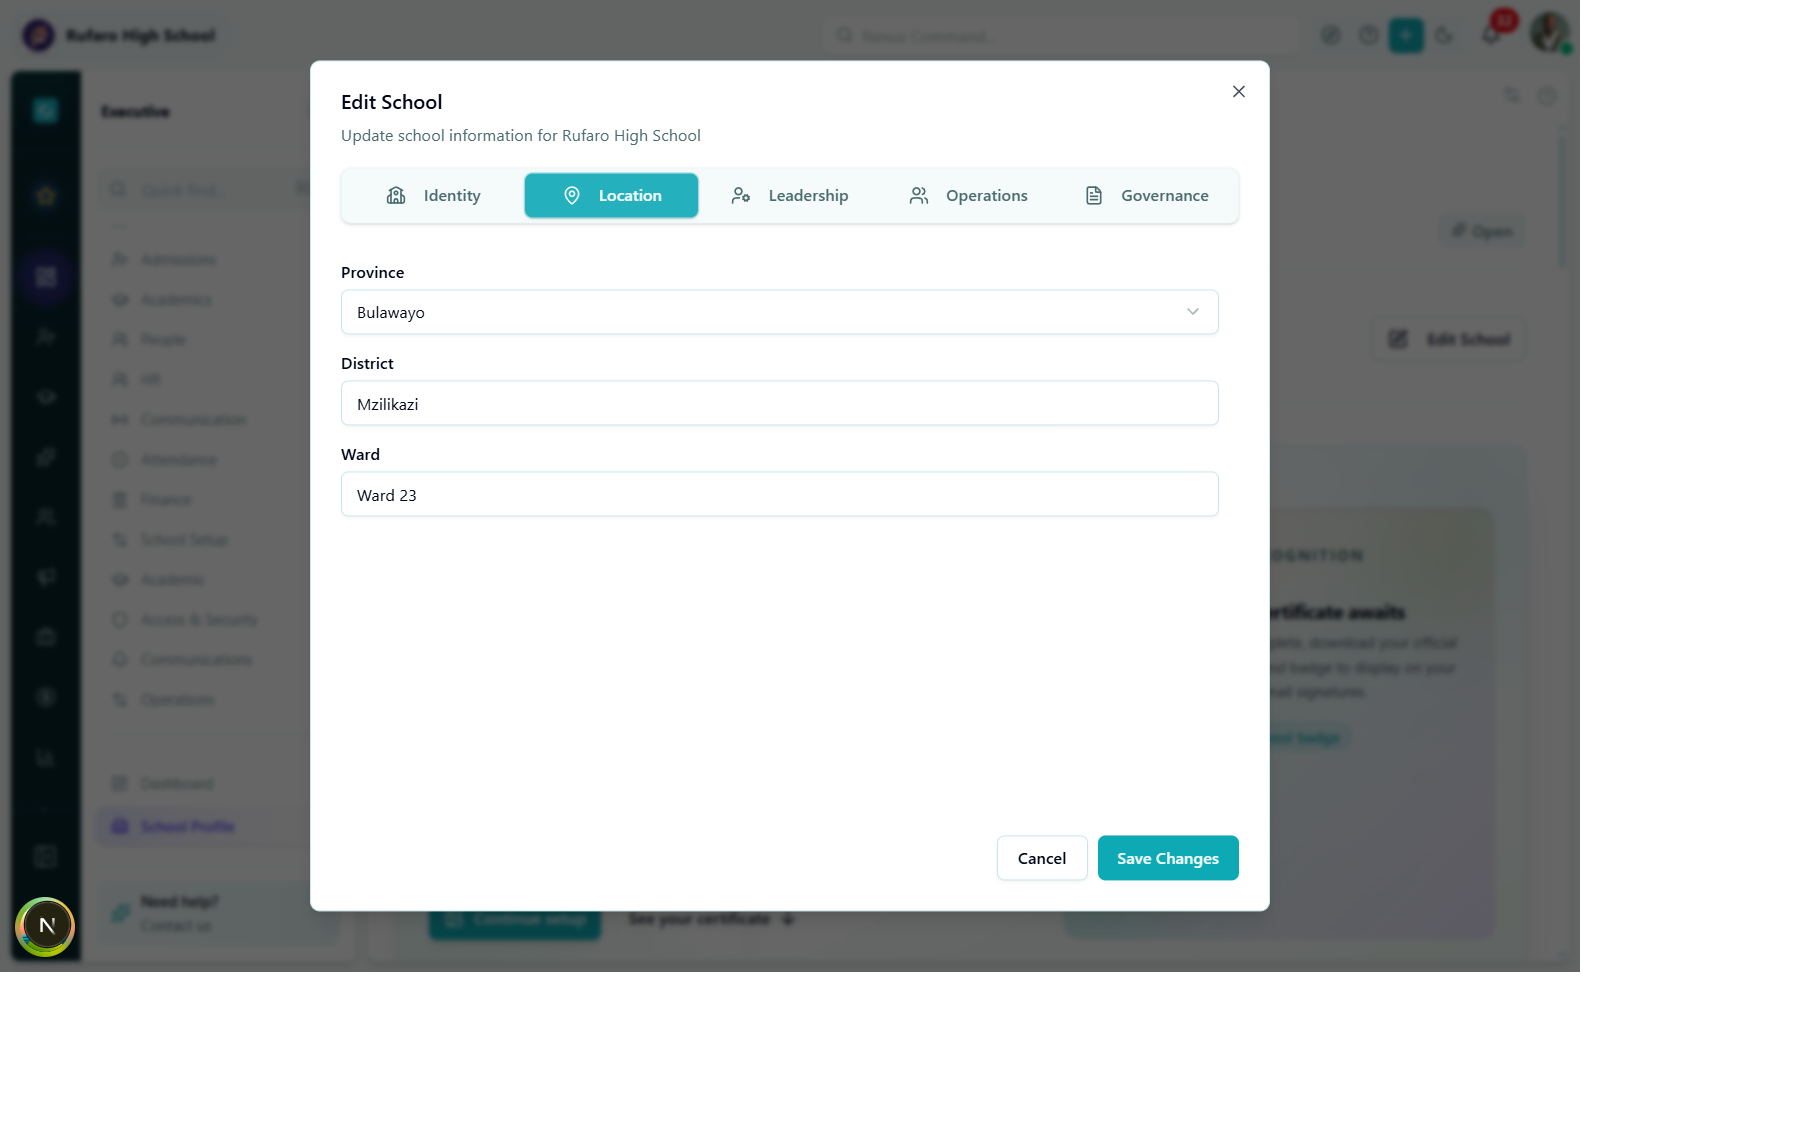
Location tab inside the Edit School dialog — set the province, district, and ward.
| Field | Required | Description |
|---|---|---|
| Province | ✓ | Select from dropdown (e.g., Bulawayo, Harare) |
| District | ✓ | e.g., Mzilikazi |
| Ward | Optional | e.g., Ward 23 |
If you're using the Setup Progress dashboard, click the Start or Continue button next to each step to jump directly to the relevant page with the form pre-opened.
Phase 2: Academic structure
2.1 Create academic year
Navigation: Foundation → Schools → Academic Years

Academic Years list page — shows metrics at a glance and the + New Year button.
- Click + New Year
- Fill in the form:
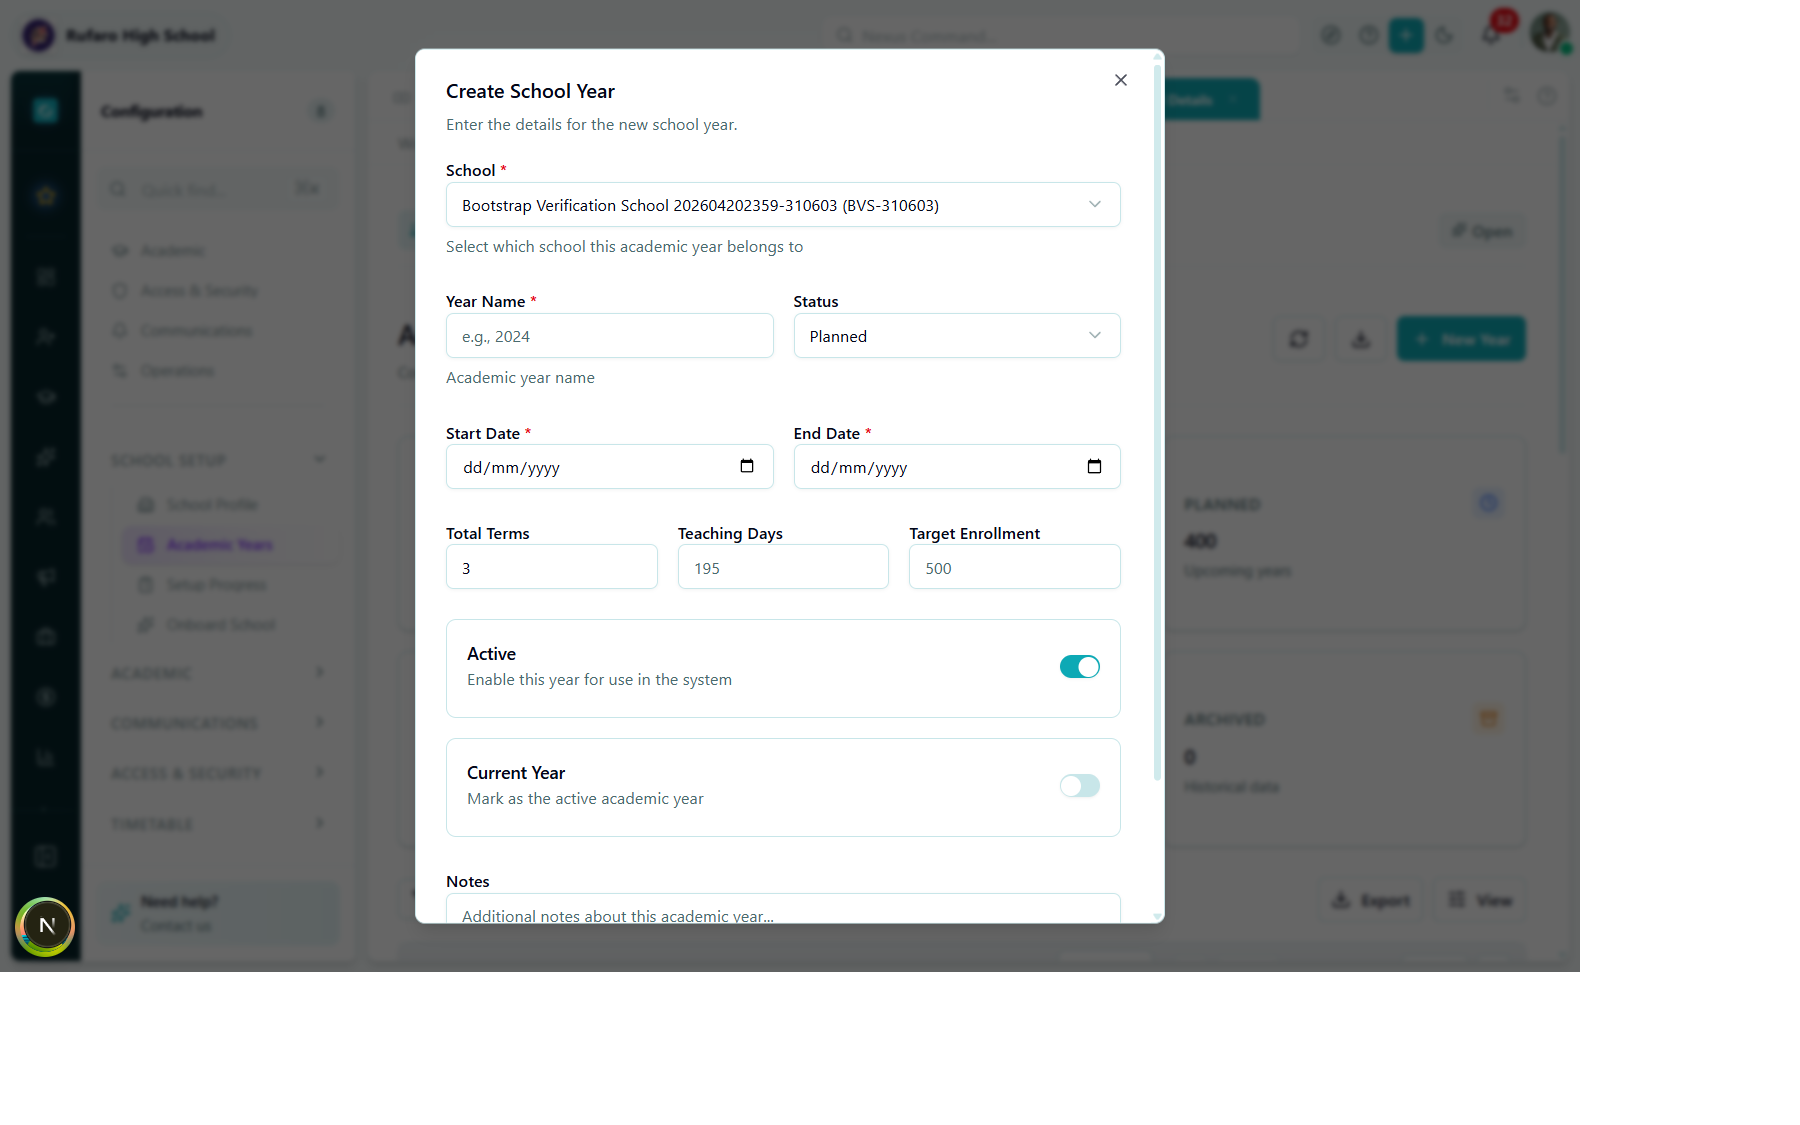
Create School Year dialog — set the year name, dates, number of terms, and toggle Current Year on to make it the active year.
- School: Select the school this year belongs to
- Year Name: e.g., "2026"
- Status: Planned → Active when ready
- Start Date / End Date: Academic calendar boundaries
- Total Terms: e.g., 3
- Teaching Days: e.g., 195
- Current Year: Toggle ON to make this the active year
- Click Create
Without a current academic year, most academic and enrollment features will not function. Always toggle Current Year on for the active year.
2.2 Add terms to the academic year
Navigation: Foundation -> Schools -> Academic Years -> Select year -> Terms tab
For each term (typically 3 per year in Zimbabwe):
- Click Add term
- Enter:
- Name: e.g., "Term 1", "First Term"
- Start date: First day of term
- End date: Last day of term (excluding holidays)
- Mark one term as the current term
- 3-term system
- 2-semester system
| Term | Typical dates |
|---|---|
| Term 1 | January - April |
| Term 2 | May - August |
| Term 3 | September - December |
| Semester | Typical dates |
|---|---|
| Semester 1 | January - June |
| Semester 2 | July - December |
2.3 Configure grade levels
Navigation: Academics → Class Structure → Grade Levels
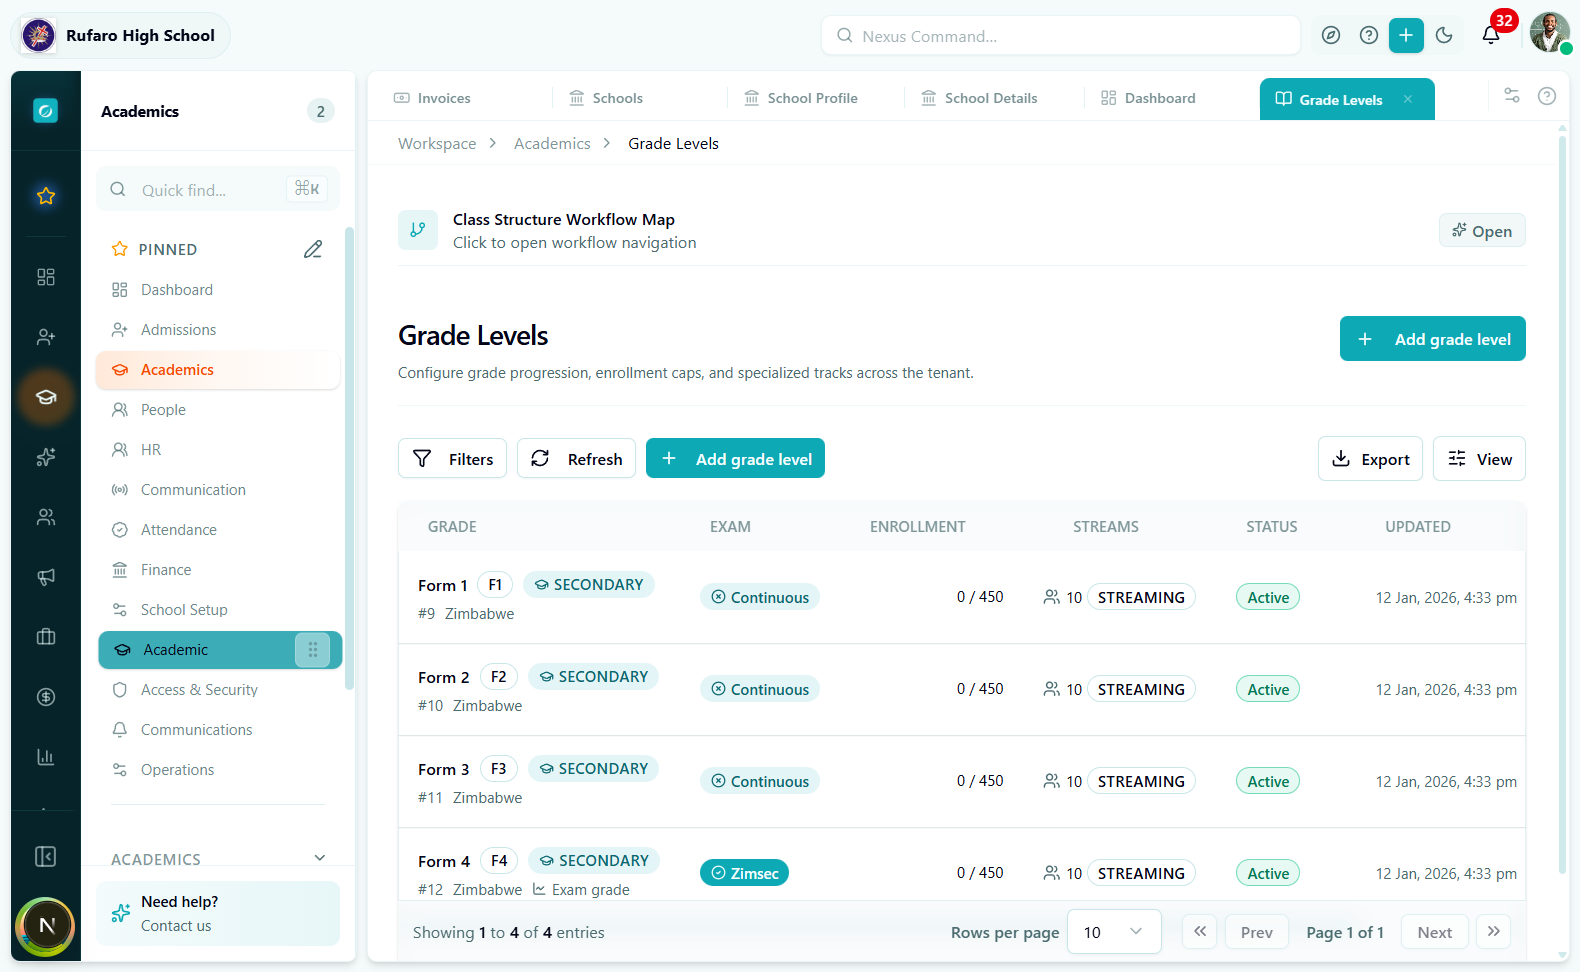
Grade Levels page — each row shows the grade name, code, level type, exam type, enrollment cap, number of streams, and status.
- Click + Add grade level or use Seed grade levels for one-click bulk creation
- For each grade level configure:
- Name: e.g., "Form 1", "Grade 8"
- Short name / Code: e.g., "F1", "G8"
- Level type: Secondary, Primary, etc.
- Curriculum: Zimbabwe, Cambridge, etc.
- Enrollment cap: Maximum students per grade
- Streams: How many streams this grade has
- Exam grade: Toggle on for national exam grades (e.g., Form 4 / O-Level)
Using the Seed feature:
If your school follows the standard Zimbabwe curriculum structure:
- Click the Seed option from the toolbar
- Select the school level (Primary, Secondary, etc.)
- Grade levels are created automatically (ECD → Form 6)
- Customize individual grades afterwards
2.4 Configure streams (optional)
Navigation: Academics → Class Structure → Streams
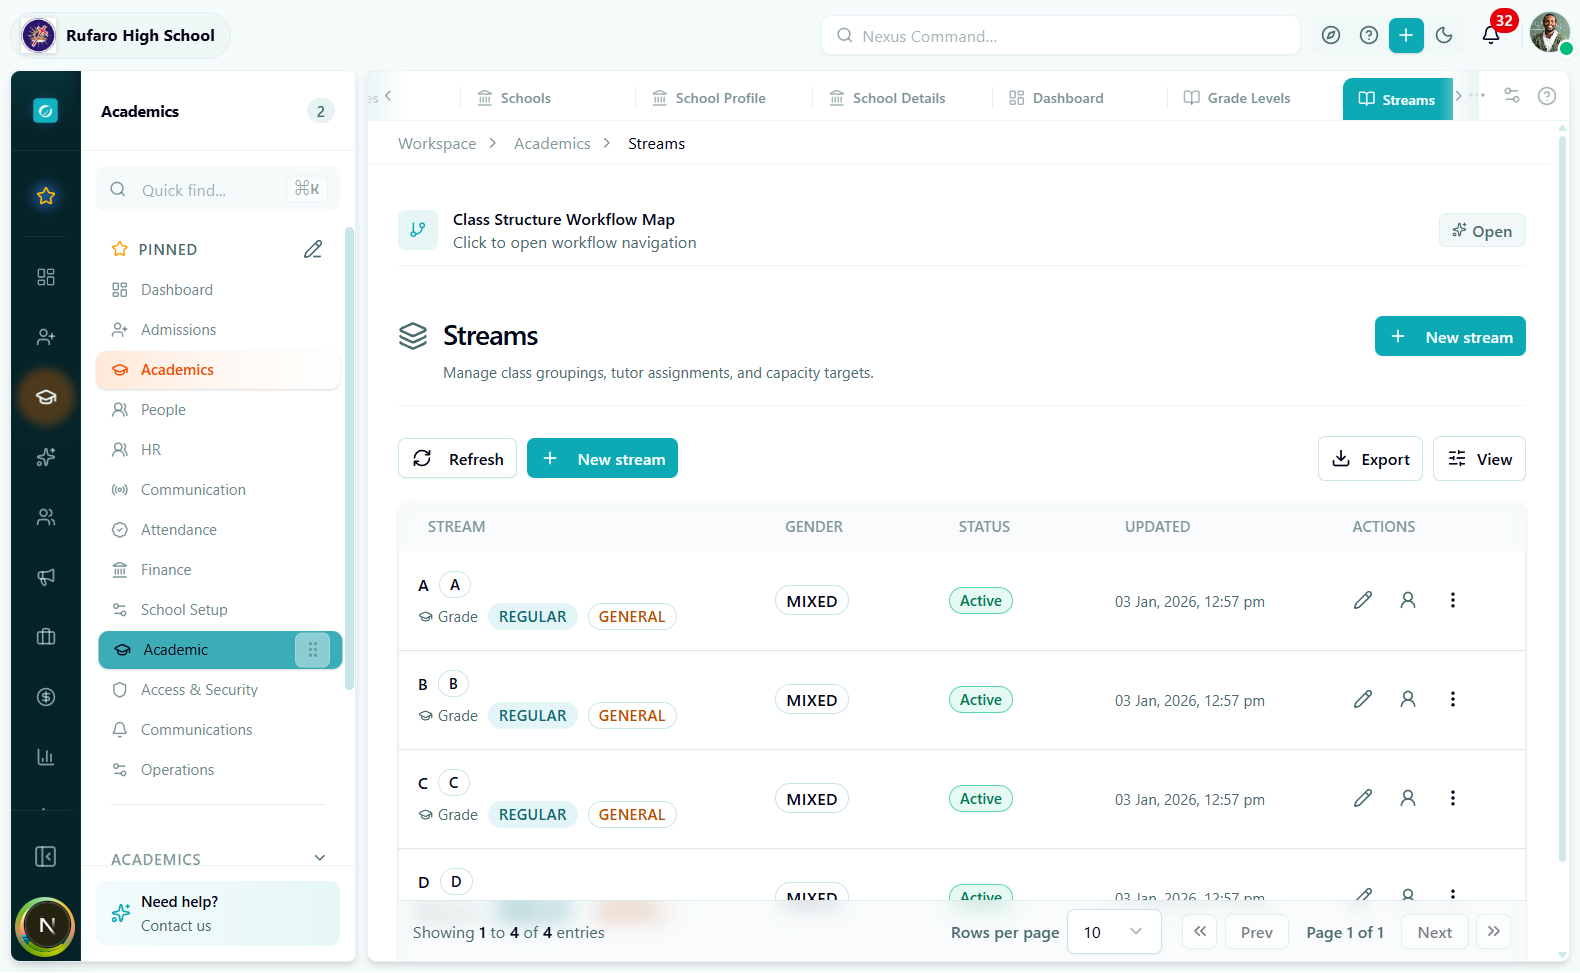
Streams page — each stream shows its code, gender composition, and the grade level it applies to.
- Click + New stream
- Enter:
- Name / Code: e.g., "A", "B", "Sciences"
- Gender: Mixed, Male only, Female only
- Grade level: Which grade this stream applies to
- Capacity: Maximum students
Streams are useful when students in the same grade follow different curricula based on their academic track. If all students take the same subjects, you may not need streams.
2.5 Create class divisions
Navigation: Academics → Class Structure → Class Divisions
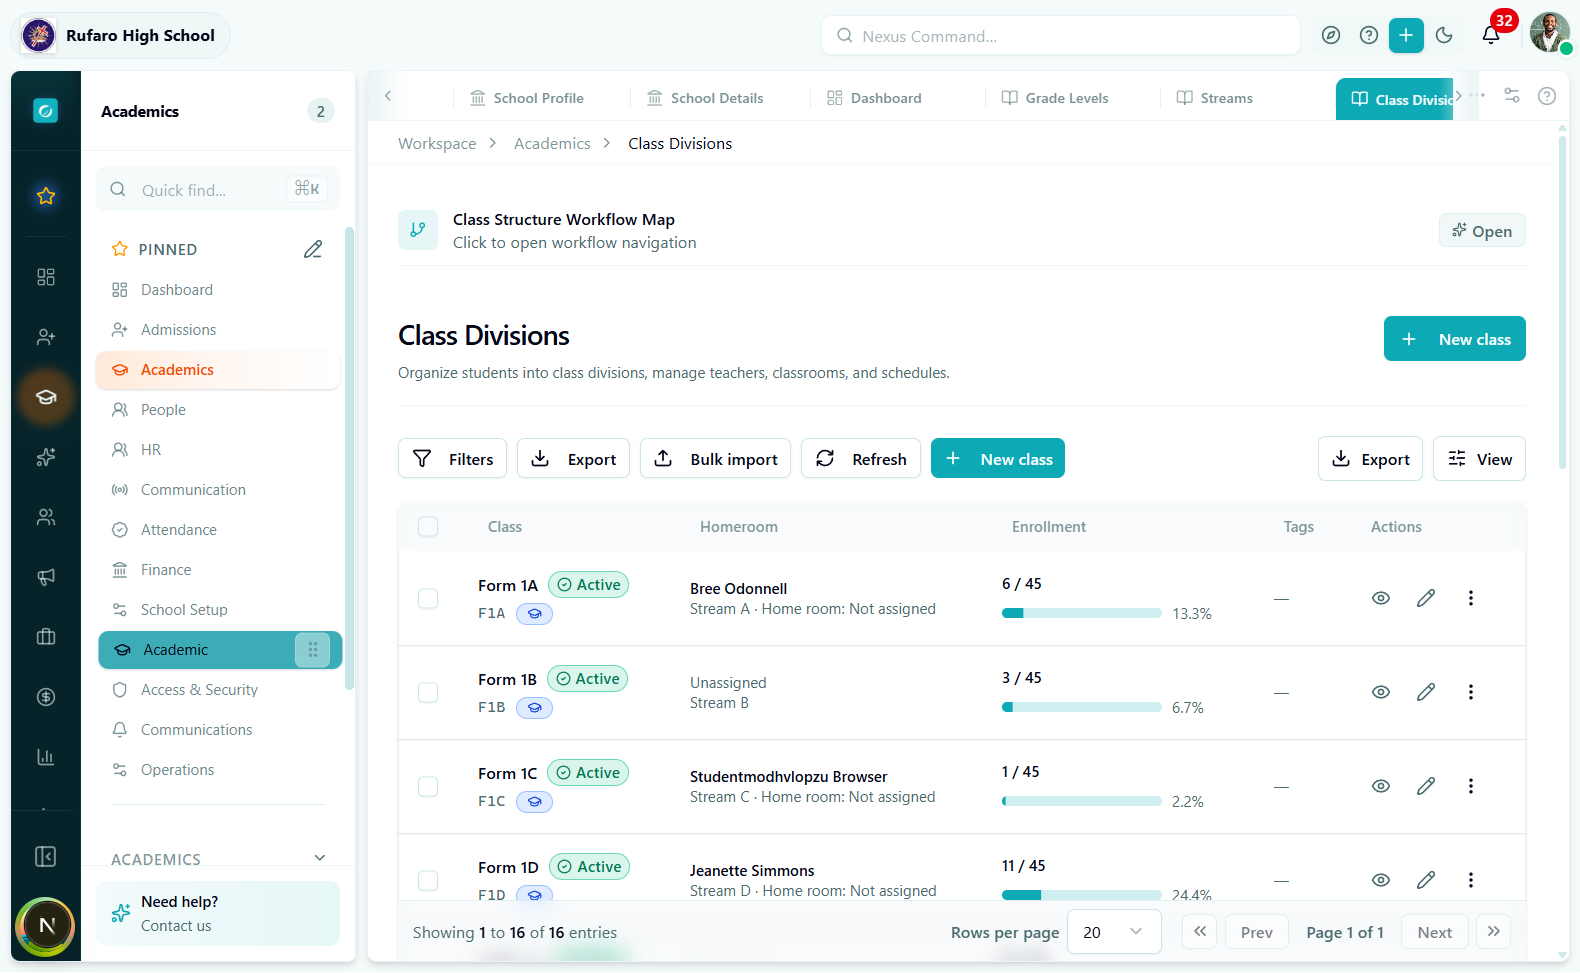
Class Divisions page — shows each class with its homeroom teacher, stream, enrollment count, and fill percentage.
- Click + New class
- Enter:
- Name: e.g., "Form 1A", "Form 1B"
- Grade level: The grade this class belongs to
- Stream: (If using streams) The academic track
- Homeroom teacher: Assign a teacher (if staff already added)
- Capacity: Maximum students (e.g., 45)
- Room: Physical classroom (optional)
Phase 3: Personnel
3.1 Create departments (optional)
Navigation: Foundation -> Schools -> Departments
Departments organize staff and subjects:
- Click Add department
- Enter:
- Name: e.g., "Mathematics", "Sciences", "Languages"
- Head of department: Assign a staff member (after adding staff)
- Budget code: For financial tracking (optional)
3.2 Add staff and teachers
Navigation: People → Staff or People → Teachers
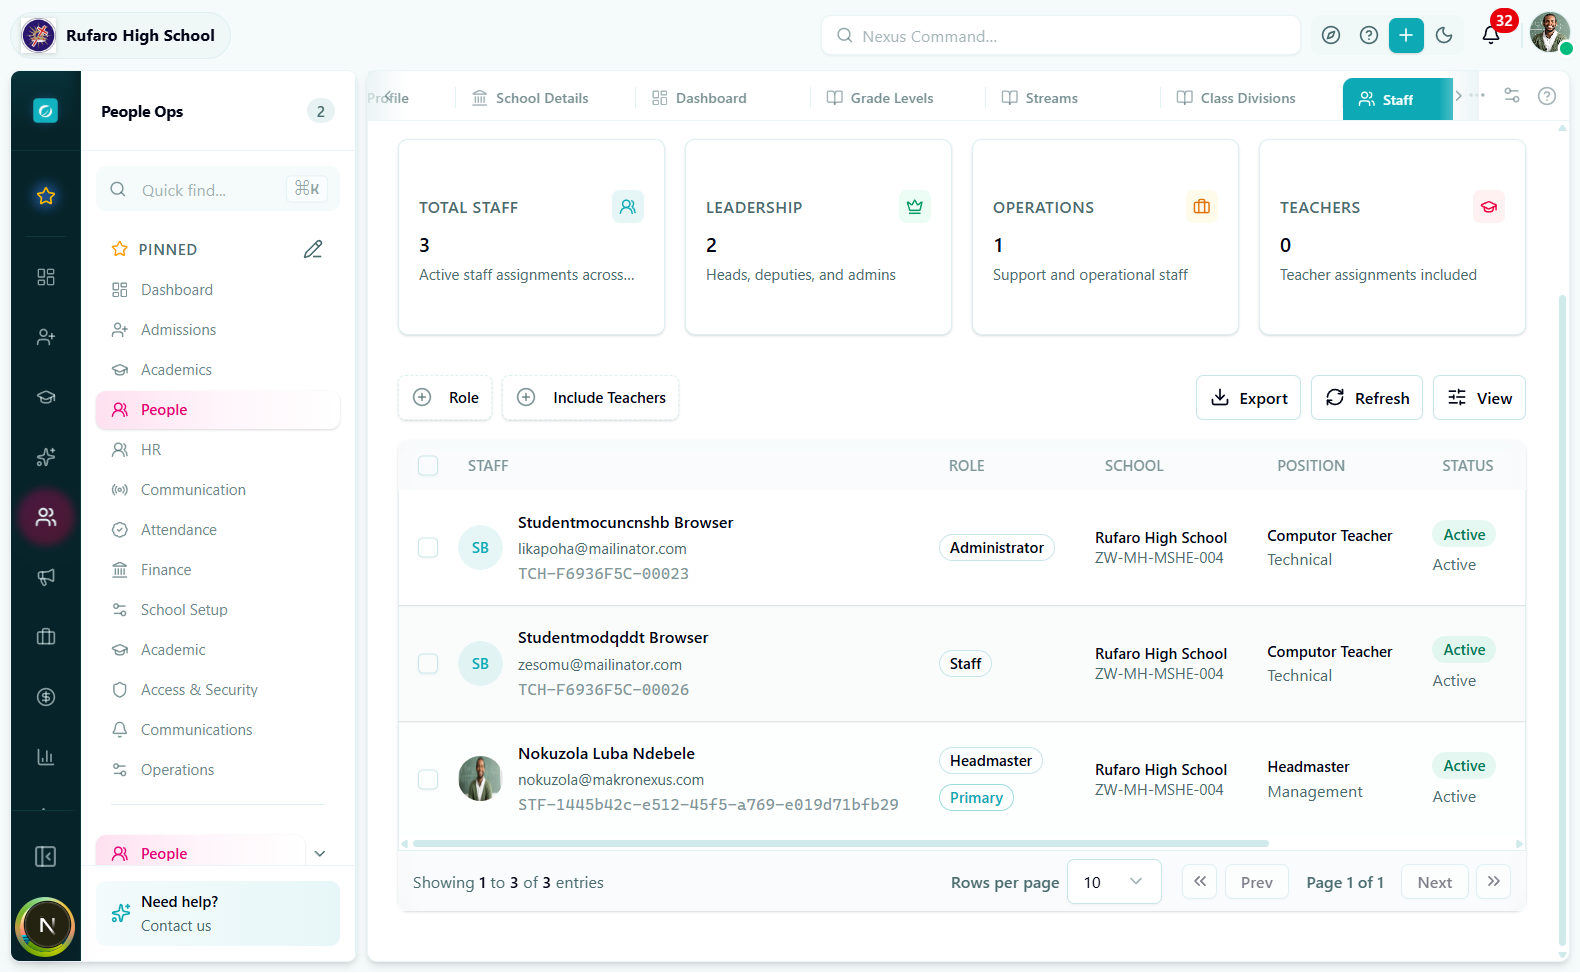
Staff page — shows all staff assignments across the school with role, position, and status.
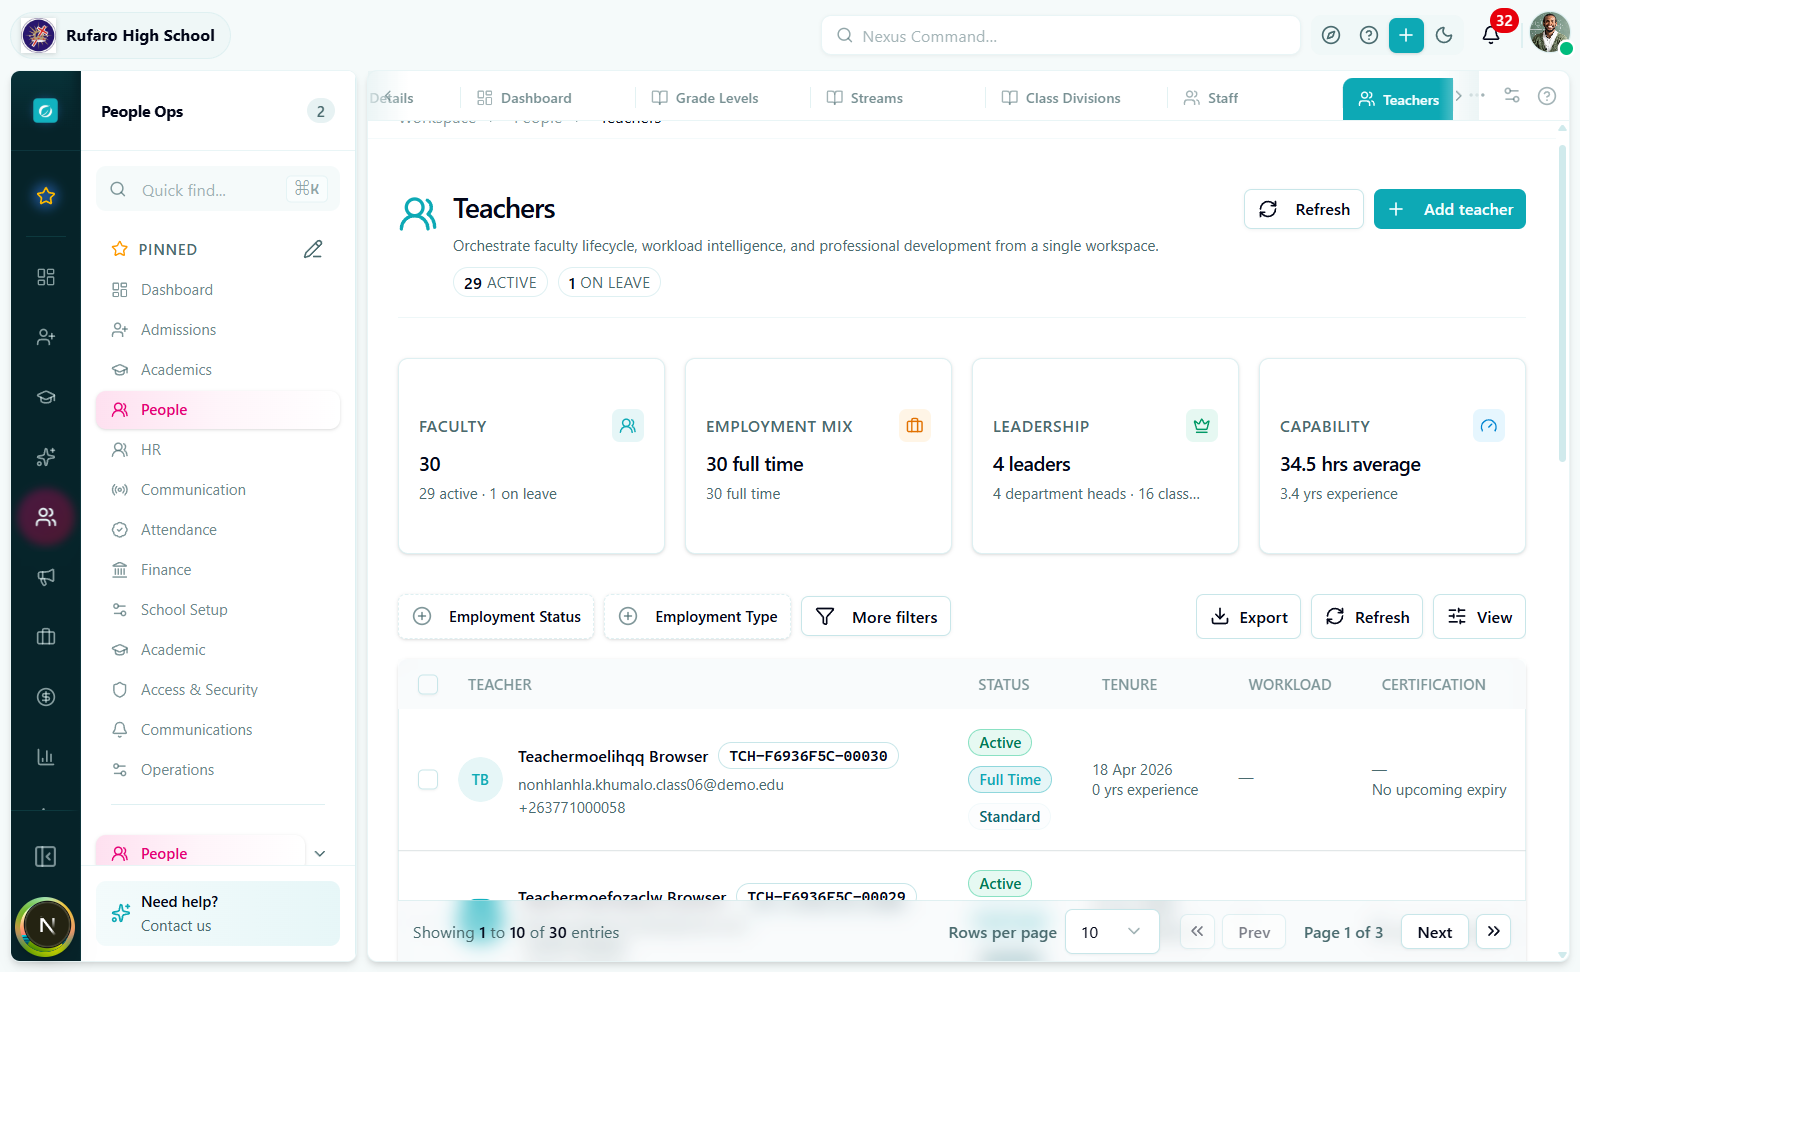
Teachers page — lists teacher profiles with contract type, years of experience, and upcoming expiry dates.
- Add manually
- Bulk import
- Click Add staff or Add teacher
- Enter personal details:
- Full name
- Email address (creates user account)
- Phone number
- Employee ID (optional)
- Assign to school and department
- Set employment details (start date, contract type)
- Save
- Go to People -> Import People
- Download the CSV template
- Fill in staff details following the template format
- Upload the completed CSV
- Review the import preview
- Confirm the import
When you add staff with an email address, the system can automatically create a user account for them. They'll receive an activation email to set their password.
Phase 4: Students
4.1 Add students
Navigation: People → Students
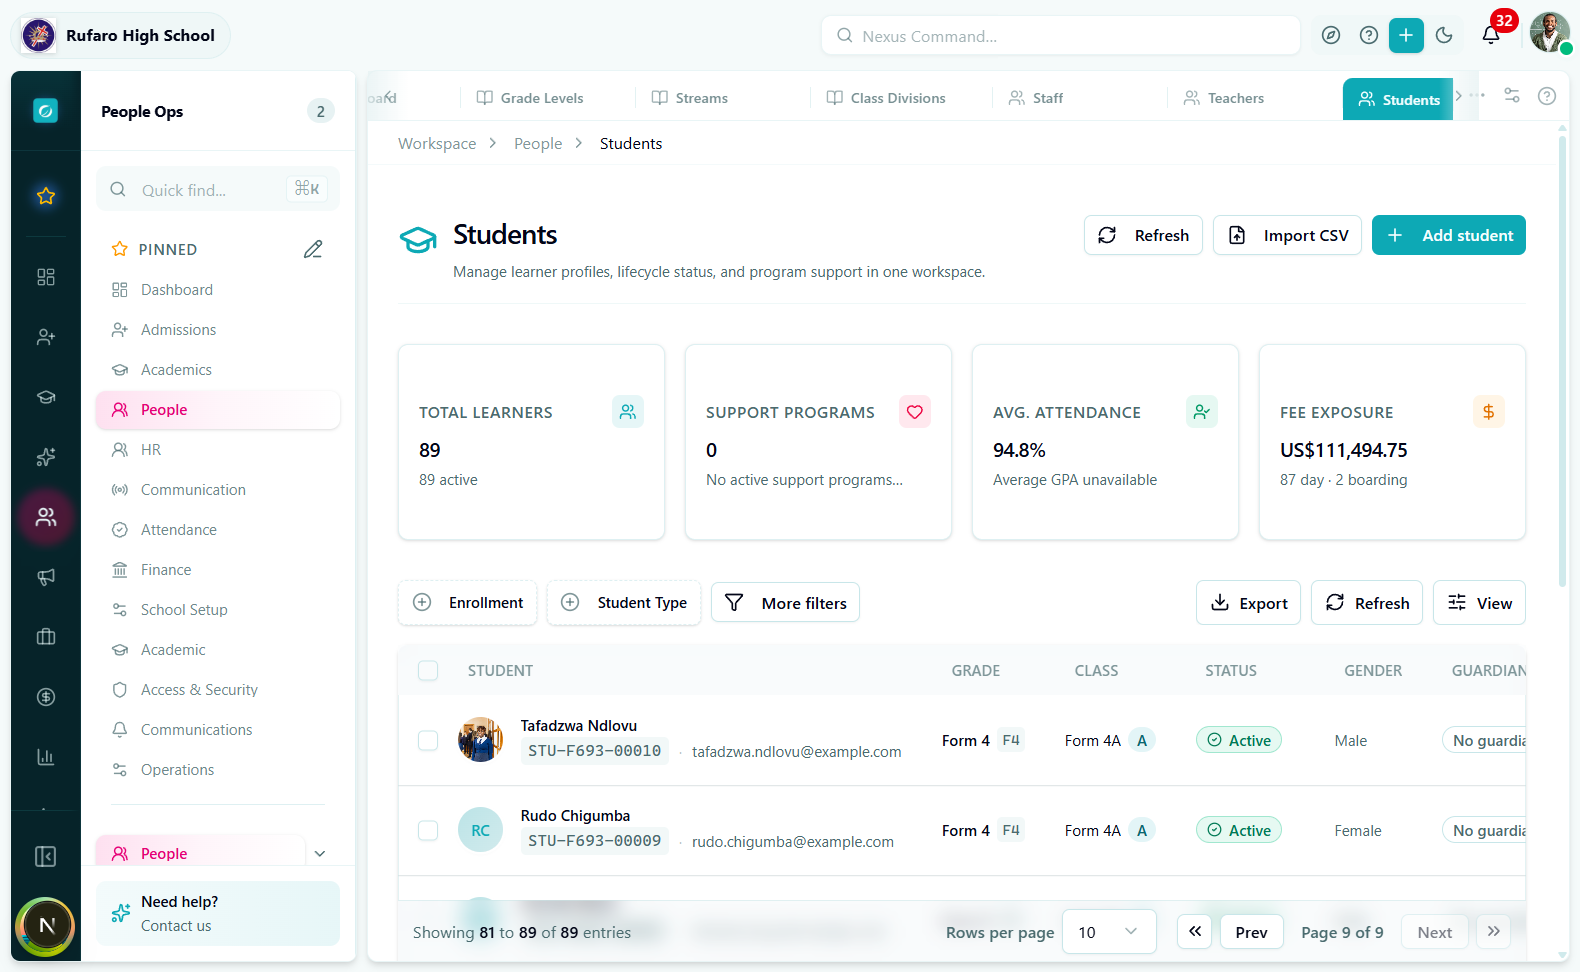
Students page — top metrics show total learners, average attendance, and total fee exposure. The table lists students with grade, class, status, and guardian.
- Add manually
- Bulk import
- Via admissions
- Click Add student
- Enter:
- Basic info: First name, surname, date of birth, gender
- Identity: National ID or birth certificate number
- Contact: Phone, email (for older students)
- Class assignment: Grade level and class division
- Save the student record
- Go to People -> Import People
- Select Students as the import type
- Download the CSV template
- Required columns:
firstName,surnamedateOfBirth(YYYY-MM-DD)gender(MALE/FEMALE)gradeLevelCodeorgradeLevelNameclassDivisionCodeorclassDivisionName
- Upload and preview the import
- Resolve any validation errors
- Confirm import
If using the full admissions workflow:
- Go to Admissions -> Applications
- Create applications for new students
- Move through the pipeline: Application -> Decision -> Offer -> Acceptance
- Convert accepted students to enrolled status
- Assign to class divisions
See the Admit a student guide for details.
Phase 5: Finance
5.1 Configure fee structure
Navigation: Finance → Fees
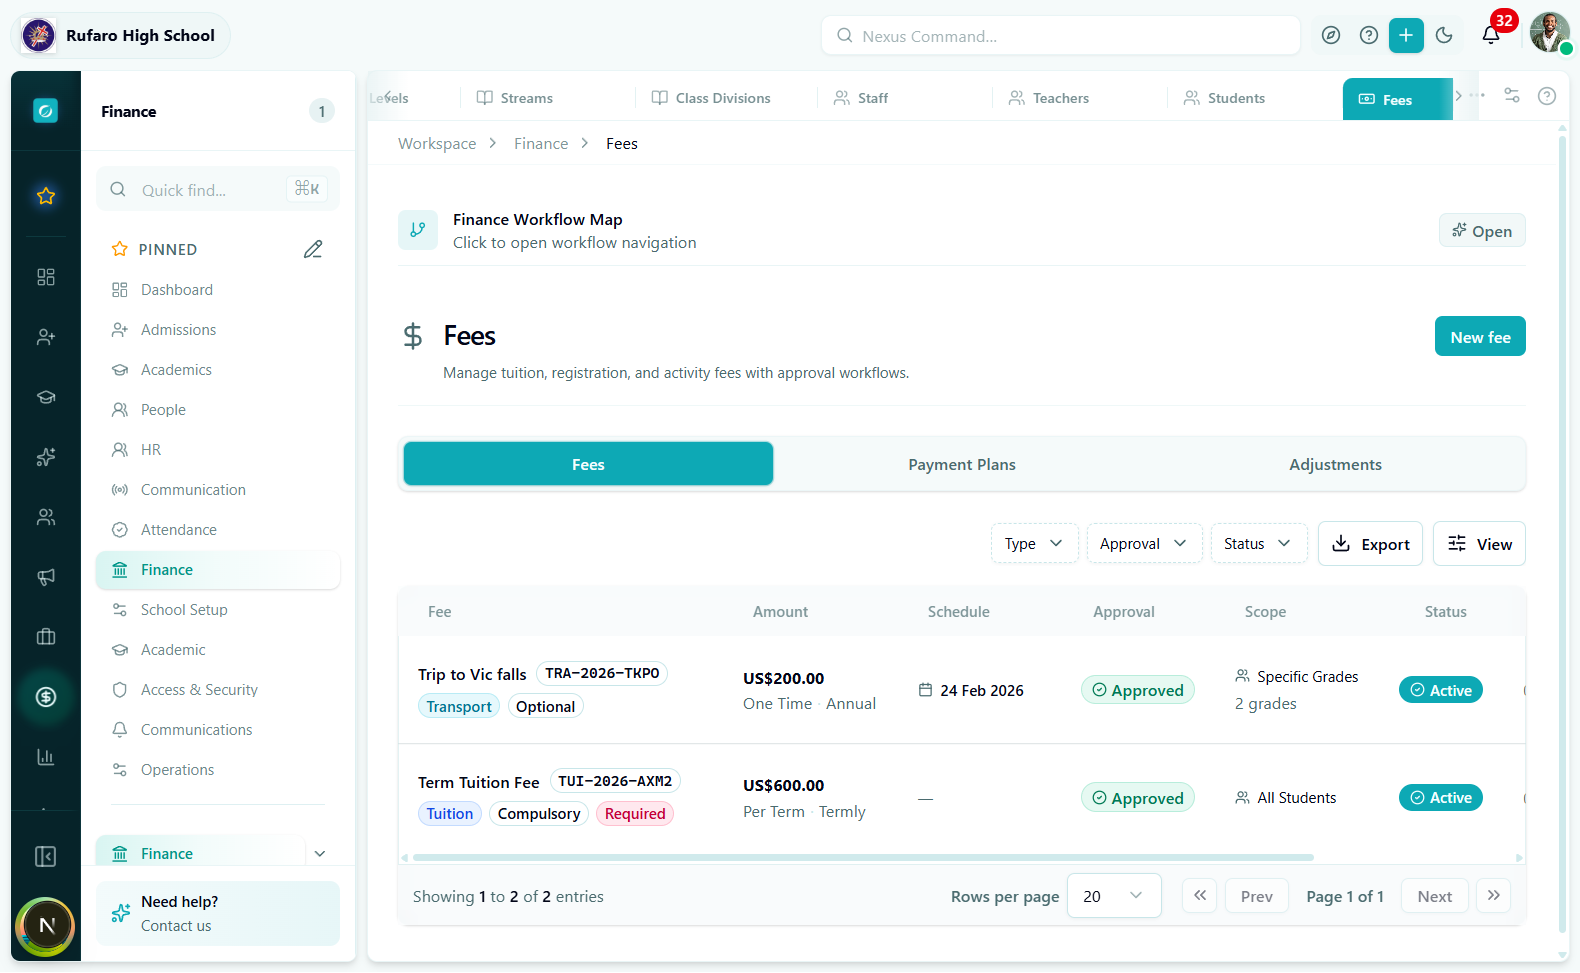
Fees page — shows all configured fees with type tags, amount, payment schedule, approval status, scope, and active status.
- Click New fee
- Enter:
- Name: e.g., "Term Tuition Fee", "Registration Fee"
- Fee type: Tuition, Registration, Exam, Transport, Activity, etc.
- Amount: Fee amount (e.g., US$600.00)
- Frequency: Per term, annual, once-off
- Scope: All students, specific grades, or specific streams
- Create fees for each category your school charges
Common fee structure:
| Fee name | Type | Frequency | Notes |
|---|---|---|---|
| Tuition | Tuition | Per term | Main school fee |
| Registration | Registration | Once-off | New students only |
| Exam levy | Exam | Per term | For exam grades |
| Sports levy | Activity | Per term | Optional |
| Computer levy | Activity | Per term | Optional |
5.2 Test the billing flow
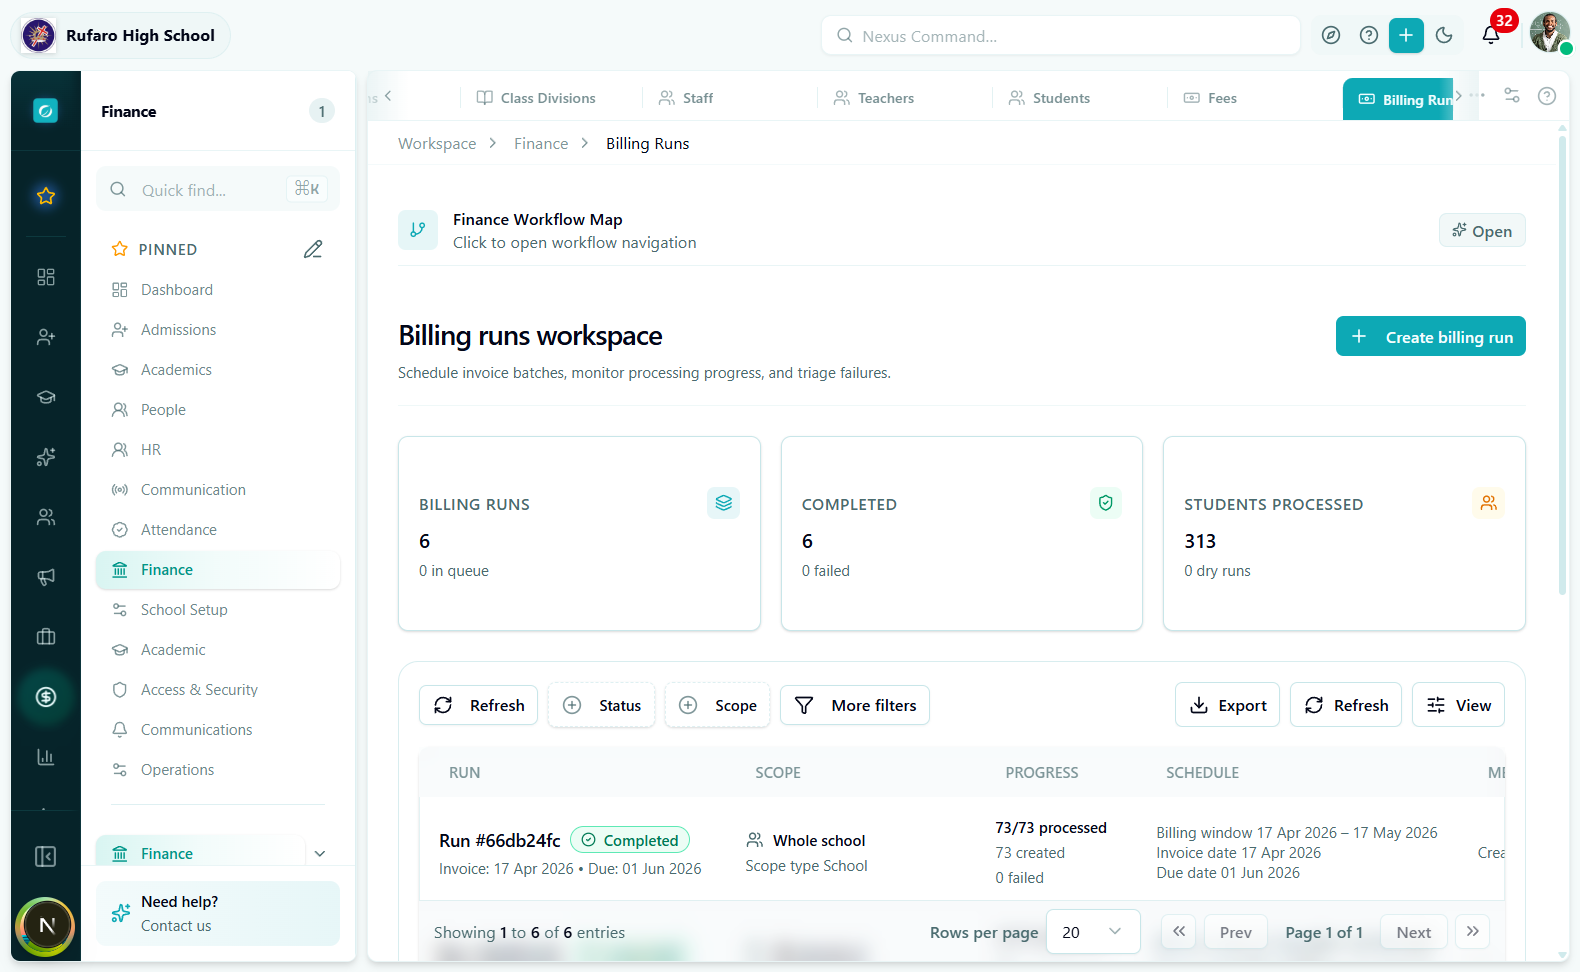
Billing Runs page — each run shows the term, scope, status, and number of invoices generated.
- Go to Finance → Billing Runs
- Click + New billing run and select the term and fee scope
- Preview the billing run to verify the student list and amounts
- Confirm the run to generate invoices
- Check Finance → Invoices to see the created invoices
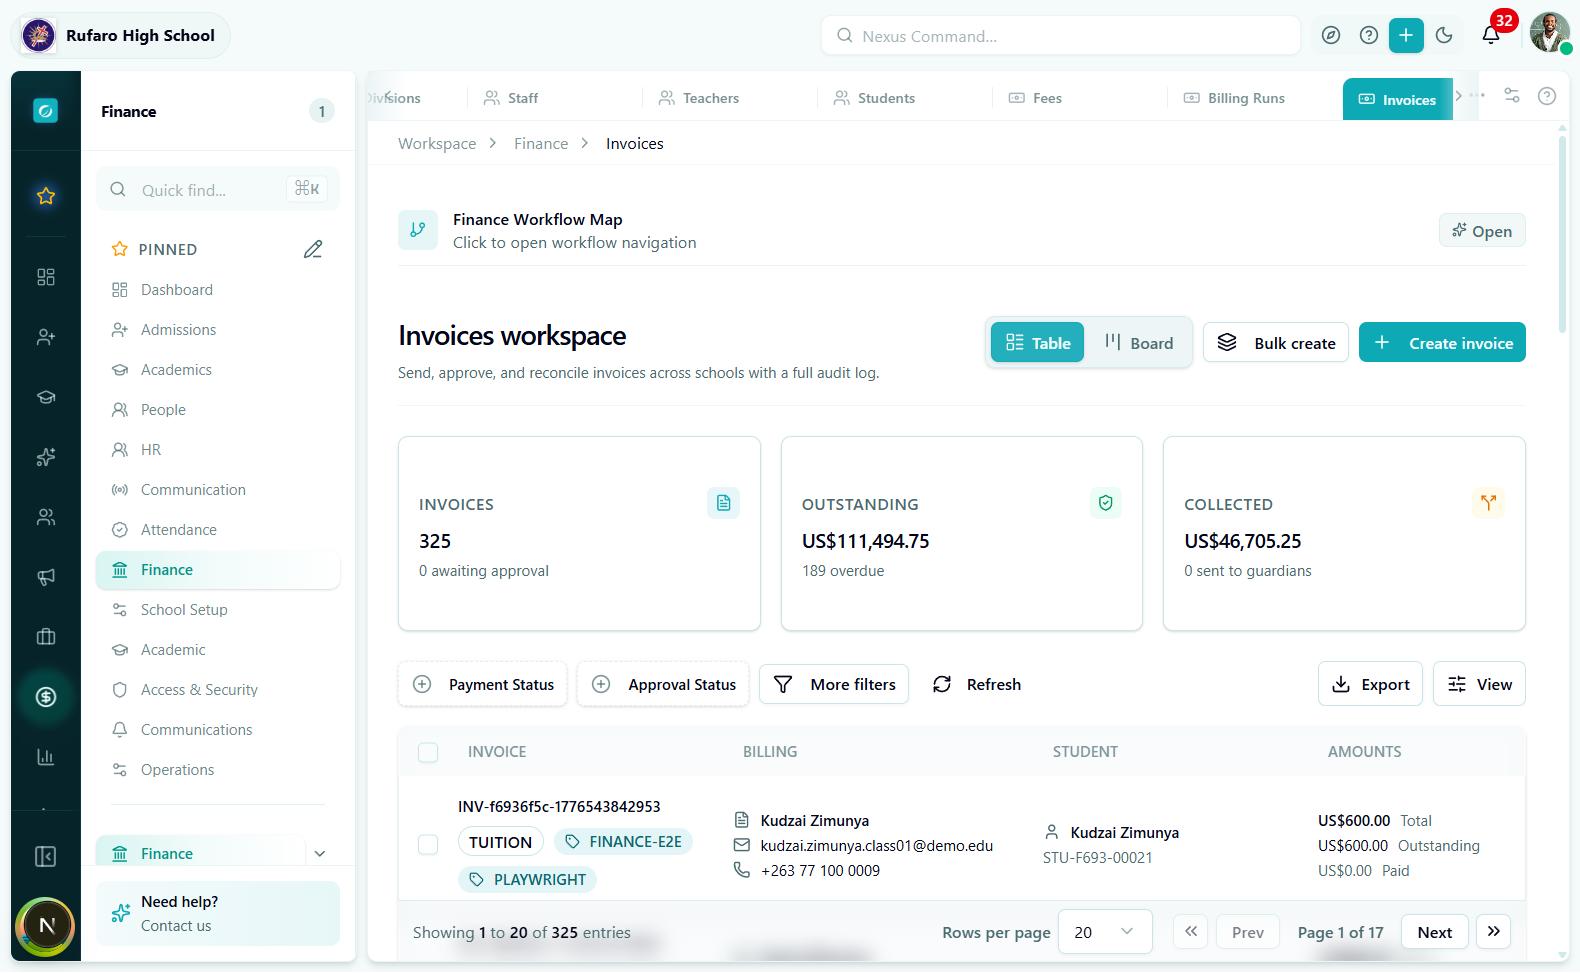
Invoices page — generated invoices show the student, amount owed, payment status, and due date.
5.3 Set up payment recording
Navigation: Finance -> Payments
- Familiarize yourself with the Record payment workflow
- Test recording a payment against a student invoice
- Verify the receipt is generated in Finance -> Receipts
- Check the student's balance updates correctly
Verification checklist
After completing setup, verify each area works:
| Area | Test | Expected result |
|---|---|---|
| Dashboard | Open Executive -> Dashboard | See metrics and charts |
| Students | Open People -> Students | See student list with class assignments |
| Classes | Open Academics -> Class Divisions | See classes with enrolled students |
| Teachers | Open People -> Teachers | See teacher list with assignments |
| Fees | Open Finance -> Fees | See configured fee items |
| Invoices | Run a test billing | Invoices generated for students |
| Payments | Record a test payment | Payment appears, balance updates |
| Receipts | View Finance -> Receipts | Receipt generated for payment |
Setup completion
When all required steps are complete:
- The Setup Progress dashboard shows 100% completion
- The setup stage changes to Completed
- You can begin normal school operations
Once setup is complete, your school can:
- Enroll and manage students
- Record attendance
- Process payments and issue receipts
- Generate reports
- Send communications
If modules are missing
Some modules appear only when:
- School is selected - Use the school switcher in the top bar
- Permission is granted - Contact your administrator
- Feature is enabled - Some features are tenant-level configurations
Common permission requirements:
| Module | Required permission |
|---|---|
| Finance | finance:view or payments:view |
| Attendance | attendance:view |
| Academics | academics:view |
| People | students:view, teachers:view, staff:view |
| Foundation | Usually requires admin or exec role |
Related topics
- Onboard a school - Detailed school onboarding guide
- Bulk import students - CSV import workflow
- Fee setup and invoicing - Complete finance setup
- Create academic year and term - Detailed academic year guide