Bulk Teacher Import
Import your entire teaching staff in minutes. This guide covers every step of the 6-step wizard — from downloading the template to reviewing results — including required fields, employment types, qualification codes, and common fixes for import errors.
Before You Start
What you'll need
- Spreadsheet software — Microsoft Excel, Google Sheets, or LibreOffice Calc
- Teacher data ready — full name, email, gender, employment type, hire date, and highest qualification at minimum
- Permission — your account must have the Teachers › Create permission. Contact your administrator if the Teachers tab is locked.
- School selected — verify the correct school is active in the top navigation bar.
Supported file formats
| Format | Extension | Notes |
|---|---|---|
| CSV (comma-separated) | .csv | Universal; works in any spreadsheet app |
| Excel workbook | .xlsx | Recommended; includes dropdown validation |
| Legacy Excel | .xls | Supported but .xlsx preferred |
Files larger than 10 MB are rejected. For large schools, split the import into batches of 200–500 rows.
How to Open the Import Wizard
- In the left sidebar, click People.
- Click Import in the People sub-menu.
- Click the Teachers tab.
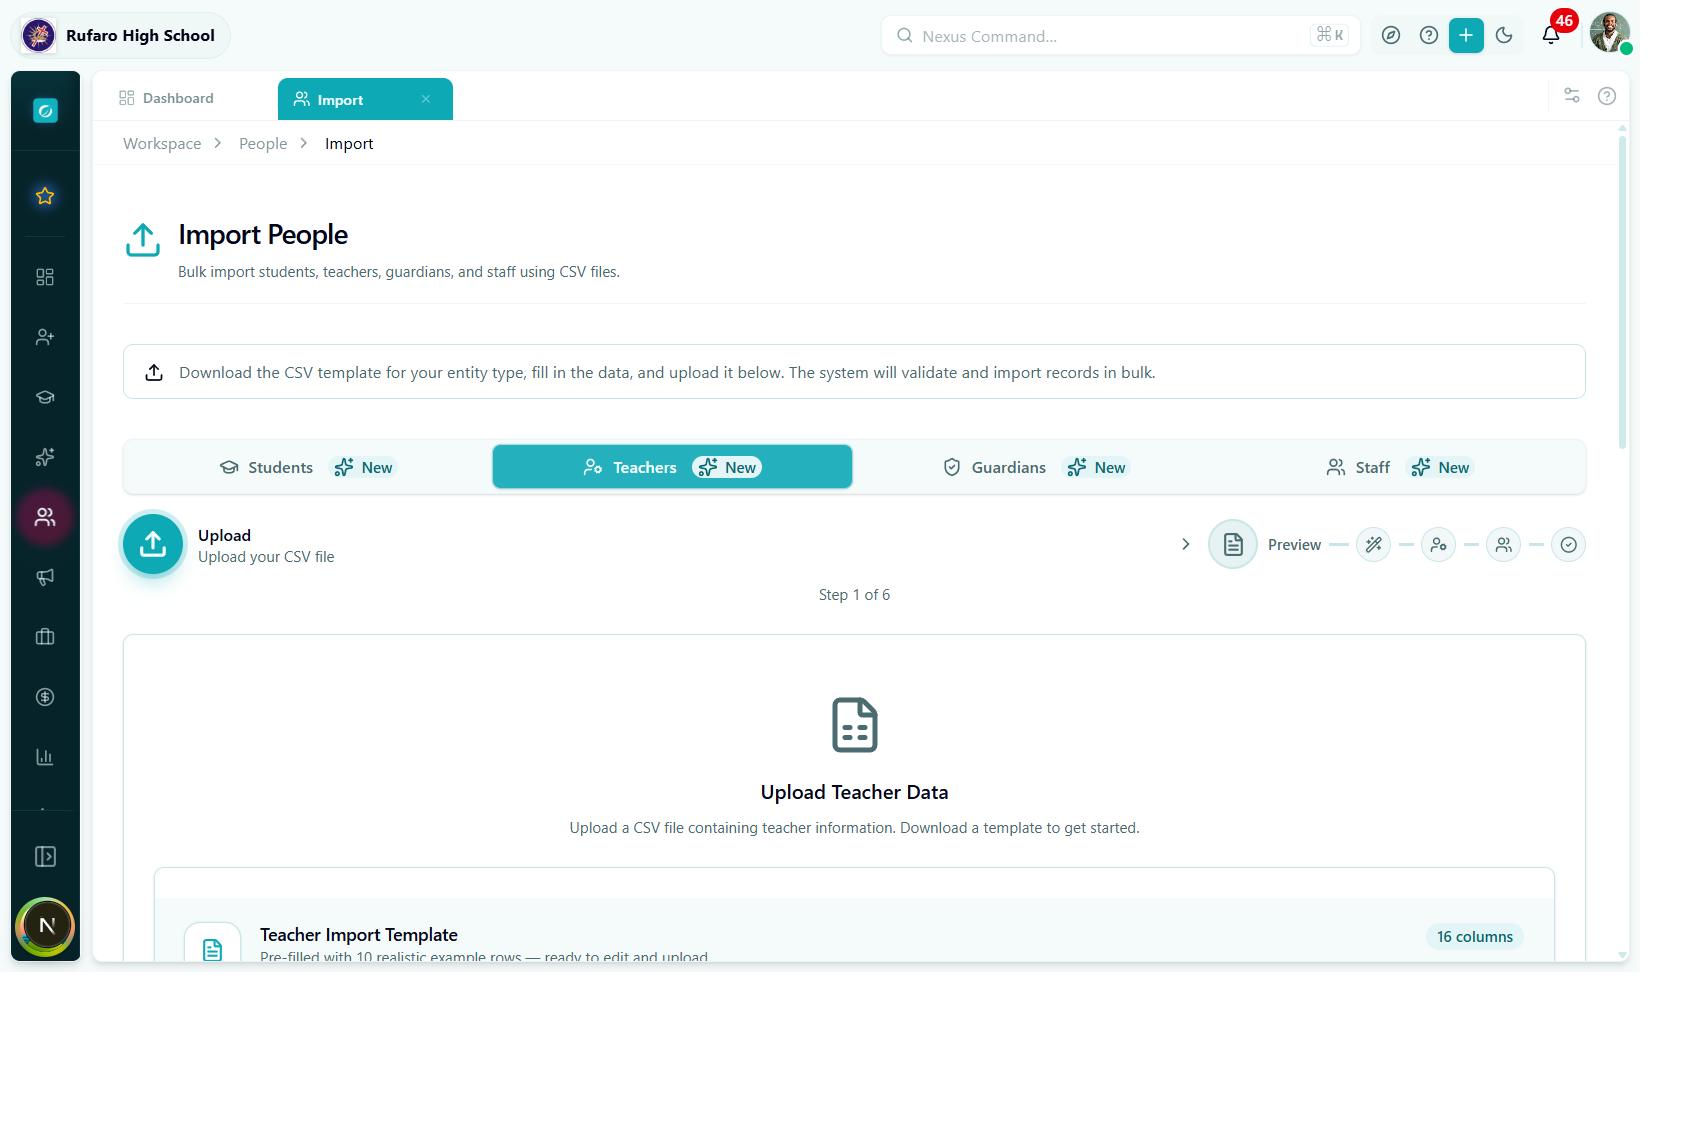
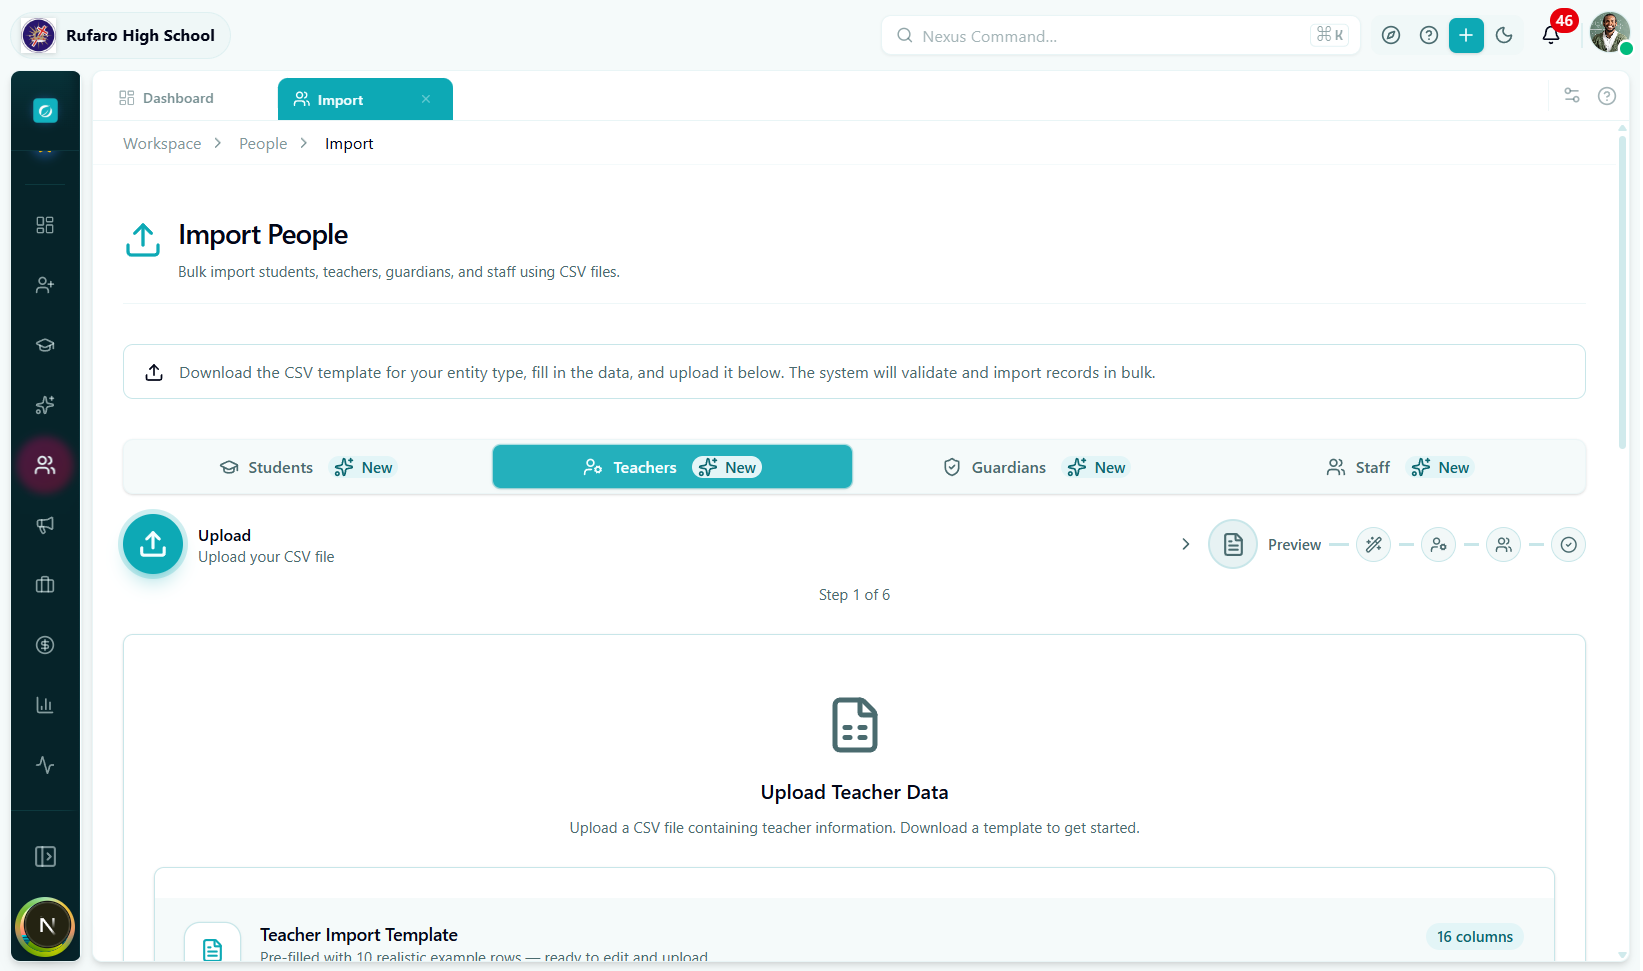
Step 1 — Upload
Option A: Download the template (recommended)
Click Download Template to receive a pre-formatted Excel file.

The template contains:
- Sheet 1 – Data: colour-coded headers (blue = required, grey = optional), format hint row, and three sample teacher rows.
- Sheet 2 – Field Reference: full column descriptions, accepted values, and dropdown validations for
gender,employmentType, andhighestQualification.
Option B: Upload your existing spreadsheet
Drag and drop your file onto the upload zone, or click Browse files.
Column names are matched case-insensitively. EmploymentType, employmenttype, and employment_type are all recognised as the same field.
Required columns
These seven columns must be present or the upload will be rejected:
| Column | Description | Example |
|---|---|---|
firstName | Teacher's first name | Chiedza |
lastName | Teacher's surname | Gumbo |
email | Work email address | c.gumbo@rufaro.ac.zw |
gender | Gender | female |
employmentType | Type of employment contract | full_time |
hireDate | Date employment began | 2022-01-10 |
highestQualification | Highest academic credential | bachelor |
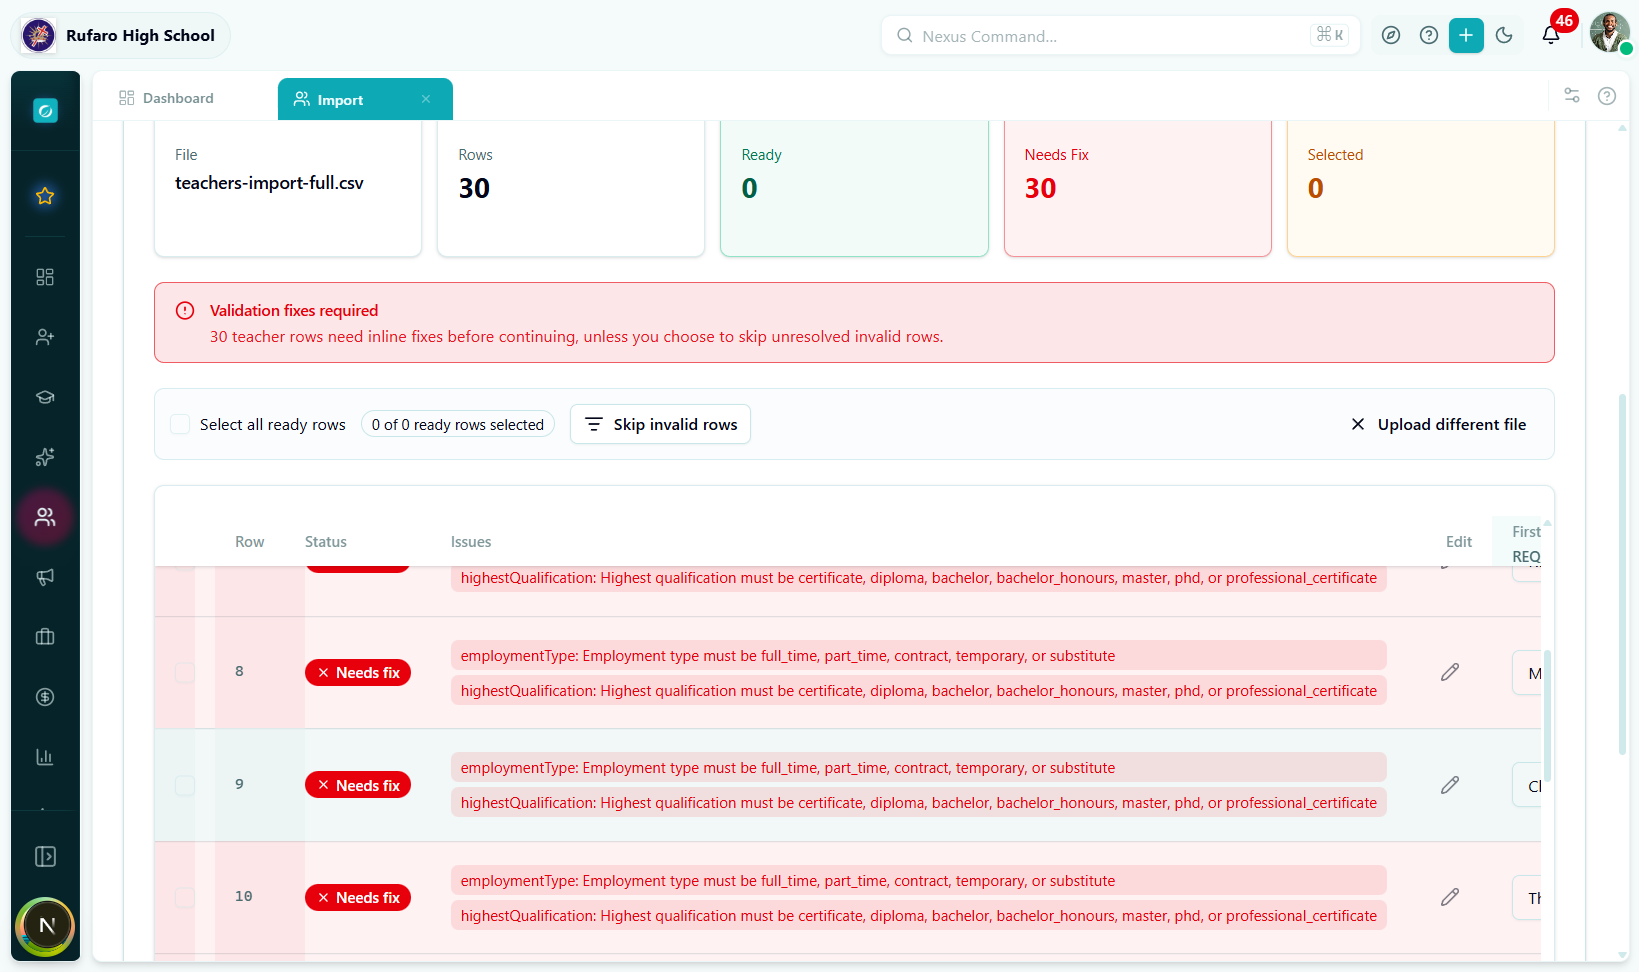
Employment type values
| Value | Meaning |
|---|---|
full_time | Permanent full-time teacher |
part_time | Part-time teaching hours |
contract | Fixed-term contract |
temporary | Short-term / relief teacher |
substitute | Day-by-day relief cover |
Qualification code values
| Value | Meaning |
|---|---|
certificate | Teaching certificate (e.g. ZINTEC) |
diploma | Teaching diploma |
bachelor | Bachelor's degree (e.g. B.Ed) |
bachelor_honours | Honours degree |
master | Master's degree |
phd | Doctorate |
professional_certificate | Professional body certification |
If you enter Bachelor of Education or B.Ed, the row will fail validation. You must use the exact code: bachelor. Refer to the Field Reference sheet in the downloaded template for the complete list.
Accepted date formats
| Input format | Example |
|---|---|
| ISO 8601 | 2022-01-10 (preferred) |
| Day/Month/Year | 10/01/2022 |
| Month-Day-Year | 01-10-2022 |
| Excel serial date | 44571 (auto-converted) |
Click Next to proceed.
Step 2 — Preview
Every teacher row appears in an editable table. Red-bordered rows have validation errors; white rows are ready to import.
Editing a cell
Click a cell to edit it. The editor adjusts to the field type:
- Employment type / qualification — dropdown with accepted codes
- Date fields — date picker
- Subjects — comma-separated text (e.g.
Mathematics, Physics) - Name / email / phone — plain text
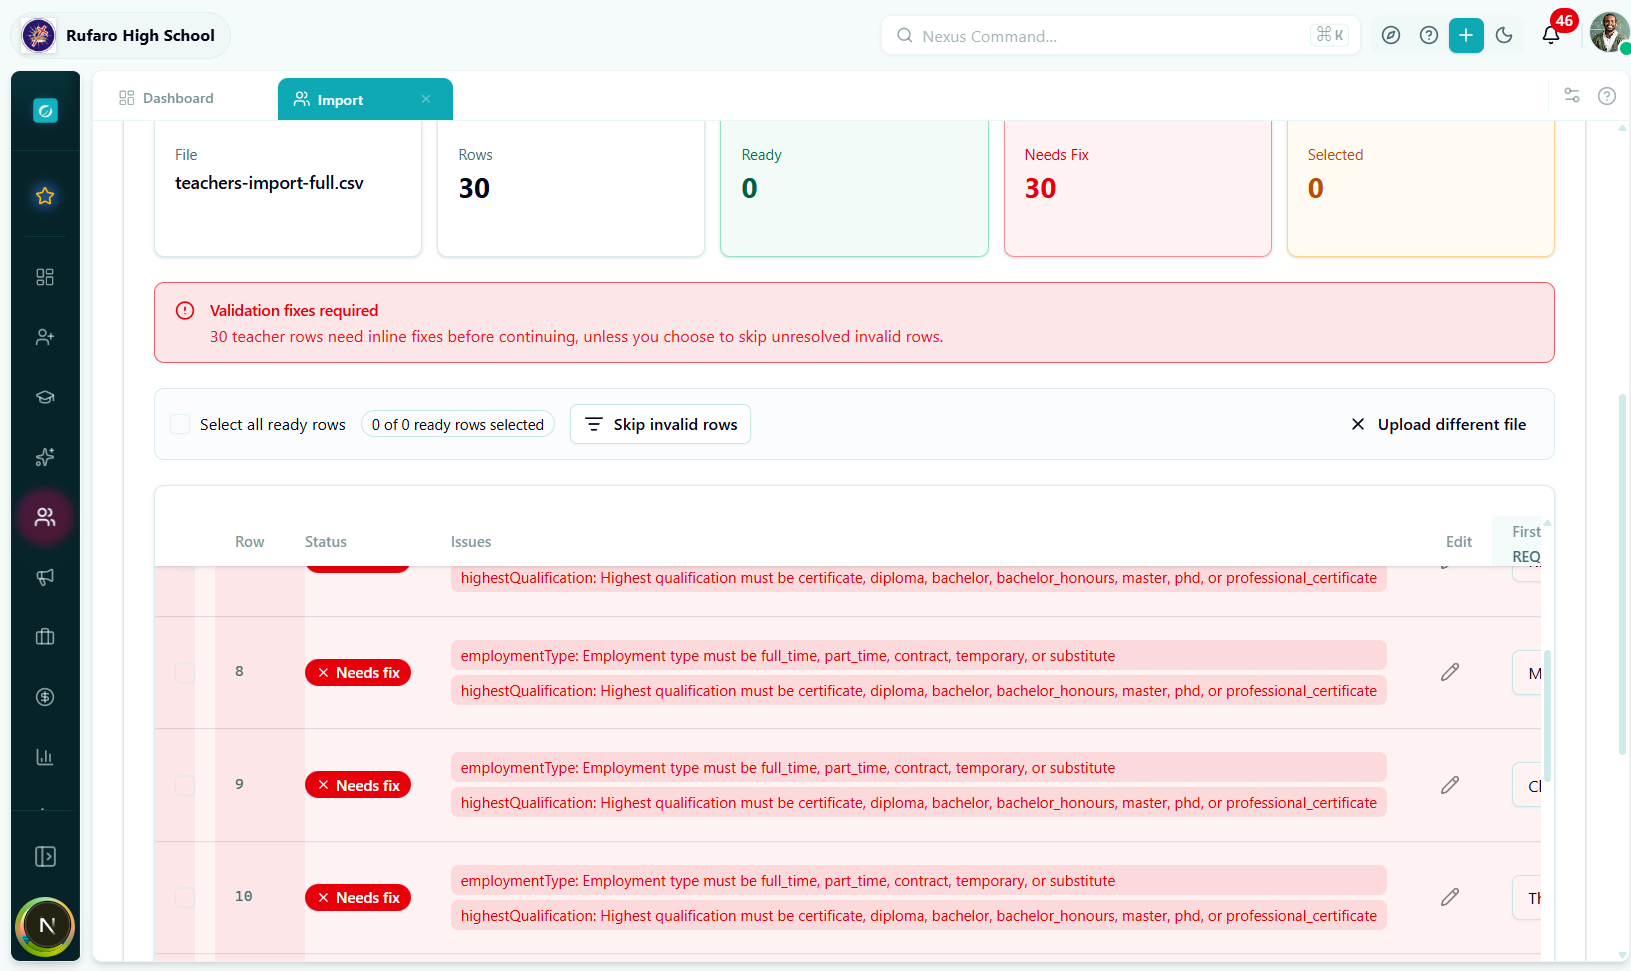
Error panel
Click the red badge on an errored row to see exactly which fields fail and why.
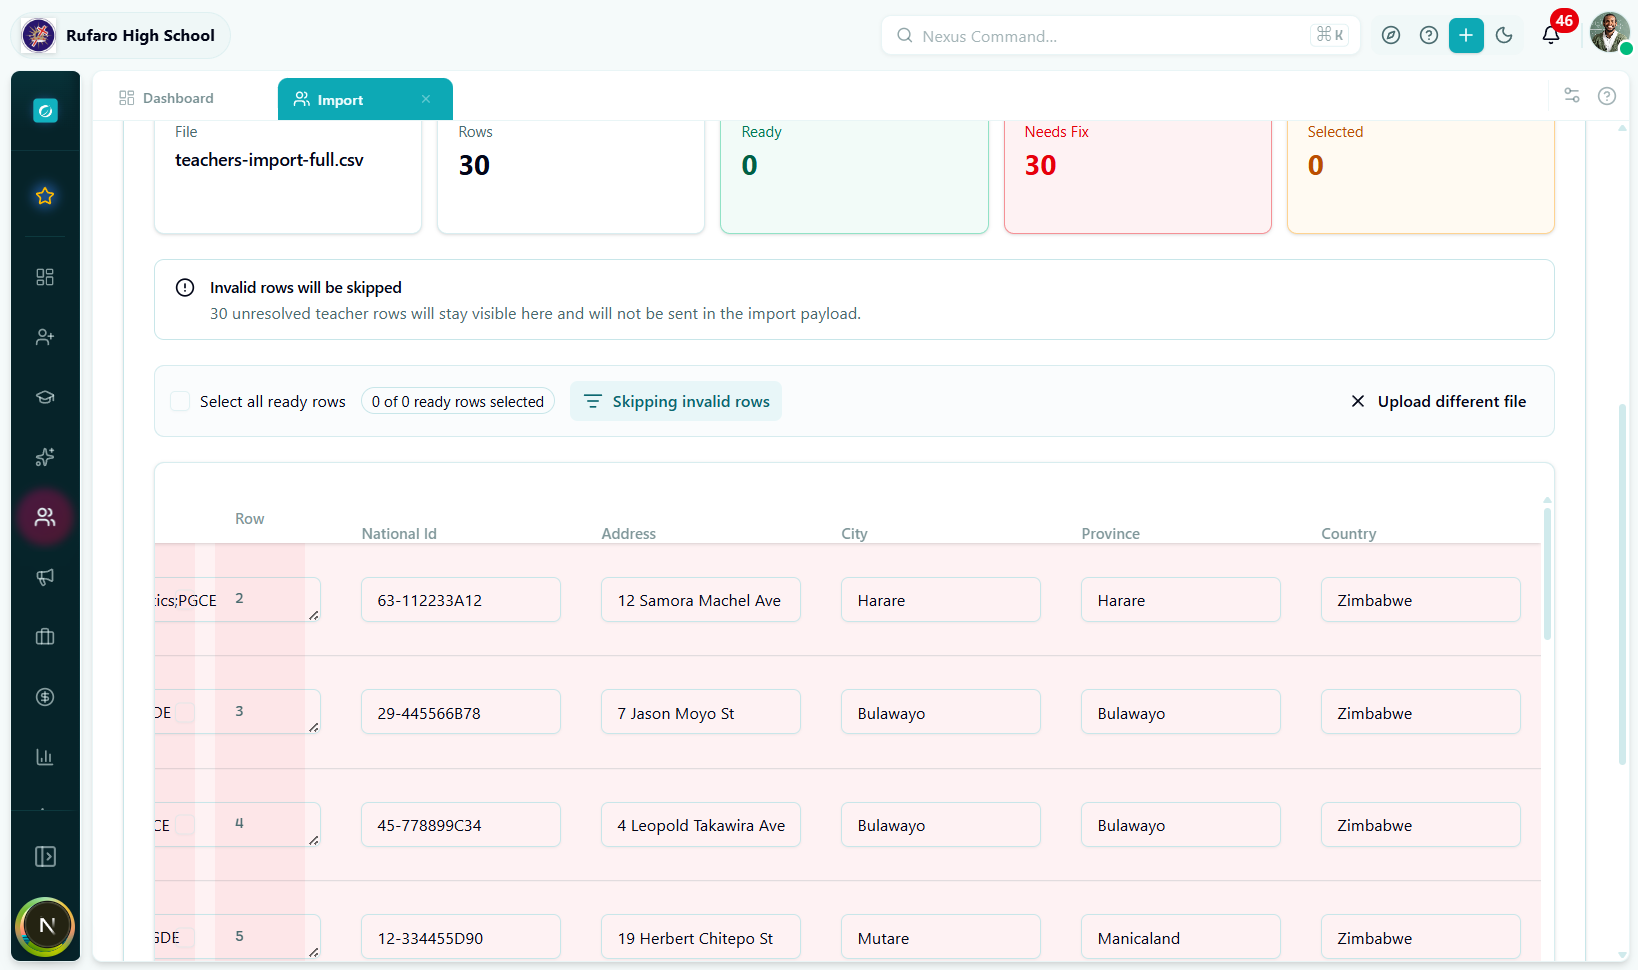
Skip invalid rows
Enable Skip invalid rows at the top of the table to exclude problem rows and import the rest. Failed rows can be corrected and re-imported in a separate batch.
Click Next to proceed.
Step 3 — Assign
Enrich each teacher's record before saving. This step is optional if your CSV already contains all necessary fields.
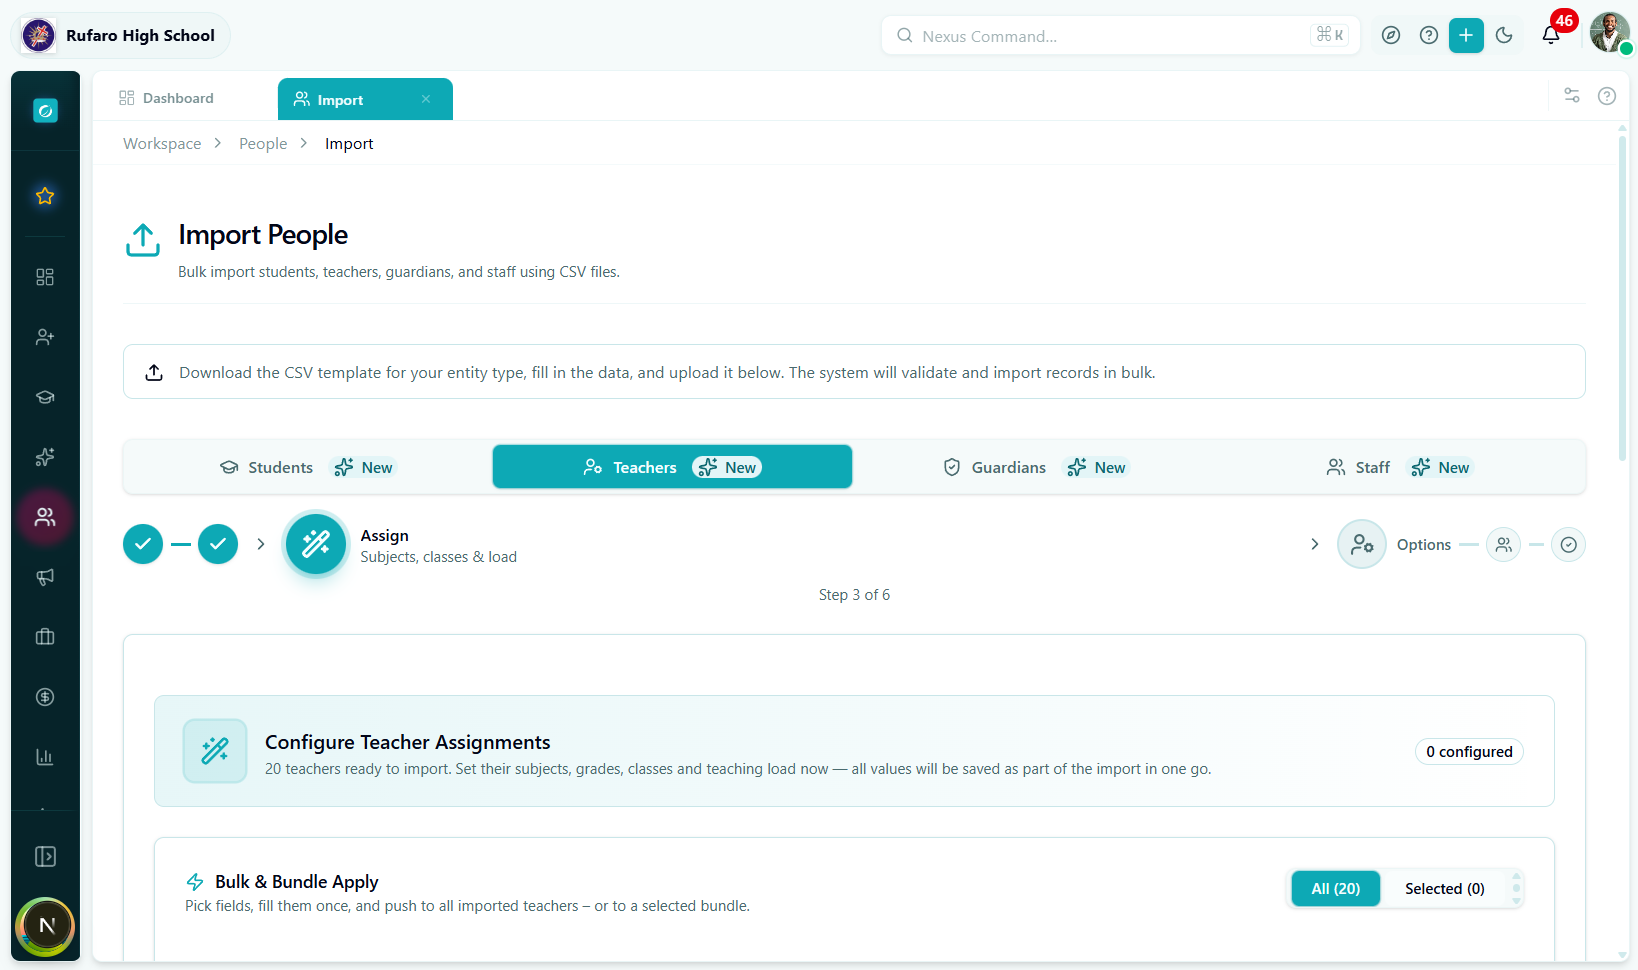
Subjects & class teaching loads
Use the combobox to select subjects the teacher is qualified to teach. You can also pre-assign specific class divisions.
| Field | Description |
|---|---|
| Subjects | Multi-select from subjects configured in Academics |
| Class Assignments | Specific class divisions this teacher will teach |
Subjects must be created in Academics → Subject Management before they appear in the combobox. If you don't see a subject, set it up in Academics and return to this import.
Qualifications
Add formal qualifications beyond the CSV highestQualification field:
| Field | Description |
|---|---|
| Qualification name | e.g. B.Ed Science Education |
| Institution | University or college name |
| Year obtained | Four-digit year |
| Certificate number | Awarding body reference |
Profile extras
| Field | Description |
|---|---|
| Title | Mr., Mrs., Ms., Dr., Prof. |
| Preferred name | Goes by a different name |
| Department | e.g. Sciences, Languages |
| Office / room | Teacher's base classroom |
Tags & notes
Attach free-form tags (e.g. new-hire-2026, hod-candidate) and optional internal notes visible only to administrators.
Click Next to proceed.
Step 4 — Options
Global settings for this import batch.
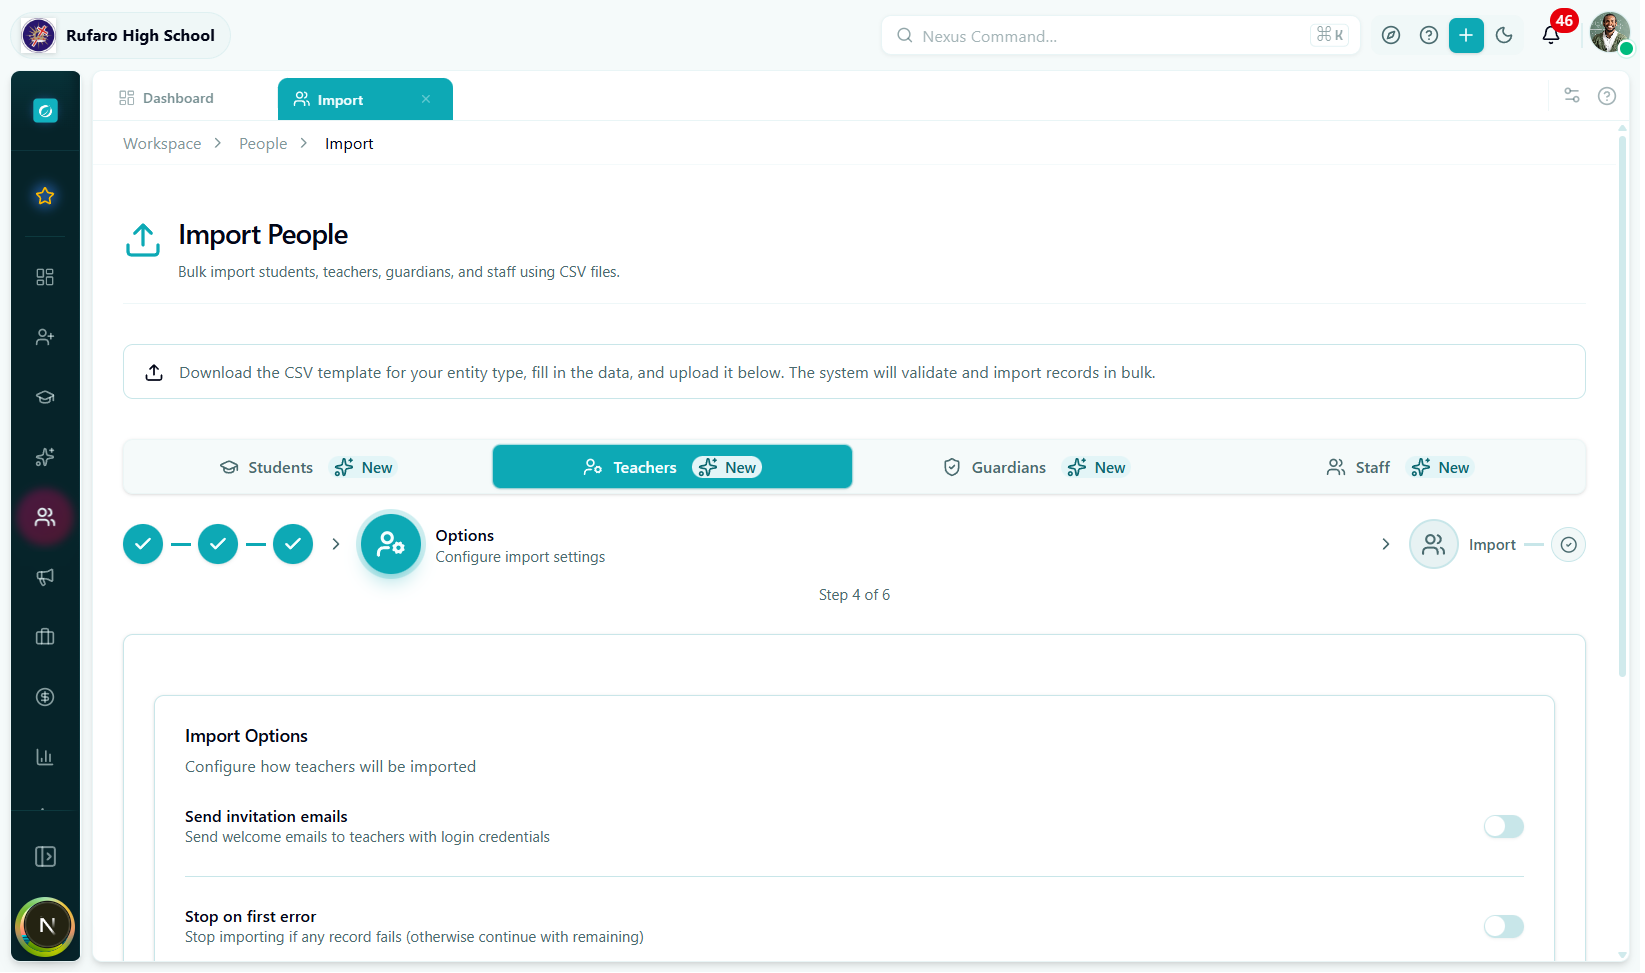
| Option | Default | What it does |
|---|---|---|
| Send Portal Invitation Emails | Off | Sends welcome emails with login links to each teacher's email address immediately after import. |
| Assign Default Teacher Role | On | Automatically assigns the school's default Teacher role to every imported account. |
| Stop on First Error | Off | If any teacher record fails, the entire batch is cancelled. Leave off for partial success. |
Enable this only if you need guaranteed all-or-nothing atomicity — for example, when re-importing a corrected batch where you have already verified every row is valid.
Click Import to begin.
Step 5 — Import (Processing)
A progress bar tracks the batch in real time.
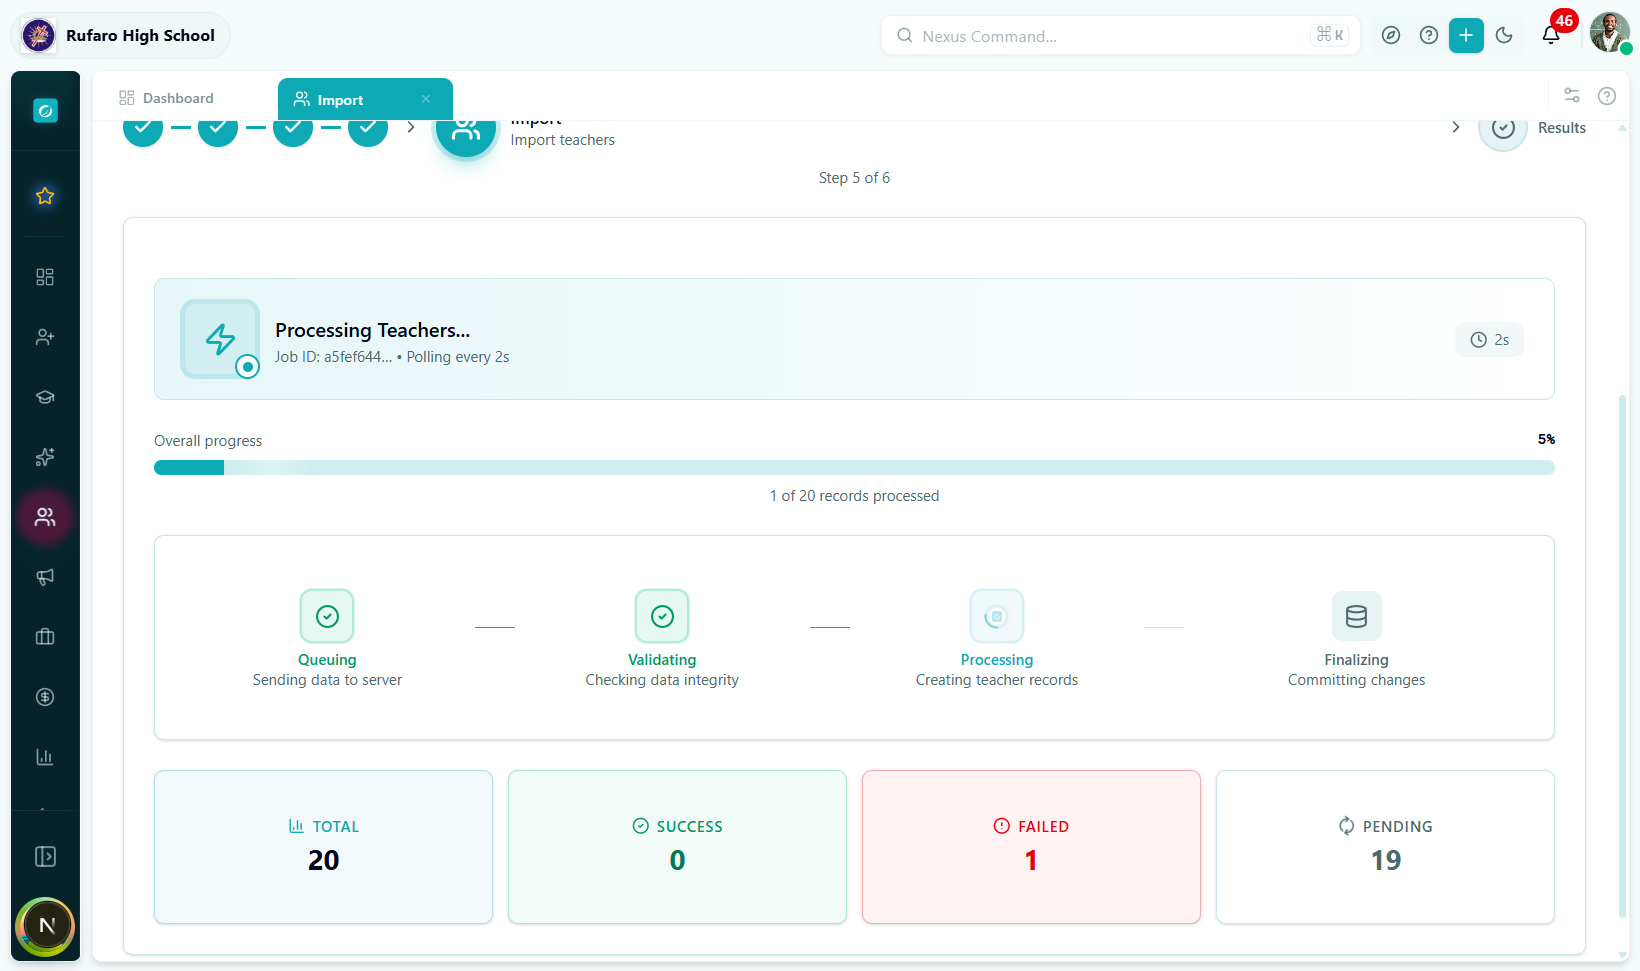
Background processing steps:
- Teacher profiles are created.
- IAM user accounts are created (if Assign Default Role is on).
- Subject and class assignments from Step 3 are applied.
- Invitation emails are queued (if enabled).
Leave the tab open while processing. The import runs on the server even if you close the tab, but you'll lose the live progress view.
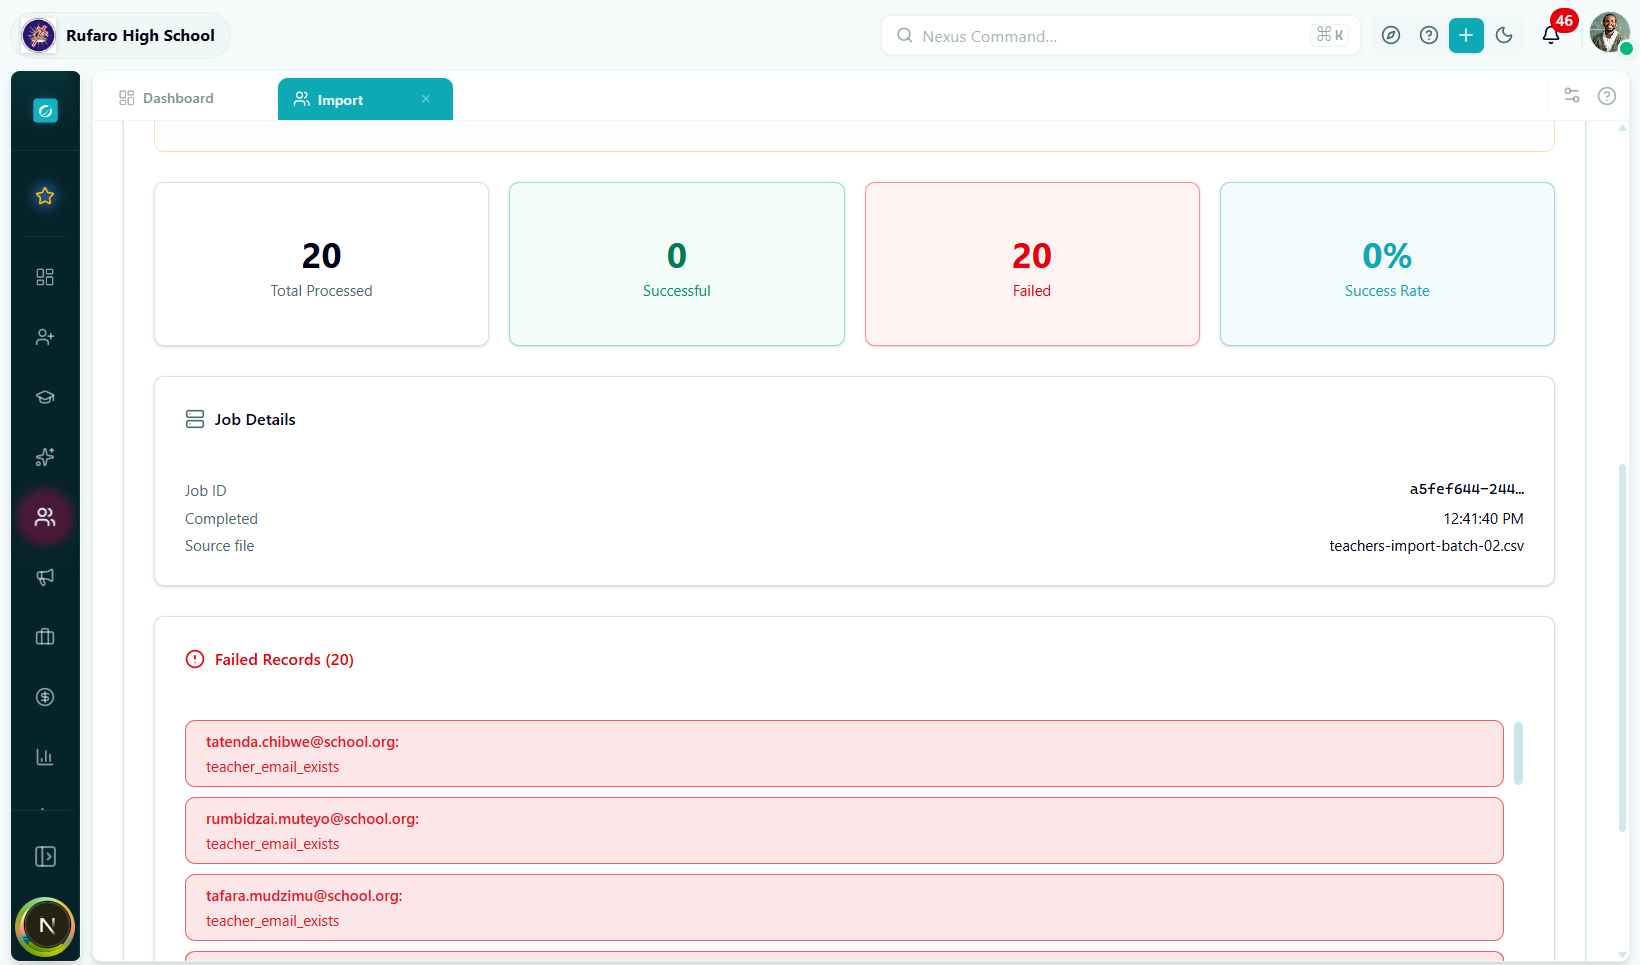
Step 6 — Results
After processing completes, see a full summary.
Success summary
| Item | Meaning |
|---|---|
| Green banner | Teachers successfully created |
| Subject assignment badge | How many subject links were applied |
| Download results | Export CSV with per-row outcome |
Error table
| Column | Content |
|---|---|
| Row # | Position in your original file |
| Name | Teacher name |
| Error | What went wrong |
| Field | Which field caused it |
After the import
- Click View Teachers to see the newly imported teachers.
- Click Start New Import for another batch.
- Fix failed rows in your spreadsheet and re-upload.
Complete Field Reference
Required fields
| Column | Format | Example |
|---|---|---|
firstName | Text | Chiedza |
lastName | Text | Gumbo |
email | Valid email | c.gumbo@school.ac.zw |
gender | male / female / other | female |
employmentType | See table above | full_time |
hireDate | YYYY-MM-DD | 2022-01-10 |
highestQualification | See table above | bachelor |
Personal details
| Column | Format | Notes |
|---|---|---|
phoneNumber | Phone number | +263772345678 |
dateOfBirth | YYYY-MM-DD | Optional |
nationalId | Text | National ID number |
address | Text | Street address |
city | Text | e.g. Harare |
province | Text | e.g. Harare Metropolitan |
country | Text | Default Zimbabwe |
Teaching profile
| Column | Format | Notes |
|---|---|---|
subjects | Comma-separated | e.g. Mathematics, Physics |
qualifications | Comma-separated | Additional qualification names |
Common Errors & How to Fix Them
File errors
| Error | Cause | Fix |
|---|---|---|
Missing required columns: email | email column absent or misspelled | Add or rename the column |
Missing required columns: employmentType | Column header doesn't match | Use employmentType exactly (camelCase) |
File size exceeds 10 MB | File too large | Split into smaller batches |
Row validation errors
| Error | Cause | Fix |
|---|---|---|
employmentType: invalid value | Value not in accepted list | Use one of: full_time, part_time, contract, temporary, substitute |
highestQualification: invalid value | Wrong qualification code | Use: certificate, diploma, bachelor, bachelor_honours, master, phd, professional_certificate |
email: invalid email address | Malformed email | Check for spaces, missing @, or double dots |
hireDate: invalid date | Unrecognised date format | Use YYYY-MM-DD |
Import errors (server-side)
| Error | Cause | Fix |
|---|---|---|
email already exists | Email linked to another account | Use a different email or check the existing account |
schoolId not found | School context mismatch | Verify the correct school is selected |
Frequently Asked Questions
Can I import teachers without an email address?
No. Email is a required field for teachers because it is the primary identifier for their portal account and the address used for notifications, timetables, and communications. If a teacher does not have an email address yet, create a temporary one (e.g. firstname.lastname@school.ac.zw) and update it later from their profile.
How do I specify that a teacher teaches multiple subjects?
In the CSV, set the subjects column to a comma-separated list: Mathematics, Physics. Alternatively, leave that column blank and use the Assign step (Step 3) to select subjects from the combobox after upload.
Can I import a teacher who is also a head of department?
Yes. Import the teacher record first. After the import, open the teacher's profile and assign the Head of Department role or flag from the profile page. The import wizard handles basic teacher records — HOD designation is managed separately.
The qualification dropdown only shows a few options. Where is my qualification type?
The qualification code list is fixed (see the table above). If a teacher has an unusual qualification, use the closest matching code for import and add a free-text note in the qualifications column or in the Notes section of Step 3.
What if I need to import substitute teachers for just one term?
Use employmentType: substitute or temporary. These employment types are fully supported and can be updated to full_time later if the teacher is made permanent.
How do I assign a teacher to a department?
Use the Assign step (Step 3) and set the Department field in the Profile section. You can also set it later from the teacher's profile page.
Quick-Start Checklist
- Downloaded the Excel template from Step 1
- All seven required columns are present
-
employmentTypeuses a valid code (full_time,part_time,contract,temporary,substitute) -
highestQualificationuses a valid code (see table above) - All
hireDatevalues are inYYYY-MM-DDformat - All email addresses are valid and unique
- File is
.csvor.xlsxand under 10 MB - Preview step shows 0 errors (or Skip invalid rows is enabled)
- Subjects exist in Academics if you plan to assign them in Step 3
- Send Portal Invitation is set correctly for your rollout plan
Previous: Import Students · Next: Import Guardians