Bulk Guardian Import
Import all your guardians, parents, and family contacts at once. This guide covers the full 6-step wizard — from downloading the template to linking imported guardians to students automatically — so every family relationship is correctly recorded in the system.
Before You Start
What you'll need
- Spreadsheet software — Microsoft Excel, Google Sheets, or LibreOffice Calc
- Guardian data ready — first name, last name, phone number, and gender at minimum
- Permission — your account must have the Guardians › Create permission. Contact your administrator if the Guardians tab is locked.
- School selected — make sure the correct school is active in the top navigation bar.
How guardian import works
The guardian import is a two-phase process:
Phase 1: Guardian profiles are created
           ↓
Phase 2: Guardian–student links are created
          (for each guardian that was successfully saved)
This means you can link guardians to their children in the same import run, as long as you provide the student's National ID (studentNationalId) in the CSV, or use the guardian link section in Step 3 – Assign.
Supported file formats
| Format | Extension | Notes |
|---|---|---|
| CSV (comma-separated) | .csv | Universal |
| Excel workbook | .xlsx | Recommended; includes dropdowns |
| Legacy Excel | .xls | Supported |
Files larger than 10 MB are rejected. Batch large schools into 500–1 000 rows per file.
How to Open the Import Wizard
- In the left sidebar, click People.
- Click Import in the People sub-menu.
- Click the Guardians tab.
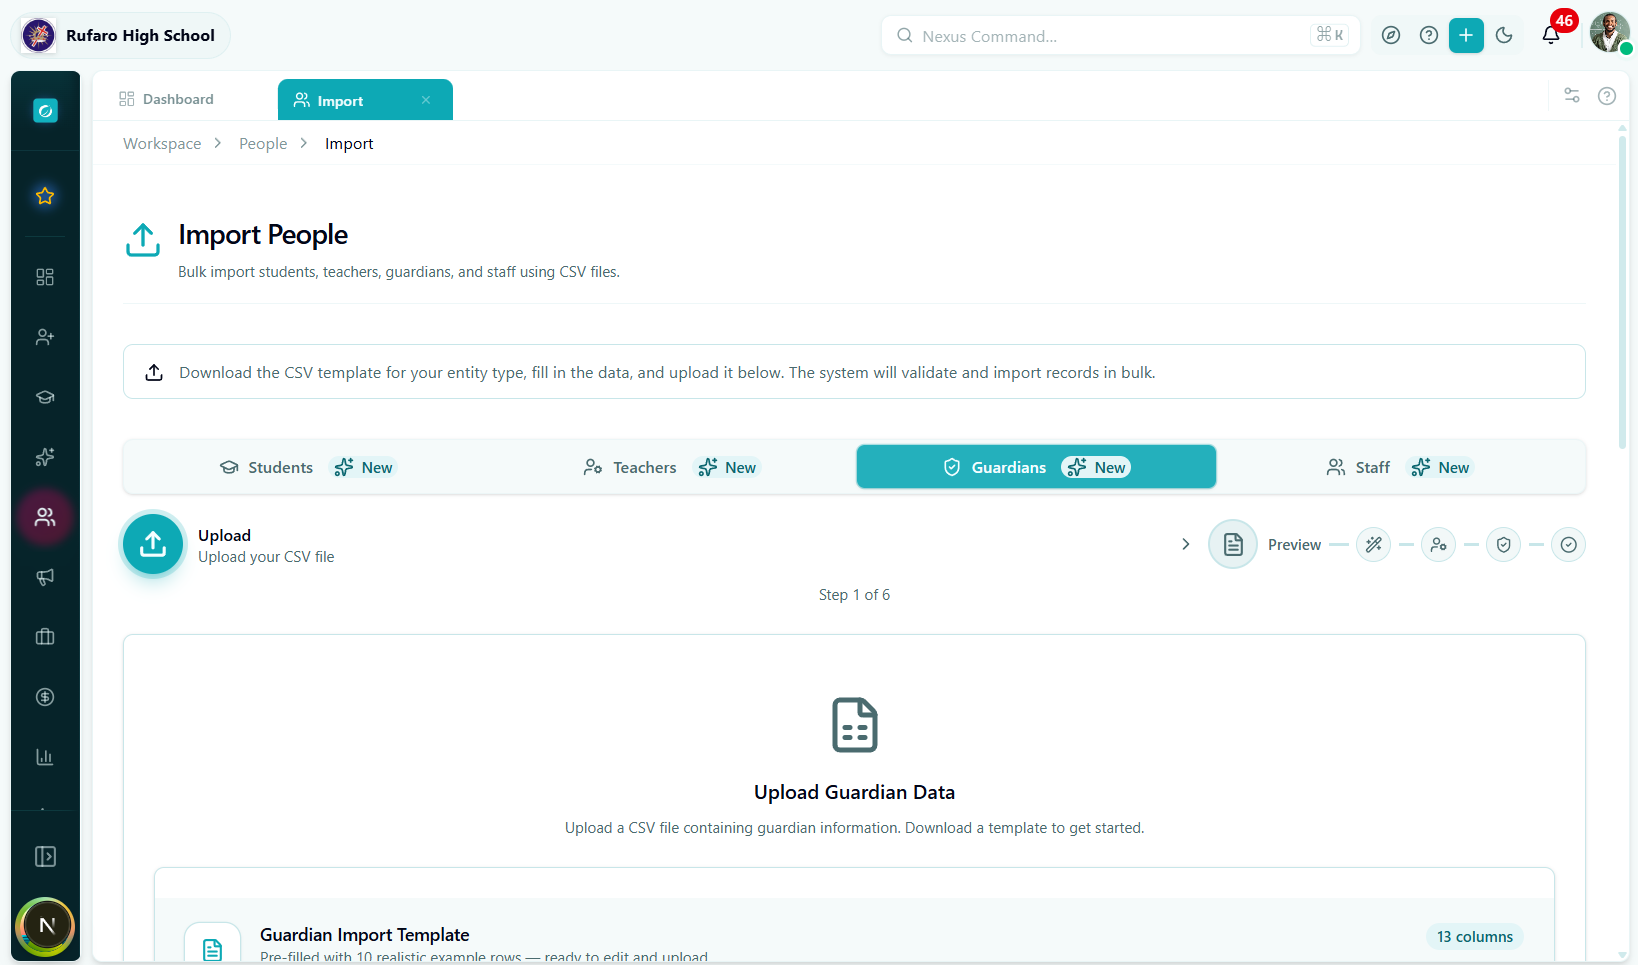
Step 1 — Upload
Option A: Download the template (recommended)
Click Download Template to get the pre-formatted Excel file.
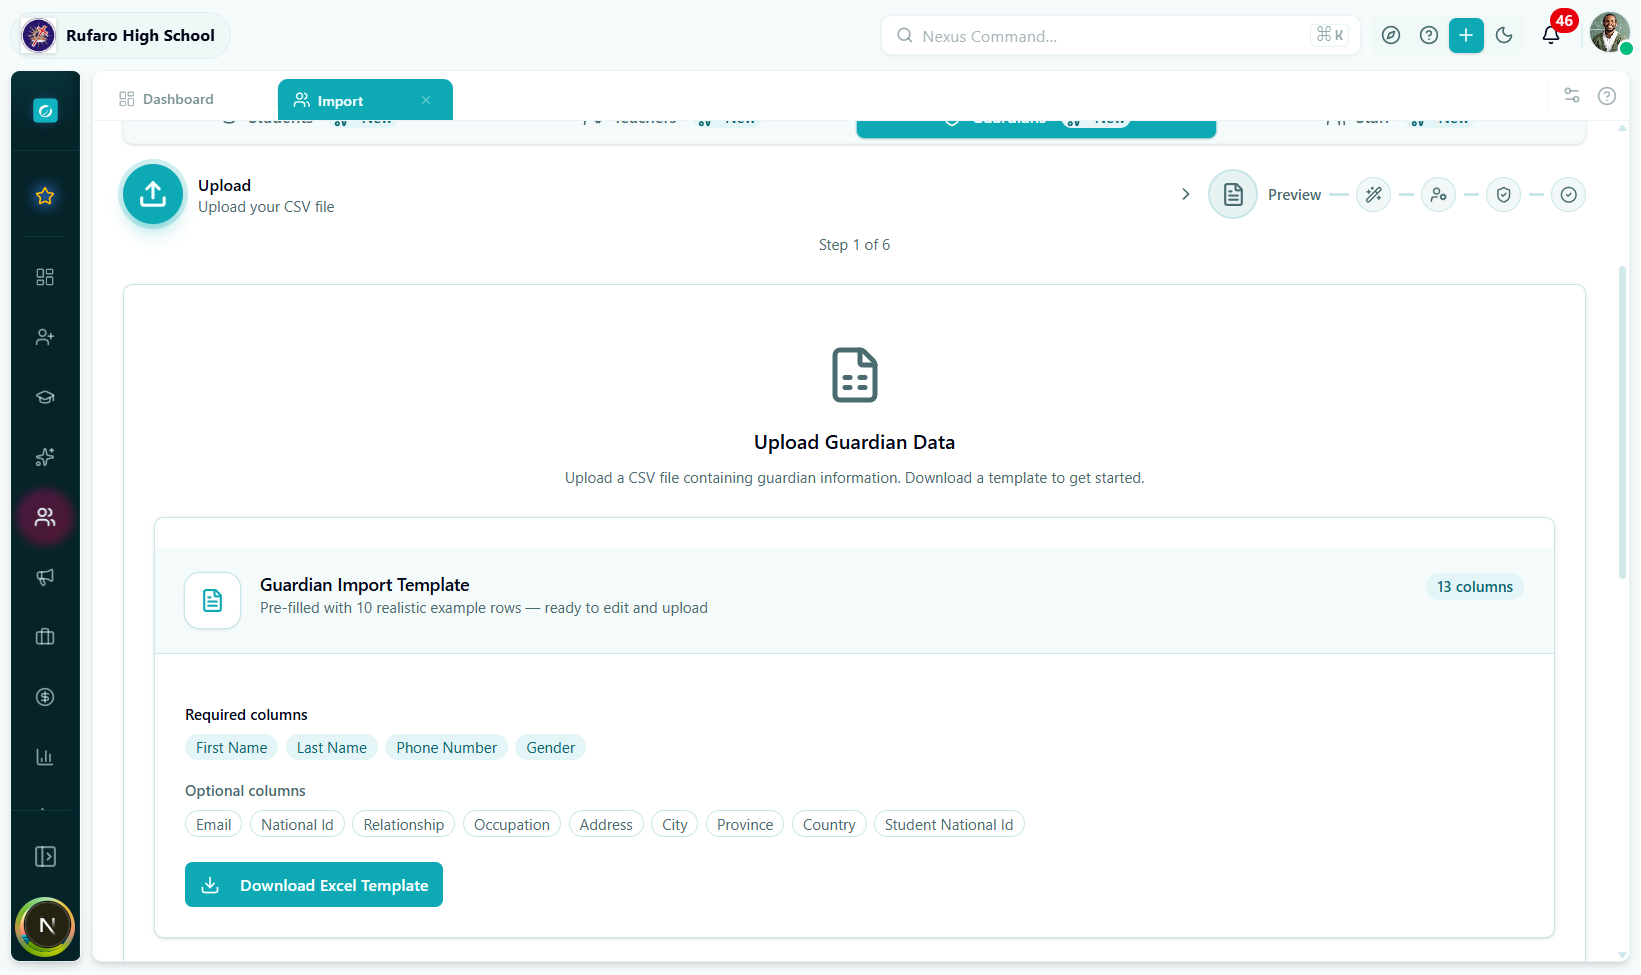
The template contains:
- Sheet 1 – Data: colour-coded headers (blue = required, grey = optional), format hints, and three sample guardian rows.
- Sheet 2 – Field Reference: complete column descriptions, accepted values for
gender,relationship, andcountry.
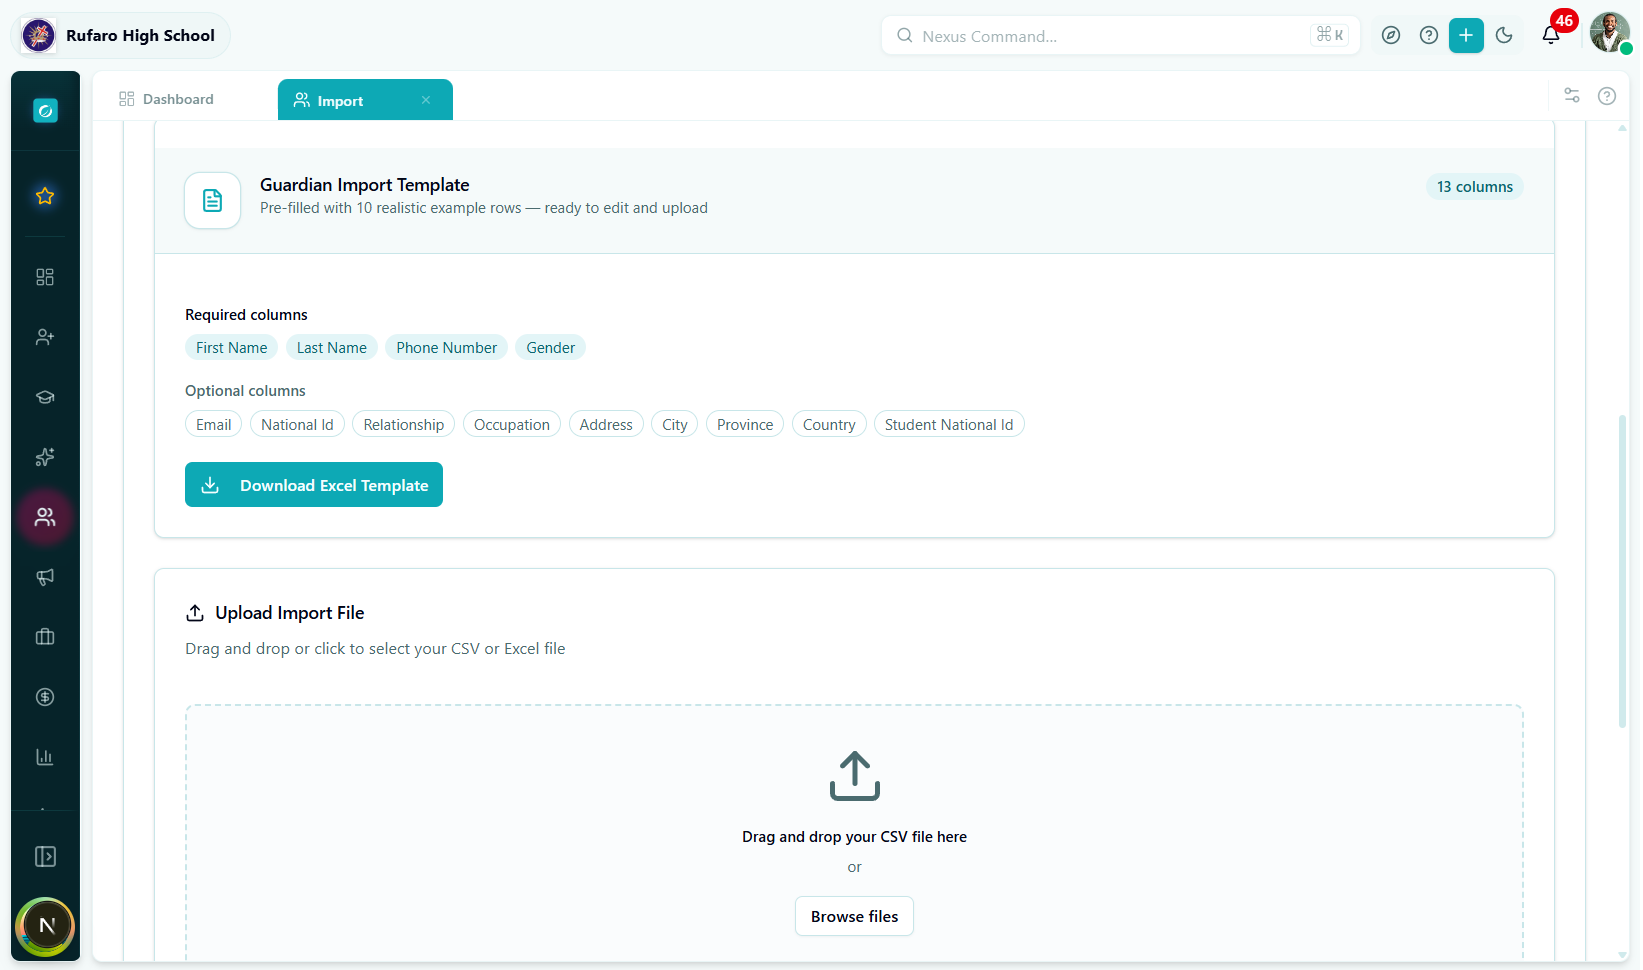
Option B: Upload your existing file
Drag and drop your spreadsheet onto the upload zone, or click Browse files.
Required columns
These four columns must be present:
| Column | Description | Example |
|---|---|---|
firstName | Guardian's first name | Grace |
lastName | Guardian's surname | Moyo |
phoneNumber | Primary contact number | +263772345678 |
gender | Gender | female |
Gender values
| Accepted values | Stored as |
|---|---|
male, m, man | male |
female, f, woman | female |
| anything else | other or prefer_not_to_say |
Linking a guardian to a student via CSV
If you already know the student's National ID, add it in the studentNationalId column. The system will automatically create the guardian–student link after the guardian is saved.
To link one guardian to multiple students, add the guardian as multiple rows in the CSV — one row per student link — and include each student's studentNationalId. The duplicate guardian record will be merged if the name and phone number match an already-imported guardian.
Alternatively, import the guardian once and then use the Assign step (Step 3) to link multiple students in a single run.
Click Next to proceed.
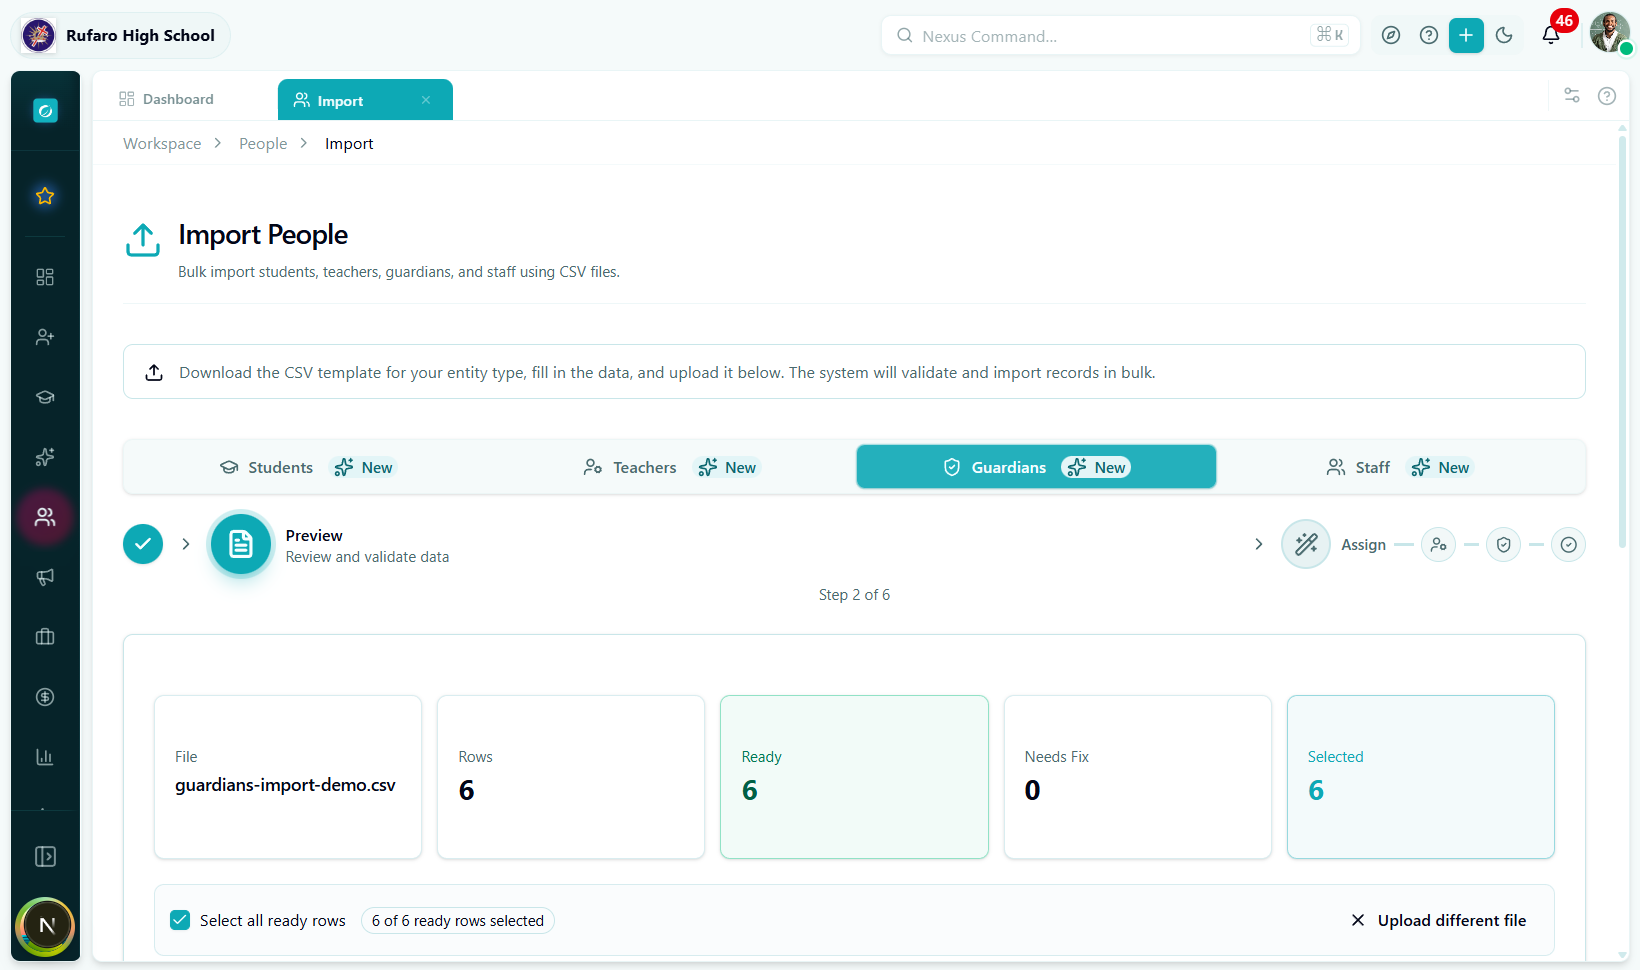
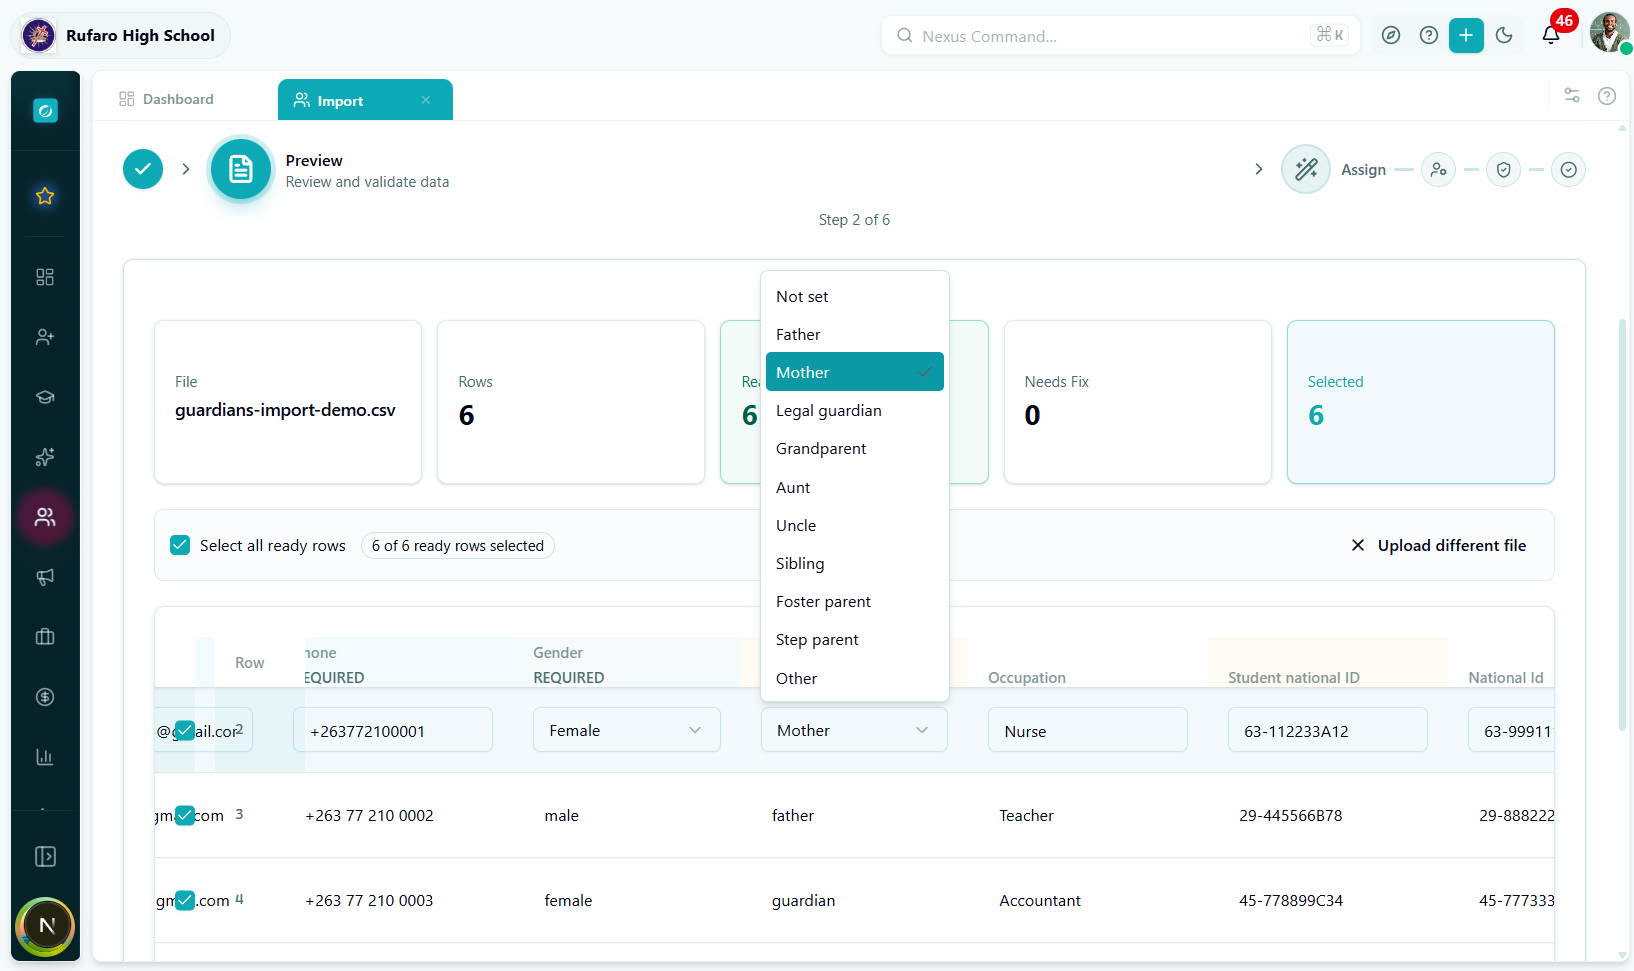
Step 2 — Preview
Every guardian row is displayed in an editable table. Fix errors before importing.
Editing a cell
Click any cell to edit it inline:
- Relationship — dropdown with all accepted relationship types
- Gender — dropdown: male / female / other
- Phone / email — plain text with format validation
- Name fields — plain text
Error panel
Click the red badge on an errored row to see field-level errors.
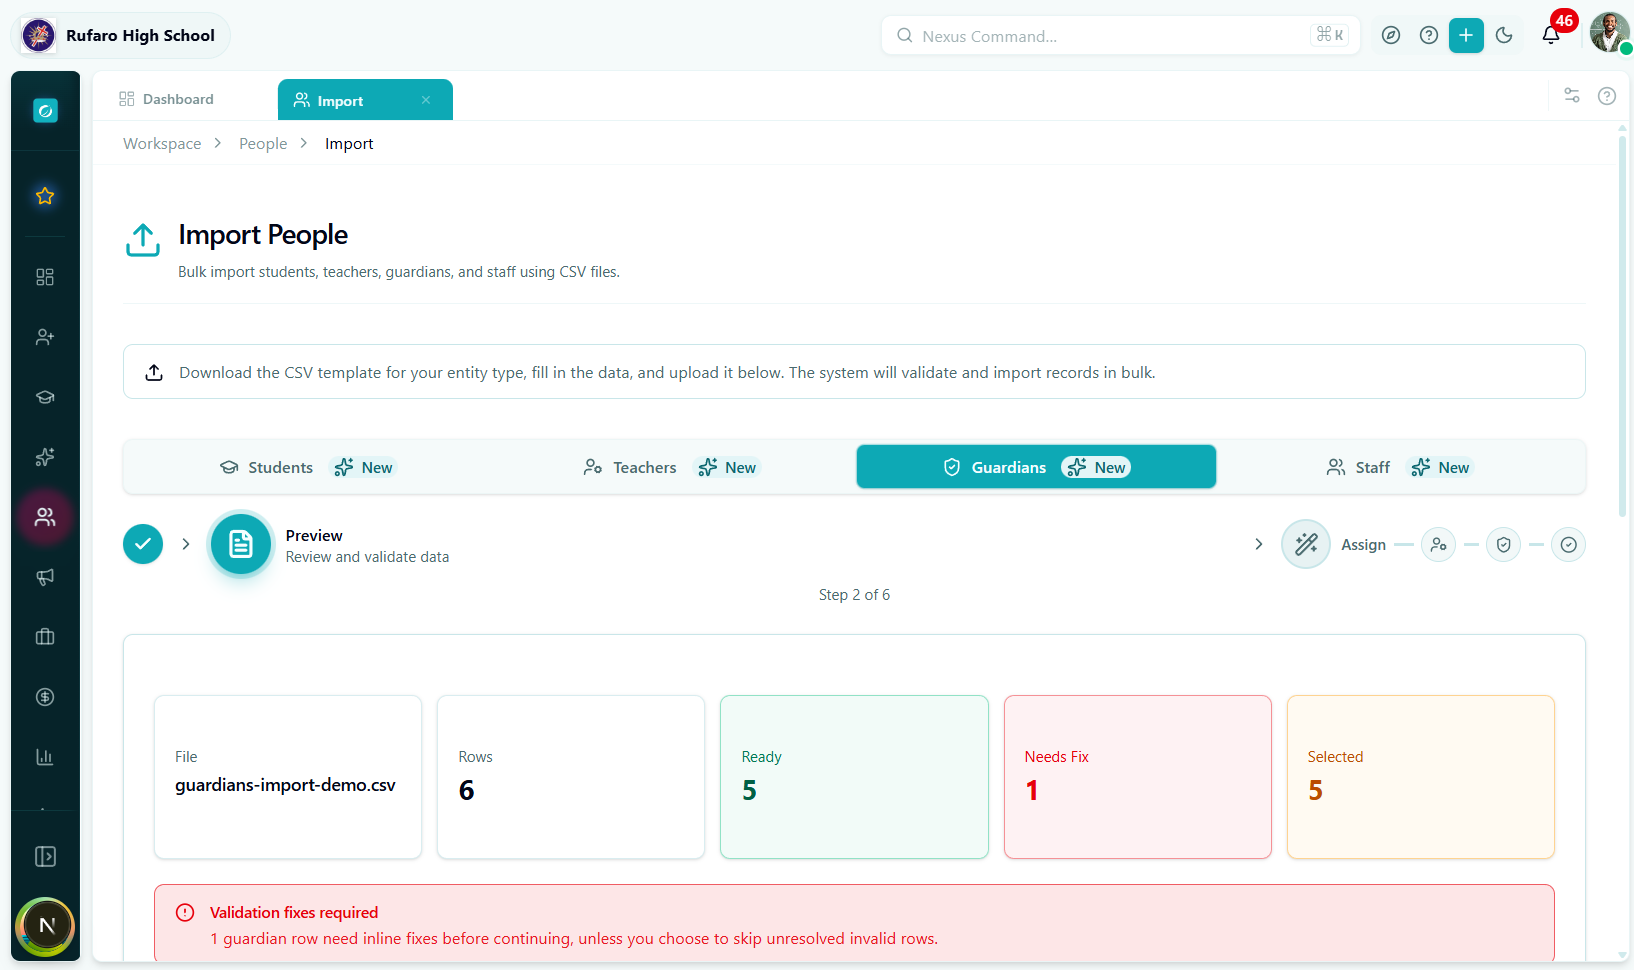
Skip invalid rows
Enable Skip invalid rows to exclude problem rows and import the valid ones. Correct the failed rows later in a fresh import.
Click Next to proceed.
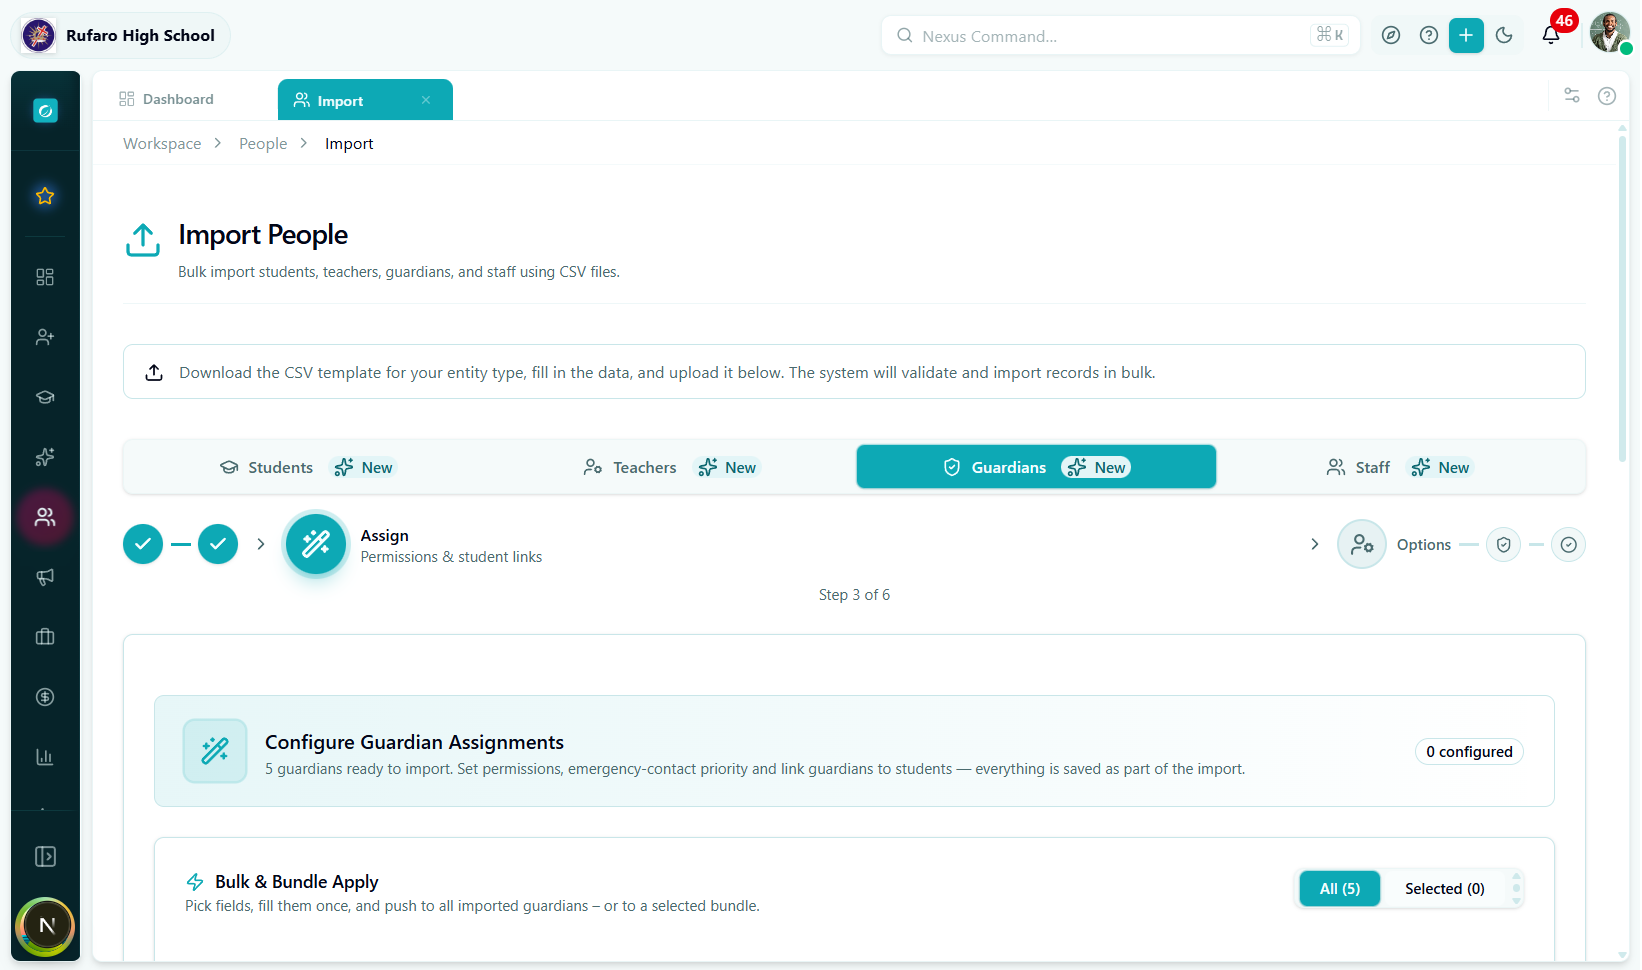
Step 3 — Assign
Enrich each guardian's record and set up student links with full relationship metadata.
Profile details
| Field | Description |
|---|---|
| Relationship type | Default relationship to students (e.g. Mother) |
| Occupation | Employment or profession |
| National ID | Government ID number |
Address
| Field | Description |
|---|---|
| Street address | House number and street |
| City | Town or city |
| Province | Province or district |
| Country | Default: Zimbabwe |
Student linking
This is the most important section for schools doing a first-time bulk import. Here you connect each guardian to their children with full permission metadata.
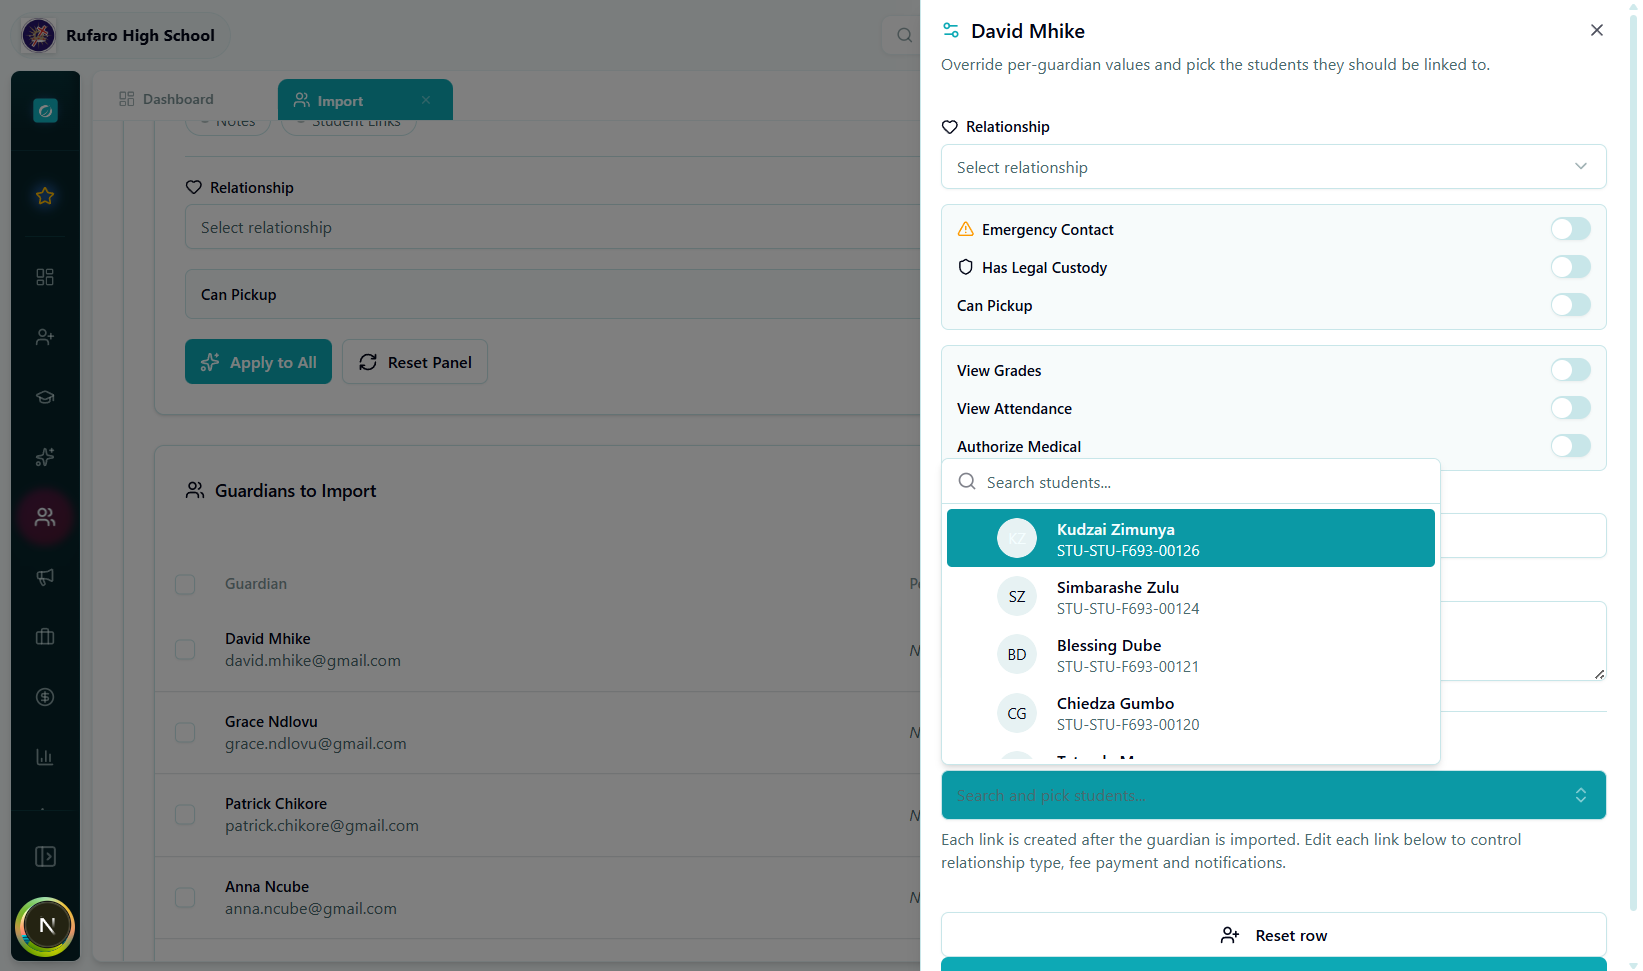
To link a student:
- Click Search student and type the student's name or student number.
- Select the student from the results.
- Set the relationship type for this specific link.
- Configure the permission toggles (see table below).
Student link permission toggles
| Permission | What it controls |
|---|---|
| Is Primary Contact | This guardian is contacted first in any situation |
| Is Fee Payer | Guardian receives invoices and fee statements |
| Lives With Student | Guardian's address is used as the student's home address |
| Can Pick Up | Guardian is authorised to collect the student at any time |
| Can Authorise Medical Treatment | Guardian can sign emergency medical consent |
| Receives Report Cards | Gets academic report notifications and downloads |
| Receives Attendance Alerts | Gets SMS/email when the student is absent or late |
| Receives Medical Alerts | Gets notifications about health incidents at school |
| Receives Fee Statements | Gets billing emails and payment reminders |
Only one guardian per student should be flagged as Is Primary Contact. If you link multiple guardians to one student, decide which one is the first point of contact.
Linking multiple students
A single guardian can be linked to more than one student (e.g. siblings). Click + Link Another Student to add additional student links under the same guardian card.
Relationship types
The following relationship types are recognised by the system:
| Code | Display name |
|---|---|
father | Father |
mother | Mother |
stepfather | Stepfather |
stepmother | Stepmother |
grandfather | Grandfather |
grandmother | Grandmother |
grandparent | Grandparent (unspecified) |
uncle | Uncle |
aunt | Aunt |
sibling | Sibling |
cousin | Cousin |
legal_guardian | Legal Guardian |
foster_parent | Foster Parent |
adoptive_parent | Adoptive Parent |
family_friend | Family Friend |
other | Other |
Tags & notes
Attach free-form tags (e.g. new-family-2026, scholarship-sponsor) and optional internal notes visible only to staff.
Click Next to proceed.
Step 4 — Options
Global settings for this import batch.
| Option | Default | What it does |
|---|---|---|
| Send Portal Invitation Emails | Off | Sends welcome emails with login credentials to each guardian's email address. Enable only if guardians should have portal access immediately after import. |
| Assign Default Guardian Role | On | Automatically assigns the school's default Guardian role to each created user account. |
| Stop on First Error | Off | If any guardian record fails to save, the entire batch is cancelled. Leave off for partial success. |
Guardian portal access allows parents to view their child's grades, attendance, and fee statements. Only enable Send Portal Invitation once the guardian portal is ready for use in your school.
Click Import to begin.
Step 5 — Import (Processing)
A progress bar shows live processing status.
Two-phase processing explained
Phase 1 – Guardian profiles
Guardian records are saved to the database. User accounts are created if Assign Default Role is on.
Phase 2 – Student links
After all guardian profiles are created, the system creates each guardian–student relationship link. A second progress indicator shows link creation progress.
Guardian–student links require both the guardian and the student to already exist in the database. Phase 2 only runs after Phase 1 succeeds, ensuring links are never created for guardians that failed to import.
Leave the tab open during processing. If you close it, the import continues on the server but you lose the live progress view. Student link results (Phase 2) will not be visible if you navigate away.
Step 6 — Results
A complete summary appears after processing finishes.
Success summary
| Item | Meaning |
|---|---|
| Green banner | Total guardians successfully created |
| Student links badge | Links created vs. links that failed |
| Download results | Export CSV with per-guardian outcome |
Phase 1 error table (guardian profile errors)
| Column | Content |
|---|---|
| Row # | Row in your original file |
| Name | Guardian's name |
| Error | Why the record failed |
| Field | Which field caused the failure |
Phase 2 error table (student link errors)
Student link errors are reported separately. Common causes:
| Error | Cause | Fix |
|---|---|---|
studentId not found | The linked student does not exist | Import the student first, then re-run guardian linking |
relationship already exists | This guardian–student link already exists | No action needed; the existing link is preserved |
studentNationalId not found | studentNationalId in CSV does not match any student | Verify the national ID in the student's profile |
After the import
- Click View Guardians to see all newly created guardians.
- Click Start New Import to run another batch.
- Fix failed Phase 1 rows in your spreadsheet and re-upload.
- For failed Phase 2 links, navigate to the relevant student's profile and add the guardian link manually.
Complete Field Reference
Required fields
| Column | Format | Example |
|---|---|---|
firstName | Text | Grace |
lastName | Text | Moyo |
phoneNumber | Phone number | +263772345678 |
gender | male / female / other | female |
Identity & contact
| Column | Format | Notes |
|---|---|---|
email | Valid email | Optional; required for portal access |
nationalId | Text | Government ID |
relationship | See relationship table | Default relationship type |
occupation | Text | e.g. Nurse, Accountant |
Address
| Column | Format | Notes |
|---|---|---|
address | Text | Street address |
city | Text | e.g. Harare |
province | Text | e.g. Mashonaland East |
country | Text | Default Zimbabwe |
Student linking (CSV shortcut)
| Column | Format | Notes |
|---|---|---|
studentNationalId | Text | Links to student with matching National ID |
The CSV studentNationalId field creates a basic link with default permissions. Use Step 3 – Assign to configure all permission toggles (fee payer, pick-up authorisation, etc.).
Common Errors & How to Fix Them
File errors
| Error | Cause | Fix |
|---|---|---|
Invalid file type | Not a .csv, .xlsx, or .xls file | Save as CSV or Excel |
File size exceeds 10 MB | Too many rows | Split into smaller batches |
Missing required columns: phoneNumber | Column absent or misspelled | Add the column with that exact name |
No rows found | File is empty or header-only | Add data rows |
Row validation errors
| Error | Cause | Fix |
|---|---|---|
phoneNumber: invalid phone number | Bad format | Use +263... or local 07... format |
email: invalid email address | Malformed email | Check for spaces or missing @ |
gender: invalid value | Not recognised | Use male, female, or other |
relationship: invalid value | Relationship code not recognised | Use a code from the relationship table above |
Import errors (server-side)
| Error | Cause | Fix |
|---|---|---|
email already exists | Email linked to existing account | Use a unique email or check the existing account |
phoneNumber must be unique | Phone number already in system | Verify — this guardian may already exist |
schoolId not found | School context mismatch | Select the correct school in the navigation bar |
Student link errors (Phase 2)
| Error | Cause | Fix |
|---|---|---|
studentId not found | Student not in system yet | Import students first, then re-link guardians |
studentNationalId not found | National ID doesn't match | Check spelling in the student profile |
relationship already exists | Link already created | No action needed |
Recommended Import Order
When setting up a new school, import in this order to avoid linking errors:
1. Import Guardians  ──────────────── (no dependencies)
2. Import Teachers   ──────────────── (no dependencies)
3. Import Students  ───────────────── with guardian links in Step 3
                                       (guardians must exist first)
If you import students and guardians at the same time (in parallel browser tabs), the student links in the guardian import may fail because students don't exist yet. Always complete the guardian import before linking from the student import wizard.
Frequently Asked Questions
What is the difference between a guardian and an emergency contact?
A guardian is a person with a registered account in the system who can receive notifications, view the student portal, and has configurable permissions (fee payer, pickup authorisation, etc.).
An emergency contact is a lightweight record (name + phone + relationship) stored on the student's profile with no system account and no portal access. Emergency contacts are entered directly on the student's profile page, not through the import wizard.
Can one guardian be linked to children at different schools?
Yes. The guardian profile exists at the tenant level (across all schools in your organisation). From each school's People module, you can link the same guardian to students in that school. The guardian will see all linked children when they log into the parent portal.
Do guardians need an email address?
Email is optional, but it is required for:
- Portal account creation
- Receiving report cards, fee statements, and notifications by email
Without an email, a guardian account can still be created and linked to students, but all communication will be via SMS to their phone number only.
A guardian is a parent of twins. How do I handle this?
Use the Assign step (Step 3) and click + Link Another Student on the guardian's card to link both children in one import run. This is more efficient than adding duplicate CSV rows.
What is "Is Fee Payer"?
The guardian flagged as Is Fee Payer receives all invoices, payment reminders, and fee statements for that student. Only one guardian per student should typically be the fee payer, though the system allows multiple.
Can I import a guardian without linking them to any student?
Yes. The student link sections in Step 3 are optional. You can create the guardian profile first and link them to students later from either:
- The guardian's profile page → Linked Students tab
- The student's profile page → Guardians tab
Why did some student links fail in Phase 2 even though Phase 1 succeeded?
Phase 2 link failures usually mean:
- The student does not yet exist in the system (import students first).
- The
studentNationalIdin your CSV has a typo or format difference from what is stored in the student's profile. - The link already exists (guardian was previously linked to that student).
Check the Phase 2 error table in the Results step for the exact error per row.
The student search in Step 3 is not finding any students. Why?
The search looks across students in the currently selected school. Make sure:
- The correct school is selected in the top navigation bar.
- Students have already been imported or manually created in the system.
- You are typing at least 2 characters to trigger the search.
Can I update existing guardian records with a CSV import?
The bulk import wizard creates new guardian records only. To update an existing guardian's details, open their profile from People → Guardians and edit the fields directly.
Quick-Start Checklist
- Downloaded the Excel template from Step 1
- All four required columns are present (
firstName,lastName,phoneNumber,gender) - Phone numbers use a recognisable format (
+263...or07...) - Relationship values (if included) match the accepted codes
- File is
.csvor.xlsxand under 10 MB - Preview step shows 0 errors (or Skip invalid rows is enabled)
- Students have already been imported if you plan to link them in Step 3 or via
studentNationalId - The correct school is selected in the top navigation bar
- Send Portal Invitation is set correctly for your rollout plan
- Decided which guardian per student is the Primary Contact and Fee Payer
Previous: Import Teachers · Back to: Import Students